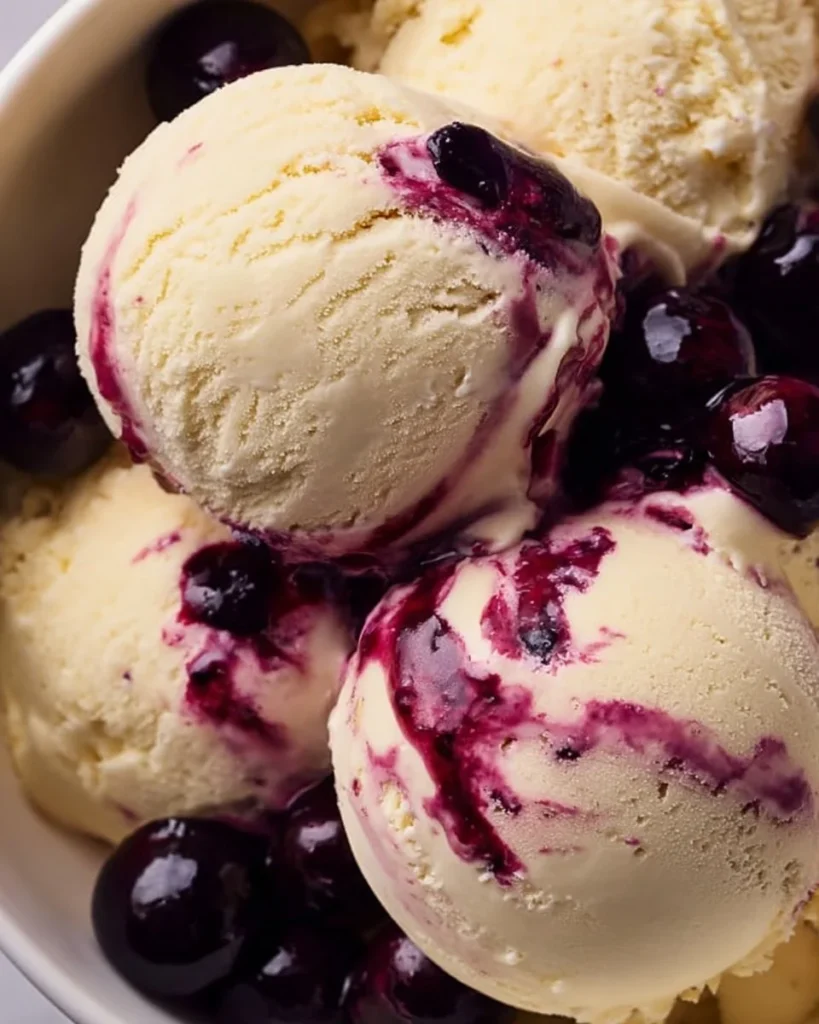
There’s something undeniably heartwarming about homemade ice cream, especially when it conjures up memories of summer days spent on the porch or cozy evenings with the family. Just thinking about that sweet, creamy texture melting in your mouth brings a smile to my face. One of my absolute favorites is Black Cherry Ice Cream, and I want to share the magic of making it at home with the help of the Ninja Creami. Don’t worry if you’ve never made ice cream before. This recipe is designed to be simple and stress-free, perfect for beginners and seasoned cooks alike. I promise you’ll feel like an ice cream pro in no time!
Highlights
Why I Love This Recipe of Ninja Creami Black Cherry Ice Cream
ThisNinja Creami Black Cherry Ice Cream recipe holds a special place in my heart. There’s something so satisfying about taking fresh ingredients and transforming them into something delightful that brings joy to everyone around you. The deep, rich flavor of black cherries paired with the creamy base creates a symphony of flavors that dance on your palate. It’s a dessert that feels indulgent yet is made from wholesome ingredients, making it a treat you won’t mind indulging in. I love how easy this ice cream is to make, especially for beginner cooks who may feel intimidated by the thought of creating their own frozen treats. Plus, it’s a wonderful recipe that allows you to gather with friends or family, whether you’re enjoying it on a hot summer day or cozying up with a bowl on a chilly evening.
Ingredients You’ll Need for Ninja Creami Black Cherry Ice Cream
To create your own batch of Ninja Creami Black Cherry Ice Cream, you’ll need the following ingredients:
Essentials:
- 240 ml of heavy cream: This will provide the luscious texture we associate with ice cream.
- 90 ml of whole milk: Helps to balance the creaminess of the heavy cream.
- 4 large egg yolks: These are essential for creating a rich, custard-style ice cream base.
- 1 tablespoon of light corn syrup: Adds sweetness and helps improve the ice cream’s texture.
- 5 tablespoons of granulated sugar: The sweetness in your ice cream; you can adjust this to taste.
- 1 teaspoon of almond extract: This elevates the flavor, giving the ice cream a delightful nutty note.
- 1 cup of black cherries: Frozen, thawed, and quartered; they are the star of the show here.
Optional Add-Ons:
- 1 to 2 tablespoons of whole milk: This is optional and can be used to adjust the consistency of your ice cream if you prefer it a bit softer.
Substitutions and Shortcuts:
- If you’re looking for a lower-fat option, you might consider using half-and-half instead of heavy cream, but the texture will differ slightly.
- If you can’t find black cherries, feel free to substitute with other fruits like raspberries or strawberries, but adjust the sweetness if needed to match the natural sugar level of the fruit.
- You can skip the almond extract if you prefer a purer cherry flavor, but I highly recommend it if you want to elevate your dish!
How to Make Ninja Creami Black Cherry Ice Cream Step-by-Step
Now that you have your ingredients ready, let’s make Black Cherry Ice Cream with the Ninja Creami! This process is incredibly straightforward, and I’ll guide you step-by-step to ensure your success.
Prepare the Base Mixture: In a small saucepan, combine the heavy cream, whole milk, light corn syrup, and granulated sugar. Warm over medium heat while whisking continuously until the mixture begins to lightly foam and steam. This constant whisking is crucial to prevent the mixture from scorching and ensures all the sugar dissolves.
Temper the Egg Yolks: While your cream mixture heats, take a separate bowl and whisk the 4 egg yolks together. To temper the yolks (which prevents them from scrambling), slowly add a bit of the hot cream mixture to the egg yolks, whisking continuously. This gentle introduction of heat is vital for a smooth custard.
Combine and Cook: Once the yolks are tempered, pour the mixture back into the saucepan with the remaining cream. Cook on low heat, stirring constantly, until the mixture reaches 74 degrees Celsius (165 degrees Fahrenheit). You’ll notice it getting thicker; this is your custard base coming together.
Flavor It Up: Remove the saucepan from heat and stir in the almond extract. Allow the mixture to cool to room temperature before transferring it to a container suitable for the Ninja Creami.
Chill in the Freezer: Seal the container and freeze the mixture for at least 24 hours. This step is crucial for getting that perfect scoopable texture.
Process Your Ice Cream: After 24 hours, remove the container from the freezer and set it in the Ninja Creami. Select the “Gelato” setting to process the ice cream base until it’s smooth and creamy.
Add the Cherries: Once the base is processed, take the lid off and add your quartered black cherries to the mixture. Secure the lid again, and process using the “Mix-Ins” setting. This will blend the fruit into the ice cream without over-processing.
Serve and Enjoy: It’s time to scoop out your delightful Black Cherry Ice Cream and serve!
Common Mistakes to Avoid
Making ice cream at home for the first time can be a fun challenge, but there are a few pitfalls to avoid:
1. Not Tempering the Eggs Properly
One of the most common mistakes is neglecting the tempering process. This critical step helps prevent your egg yolks from scrambling in the hot cream. Take your time, whisk continuously, and gradually increase the temperature of the yolks for a luxurious custard.
2. Under or Over-cooking the Base
Cooking your ice cream base to the right temperature (74 degrees Celsius or 165 degrees Fahrenheit) is essential for the safety and quality of your ice cream. Undercooked yolks may harbor bacteria, while overcooking can lead to a grainy texture.
3. Freezing the Base for Less than 24 Hours
Patience is your friend in this recipe. Freezing the base for a full 24 hours allows it to solidify properly, which results in better texture when processed in the Ninja Creami. Shortening this time can lead to a softer, less creamy final product.
Serving Suggestions for Ninja Creami Black Cherry Ice Cream
Now that you’ve created this mouthwatering Black Cherry Ice Cream, you might be wondering how to take your dessert to the next level. Here are a few serving suggestions that will elevate your ice cream experience:
1. Top with Fresh Cherries
Adding a garnish of fresh cherries on top creates a beautiful presentation and enhances the overall cherry flavor. You’ll love biting into the juicy cherries alongside the creamy ice cream.
2. Drizzle with Chocolate Sauce
A rich, decadent chocolate sauce complements the tartness of the black cherries perfectly. Drizzle a generous amount on top just before serving to create a beautiful contrast.
3. Create an Ice Cream Parfait
Layer your Black Cherry Ice Cream with crushed graham crackers and whipped cream in a glass for a delightful parfait. This not only makes for a visually stunning presentation but also adds exciting textures to every bite.
Nutritional Values of Ninja Creami Black Cherry Ice Cream
When you’re indulging in homemade Black Cherry Ice Cream, it’s good to know what you’re treating yourself to. The nutritional values may vary depending on the specific products you use, but here’s a general breakdown per serving (assuming about 1/2 cup):
1. Calories
One serving typically contains around 200-250 calories, a reasonable amount for a delicious dessert that can be enjoyed guilt-free.
2. Fats
With heavy cream and egg yolks, you can expect around 15-20 grams of fat, most of which are heart-healthy fats that enhance satiety.
3. Sugars
Each serving contains about 14-18 grams of sugar. While this may seem high, remember that it includes natural sugars from the cherries and controlled amounts are added. You can always adjust the sugar when you’re making it for a healthier treat.
Print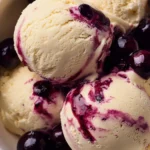
Ninja Creami Black Cherry Ice Cream
Description
A rich and creamy homemade Black Cherry Ice Cream made with fresh black cherries, perfect for summer days or cozy evenings.
Ingredients
- 240 ml of heavy cream
- 90 ml of whole milk
- 4 large egg yolks
- 1 tablespoon of light corn syrup
- 5 tablespoons of granulated sugar
- 1 teaspoon of almond extract
- 1 cup of black cherries (frozen, thawed, and quartered)
- 1 to 2 tablespoons of whole milk (optional, for adjusting consistency)
Instructions
- In a small saucepan, combine heavy cream, whole milk, light corn syrup, and sugar. Warm over medium heat while whisking until lightly foamed.
- Whisk egg yolks in a separate bowl. Slowly add hot cream mixture to temper the yolks while whisking continuously.
- Pour the tempered yolk mixture back into the saucepan with the remaining cream and cook on low until reaching 74°C (165°F), stirring constantly.
- Remove from heat and stir in almond extract. Allow to cool to room temperature.
- Transfer to a container and freeze for at least 24 hours.
- After freezing, process in the Ninja Creami on the “Gelato” setting until smooth.
- Add the quartered black cherries and process again using the
Conclusion
Making Black Cherry Ice Cream with Ninja Creami truly is easier than it seems! With simple ingredients and a straightforward method, you can whip up a delicious dessert that tastes like a dream. Not only can you customize the flavor and sweetness to your liking, but it’s also a cozy treat that’s perfect for any occasion. Now that you’ve mastered this recipe, you can easily recreate it and impress your friends and family with your ice cream-making skills.
Don’t hesitate to dive in and enjoy this delightful treat. I’d love to hear how your Black Cherry Ice Cream turns out and what creative twists you add!
FAQs about Ninja Creami Black Cherry Ice Cream
1. What is Ninja Creami Black Cherry Ice Cream?
Ninja Creami Black Cherry Ice Cream is a homemade ice cream made using a Ninja Creami machine, featuring a smooth, creamy base flavored with black cherries.
2. Can I use fresh cherries instead of frozen for Black Cherry Ice Cream ?
Yes, you can use fresh cherries, but you’ll want to pit and chop them before adding them to the ice cream. If you’re using fresh cherries, it’s a good idea to freeze them for a few hours for better texture.
3. How long does it take to make Ninja Creami Black Cherry Ice Cream?
The entire process takes about 24 hours if you include the freezing time, but the active preparation time is relatively quick—around 30-40 minutes.
4. Can I make Black Cherry Ice Cream dairy-free?
Yes! You can substitute the heavy cream and whole milk with canned coconut milk or almond milk. Ensure you find suitable egg alternatives for a dairy-free recipe.
5. How should I store my Ninja Creami Black Cherry Ice Cream?
To preserve its taste and texture, store your Black Cherry Ice Cream in an airtight container in the freezer where it will stay delicious for about 1-2 weeks.
Your next scoop of homemade goodness awaits! Enjoy the process of making it and the sweet rewards that follow.