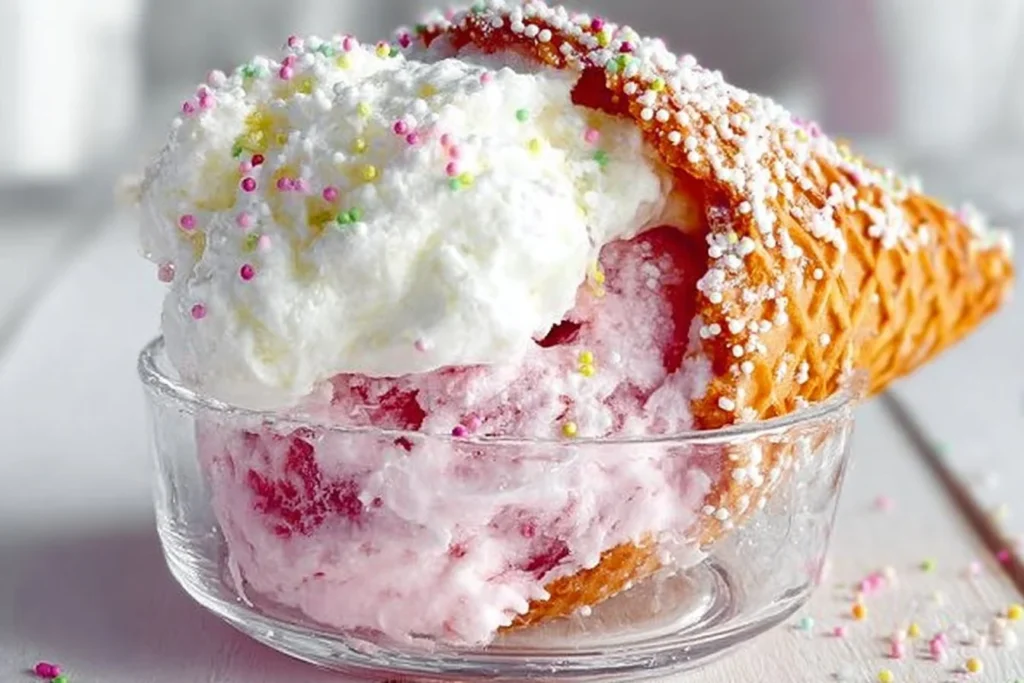
Get ready for a delightful treat that’s not only fun to make but also a joy to eat! Cake inside an ice cream cone combines two all-time favorite desserts into one amazing creation. Imagine biting into a crispy waffle cone filled with fluffy cake and topped with whipped cream, chocolate sauce, and sprinkles. This dessert is perfect for parties, picnics, or just a special treat at home. It’s a simple dessert that can bring a smile to anyone’s face. So, let’s dive in and discover how to make this delicious treat!
TABLE OF CONTENTS
Why You’ll Love This Cake Inside an Ice Cream Cone
This recipe for cake inside an ice cream cone is not only creative but also super simple to prepare. It’s versatile; you can use any flavor of cake mix you like, from rich chocolate to light vanilla. The combination of the crunchy cone with soft, sweet cake and creamy whipped topping creates a delightful contrast of textures. Plus, it’s easy to customize with toppings like chocolate sauce, sprinkles, or even fresh fruits. Each person can add their favorite toppings, making it a perfect dessert for gatherings. Whether you’re serving it for a birthday party or a cozy family night, cake inside an ice cream cone makes everything more festive!
Print
Cake Inside an Ice Cream Cone
- Total Time: 45 minutes
- Yield: 4 servings 1x
- Diet: Vegetarian
Description
A delightful and fun dessert combining cake and ice cream cones, topped with whipped cream, chocolate sauce, and sprinkles.
Ingredients
- 1 cake mix (vanilla or chocolate)
- 1 cup of whipped cream
- 1 waffle cone (per serving)
- Chocolate sauce (optional)
- Sprinkles (optional)
- Fresh fruits (optional)
Instructions
- Prepare the cake mix according to package instructions and bake in a round cake pan.
- Allow the cake to cool completely.
- Crumble the cooled cake into small pieces in a large bowl.
- Fill the waffle cone with a layer of crumbled cake, then add a layer of whipped cream.
- Repeat the layers until the cone is nearly full.
- Add toppings such as chocolate sauce, sprinkles, and fruits.
- Serve immediately and enjoy!
Notes
For best results, serve the cones immediately after assembly to prevent sogginess.
- Prep Time: 15 minutes
- Cook Time: 30 minutes
- Category: Dessert
- Method: Baking
- Cuisine: American
Nutrition
- Serving Size: 1 cone
- Calories: 350
- Sugar: 20g
- Sodium: 200mg
- Fat: 15g
- Saturated Fat: 8g
- Unsaturated Fat: 5g
- Trans Fat: 0g
- Carbohydrates: 45g
- Fiber: 1g
- Protein: 3g
- Cholesterol: 30mg
Keywords: cake, ice cream cone, dessert, party treat, kid-friendly
Ingredients You’ll Need for Cake Inside an Ice Cream Cone
Creating cake inside an ice cream cone requires just a few basic ingredients. Here’s what you’ll need:
Essential Ingredients:
- 1 cake mix (vanilla or chocolate): Choose your favorite flavor to set the base for this treat.
- 1 cup of whipped cream: This adds a creamy texture and sweetness to each bite.
- 1 waffle cone (per serving): The perfect vessel for holding all that cake and cream.
Optional Add-Ons:
- Chocolate sauce: Drizzle it on top for that extra chocolaty goodness.
- Sprinkles: Brighten up your dessert with a sprinkle of colorful fun.
- Fruits (optional): Fresh berries or sliced bananas can add a refreshing twist.
Feel free to get creative with your toppings. The beauty of this recipe is how easily you can adapt it to suit different tastes!
How to Make Cake Inside an Ice Cream Cone: Step by Step
Creating cake inside an ice cream cone is a straightforward process that packages a whole lot of joy into a single cone. Here’s how to make them step by step:
Step 1: Prepare the Cake Mix
Start by making the cake mix. Follow the instructions on the package. Whether it’s vanilla or chocolate, make sure to mix it well and prepare it in a round cake pan. Once it’s all mixed up, pop it in the oven. Bake according to the time specified on the box.
Step 2: Allow to Cool
When the cake is done baking, it’s crucial to let it cool completely. This will make it easier to crumble and fill into the cones without making a mess.
Step 3: Crumble the Cake
Once the cake has cooled, take it out of the pan and place it in a large bowl. With clean hands or a fork, crumble the cake into small pieces. This should look like soft crumbs.
Step 4: Fill the Waffle Cone
Now, grab your waffle cone! Start by adding a layer of the crumbled cake at the bottom of the cone. Don’t be afraid to pack it down gently. Then, add a layer of whipped cream on top. Use a spoon or a piping bag to make this step easier.
Step 5: Repeat the Layers
Keep adding layers of crumbled cake and whipped cream until your cone is nearly full. The top just needs a beautiful finish, so leave a bit of space for toppings.
Step 6: Add Toppings
Drizzle some chocolate sauce on top of your layered delight. Then, let the fun begin! Add sprinkles, and any fruits if you’re using them, to make your cone look as delicious as it will taste.
Step 7: Serve and Enjoy!
Your cake inside an ice cream cone is ready to be devoured! Serve immediately and watch everyone smile as they dig into their fun dessert.
Serving Suggestions for Cake Inside an Ice Cream Cone
These lovely cones can be served in various ways to enhance the overall experience:
- Party Treats: Serve them on colorful cake platters or wooden boards at parties. Adding a variety of flavors can make it even more enticing.
- Picnic Dessert: They are perfect for picnics! Pack them in a cooler and enjoy them outdoors.
- Children’s Birthday Parties: Set up a decoration station where kids can customize their cones with different toppings.
- Movie Night: Serve these cones while watching a movie at home for a sweet and fun experience.
No matter where you serve them, your guests will love these individual cake cones!
Pro Tips for Perfecting Your Cake Inside an Ice Cream Cone
- Choose the Right Cone: Make sure to use sturdy waffle cones; they hold up better to the weight of the cake and toppings.
- Cool the Cake Completely: This is essential to prevent the cone from getting soggy.
- Layer Neatly: When filling with cake and whipped cream, pack them lightly but neatly for a visually appealing treat.
- Don’t Overfill: Leave some space at the top of the cone to prevent spills when you add your toppings.
- Serve Immediately: These taste best fresh, so prepare them just before serving.
Easy Variations for Cake Inside an Ice Cream Cone
This recipe is super flexible! Feel free to experiment with variations:
- Different Flavors: Try other cake mixes like red velvet, lemon, or even spice cake for a unique twist.
- Frosting Instead of Whipped Cream: Add a layer of cream cheese frosting or any frosting of your choice instead of whipped cream for something richer.
- Chocolate-Covered Cone: Dip the rims of the cones in melted chocolate and then let them set before filling to add extra flavor and decoration.
- Layered Cones: Cooking small batches? Fill cones with different flavors of cake to create a variety of mini cakes in one.
- Ice Cream Filling: For a cool twist, add a scoop of ice cream before the cake crumbles, creating an interesting icy experience.
Get creative and have fun customizing your cake cones!
Would you be interested in more frozen desserts? you can check the list of Ninja Creami recipes, or the Best Iced Coffee Recipes.
Storage Tips to Store Cake Inside an Ice Cream Cone
Storing cake inside an ice cream cone can be tricky because the cone can get soggy. Here are some tips to keep your treat fresh:
- Make the Cake in Advance: You can bake and crumble the cake ahead of time, storing it in an airtight container.
- Store Components Separately: If you need to prepare the dessert a bit early, keep the crumbled cake, whipped cream, and cones separate until you are ready to serve them.
- Refrigerate Whipped Cream: Keep the whipped cream chilled in the fridge to maintain its texture until you’re ready to use it.
- Assemble Just Before Serving: For the best taste and texture, assemble your cones right before serving.
By following these tips, you’ll enjoy fresh, fun cake cones anytime! Remember to join our community on Pinterest and Facebook !
Conclusion
Cake inside an ice cream cone is an unforgettable dessert that brings together the joy of cake and the fun of a cone. It is simple to make, customizable, and provides a delightful treat for every occasion. Whether you’re baking for a special event or whipping up a sweet surprise at home, these cute cones are sure to impress. Don’t be afraid to let your creativity shine in this dessert. Now that you have the recipe and tips to make these delightful treats, gather your ingredients and have fun creating your cake cones!
FAQs About Cake Inside an Ice Cream Cone
1. Can I make cake inside an ice cream cone with leftover cake?
Yes! Crumbled leftover cake can work wonderfully for this recipe. Just layer it in the cones with whipped cream.
2. How do I prevent the cone from getting soggy?
To keep the cones crispy, store the components separately and assemble them right before serving.
3. Is it necessary to use whipped cream?
No, you can substitute whipped cream with frosting or even ice cream for a different flavor profile.
4. What size cone should I use?
Using standard-sized waffle cones is best, but mini cones can be fun for smaller portions or snacks.
5. Can I freeze cake inside an ice cream cone?
It’s not recommended to freeze the assembled cones as the ice cream will make the cone soggy. Freeze components separately, then assemble before serving.
Now you’re all set to make these delightful cake cones and enjoy an unforgettable dessert experience! Happy baking!