I know what it’s like to juggle after-school chaos, sports practice, and a late workday and still have to pull dinner together — that’s why I love quick fixes that feel like a treat. This Chocolate Milkshake Ninja Slushi recipe is fast, forgiving, and family-approved, and I even wrote up my Ninja Slushi chocolate milkshake adventure to help you get started without stress.
A Quick Look at This Chocolate Milkshake Ninja Slushi Recipe
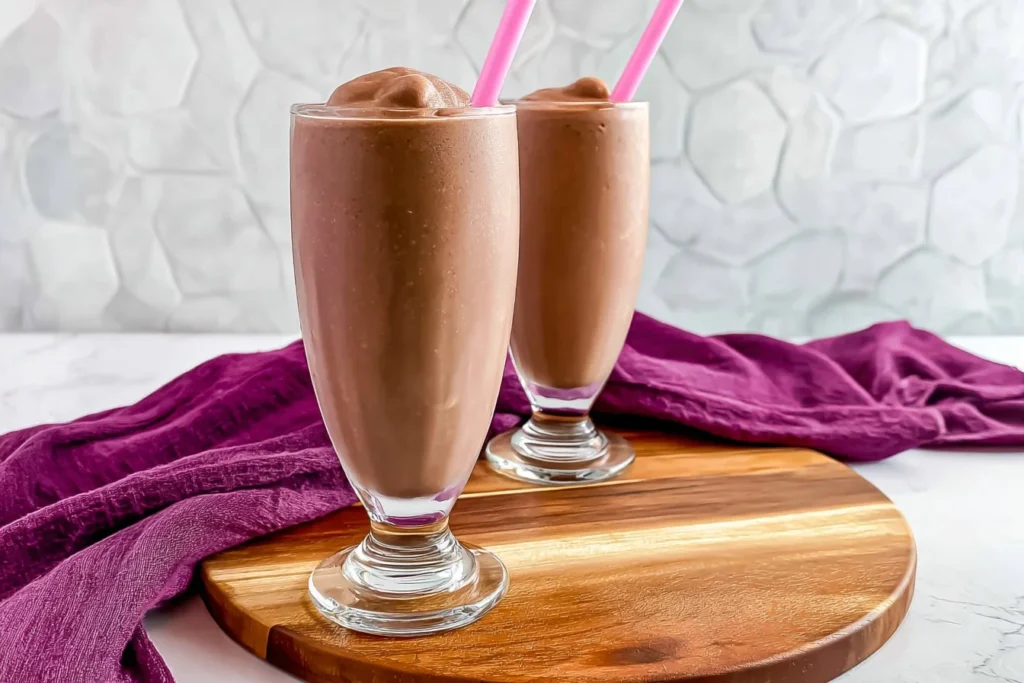
This Chocolate Milkshake Ninja Slushi uses two taste-pleasing staples kids and adults love: milk (or chocolate milk) and cocoa. It’s fast to mix — just whisk, pour, and press the milkshake setting on your Ninja Slushi. Cleanup is minimal because you’re mainly rinsing one pitcher and the machine parts, and you can tweak sweetness or thickness for picky eaters. It’s a perfect weeknight dessert or treat that reliably turns out creamy with very little babysitting, making it a go-to when time and energy are short.
Ingredients You’ll Need for Chocolate Milkshake Ninja Slushi
Essentials
- 4 cups milk or chocolate milk — whole milk makes the creamiest result, but 2% works fine.
- 1/4 cup chocolate syrup — omit if you use chocolate milk.
- 2 tablespoons unsweetened cocoa powder — omit if you use chocolate milk.
- 3/4 to 1 cup granulated sugar or sweetener — start lower and adjust to taste.
These are pantry-friendly items that I usually keep on hand. If your kids prefer a sweeter shake, aim toward the 1 cup; for less sugar, start at 3/4 cup and taste after processing.
Optional Add-ons
- 1/2 teaspoon vanilla extract for a rounded flavor boost.
- A scoop of vanilla or chocolate ice cream for extra richness (add when blending or after the Slushi is done).
- 1 tablespoon peanut butter or almond butter (blended in) for a nutty note — good if your family already likes that combo.
- Whipped cream and sprinkles for a fun finish.
- Mini chocolate chips or crushed cookies for texture.
These extras let you customize without adding much prep time.
Substitutions and Shortcuts
- Use chocolate milk instead of plain milk + cocoa/syrup to skip measuring and mixing; omit cocoa and syrup if you do this.
- Swap granulated sugar for a 1:1 baking sweetener if you need a sugar-free option — taste as you go.
- Use pre-made chocolate milkshake mix from the grocery store and just thin with milk if you prefer a store-bought shortcut.
- If you don’t have a Ninja Slushi, try a powerful blender or ice cream maker — blend with a lot of ice until thick and creamy.
If you want ideas for using other Ninja machines, I’ve compared different milkshake approaches in my Ninja CREAMi chocolate milkshake recipe, which can help you decide which tool fits your routine.
How to Make Chocolate Milkshake Ninja Slushi Step-by-Step
I keep instructions short and practical so you can get this done between homework and practice pick-ups.
- Measure the dry mix quickly: in a large pitcher or bowl, whisk the cocoa powder and sugar together to break up lumps. This saves time later and gives a smoother result.
- Add the milk: pour in the 4 cups of milk (or chocolate milk) and the chocolate syrup if you’re using plain milk. Whisk until the sugar and cocoa are fully dissolved — you don’t need perfect precision here.
- Taste now if you like: adjust sweetness or add a splash of vanilla. It’s easier to tweak before freezing or slushing.
- Pour into your Ninja Slushi: place the mixture into the machine’s pitcher or container per the manufacturer’s directions. Fit the lid and secure it.
- Press the milkshake setting: start the milkshake or Slushi program. Let the machine run — expect 15 to 45 minutes depending on sweetness and temperature. A colder, sweeter mix will thicken faster.
- Dispense and serve: when the cycle ends, place a cup under the spout, pull the handle, and let it flow. If it’s not as thick as you like, run one more short cycle or add a scoop of ice cream and stir.
- Clean quickly: rinse the pitcher and lid right away to avoid stickiness; most parts are easy to wash by hand or in the dishwasher.
If you prefer a blender, use lots of ice and pulse until thick. For an ice cream maker, follow the manufacturer’s churn time, then scoop and serve. For a protein boost or thicker texture, check my notes in the Ninja Slushi protein milkshake guide — it’s a nice upgrade for active kids.
Common Mistakes to Avoid
A quick note: avoiding a few common missteps will save time and keep the family happy — no wasted ingredients, no extra cleanup, and no complaints at the table.
Mistake 1: Adding too little sugar or sweetness up front
If you undersweeten early, the Slushi can taste flat once thickened. Taste the mix before processing and remember sweetness concentrates as the shake thickens. Start with 3/4 cup and add more after a taste test if needed.
Mistake 2: Using warm or room-temperature milk
Warm liquid slows down the thickening and can lengthen machine time. Use cold milk straight from the fridge for the quickest result. If you’re in a hurry, pop the mixed pitcher in the freezer for 10–15 minutes before running the Slushi setting.
Mistake 3: Skipping the quick rinse after serving
Letting chocolate residue dry inside the pitcher and lid makes cleanup take longer. A fast rinse immediately after serving keeps dishes easy and avoids stubborn stains or odors — and saves time the next day. For more cleanup tips and fun flavors, see my post on the Ninja Slushi eggnog milkshake for how I keep cleanup simple during holiday runs.
Serving Suggestions for Chocolate Milkshake Ninja Slushi
A short note: pair this shake with low-effort sides or use small add-ons to make it feel like a special family treat without extra time.
Kid-friendly sides
Offer graham crackers, banana slices, or a few plain cookies. These pair well with the shake and require zero cooking.
Easy add-ons
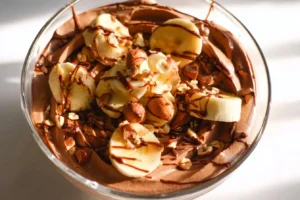
Top with whipped cream, mini chocolate chips, or a drizzle of extra chocolate syrup. Keep the toppings in small bowls so kids can customize without you doing extra prep.
Minimal prep ideas for a mini dessert spread
Set out small cups of sprinkles, crushed pretzels, or chopped nuts (if no allergies) and let kids build their own sundaes. For a themed night, serve the chocolate shake with warm mini pancakes or toaster waffles for a quick “dessert breakfast” combo — fast and fun. If you want a nutty twist, my Ninja Slushi pistachio milkshake post shows a few ideas that translate well here.

Conclusion
I’m confident this Chocolate Milkshake Ninja Slushi will save you time and energy while still pleasing picky eaters — it’s quick to mix, easy to clean, and flexible for whatever your family prefers. If you want the manufacturer’s version for comparison, check the official Ninja Chocolate Milkshake Slushi recipe for specs and setup tips, or read a fan-tested variation at Ninja Slushi Chocolate Milkshake tips and variations for creative ideas and troubleshooting.
FAQs About Chocolate Milkshake Ninja Slushi
Q1: How long does the Chocolate Milkshake Ninja Slushi take from start to finish?
A1: The machine cycle runs about 15–45 minutes depending on sugar content and how cold the mix is, and prep is only a few minutes. I plan for about 20–30 minutes total on busy nights — enough time to wrap up homework or lay out toppings.
Q2: Can I store leftovers of Chocolate Milkshake Ninja Slushi, and for how long?
A2: Yes. Pour leftovers into an airtight container and keep in the fridge for up to 24 hours, but expect some separation. Stir or reprocess briefly in the Ninja Slushi or blender to refresh the texture before serving.
Q3: Is the Chocolate Milkshake Ninja Slushi kid-friendly for picky eaters?
A3: Absolutely. You can adjust sweetness, use chocolate milk to simplify flavors, or add a scoop of ice cream for a richer texture that usually wins over picky kids. Let them choose a topping to make it more appealing.
Q4: Can I make a dairy-free Chocolate Milkshake Ninja Slushi?
A4: Yes. Use chilled oat milk or almond milk and taste before processing — you may want to add a touch more sweetener or chocolate syrup since plant milks can taste less rich. The machine works the same way.
Q5: What if my Chocolate Milkshake Ninja Slushi comes out too thin or too icy?
A5: If it’s too thin, run another short cycle, add a scoop of ice cream, or freeze the mix briefly before reprocessing. If it’s icy, it likely needs more sugar or a bit more fat (a splash of cream or a scoop of ice cream) to smooth it out — small tweaks usually fix it quickly.
Chocolate Milkshake Ninja Slushi
- Total Time: 35 minutes
- Yield: 4 servings 1x
- Diet: Vegetarian
Description
A quick and delicious chocolate milkshake made in a Ninja Slushi, perfect for busy weeknights.
Ingredients
- 4 cups milk or chocolate milk
- 1/4 cup chocolate syrup (omit if using chocolate milk)
- 2 tablespoons unsweetened cocoa powder (omit if using chocolate milk)
- 3/4 to 1 cup granulated sugar or sweetener
- 1/2 teaspoon vanilla extract (optional)
- A scoop of vanilla or chocolate ice cream (optional)
- 1 tablespoon peanut butter or almond butter (optional)
- Whipped cream and sprinkles (for topping)
- Mini chocolate chips or crushed cookies (for texture)
Instructions
- In a large pitcher or bowl, whisk together cocoa powder and sugar to break up lumps.
- Pour in 4 cups of milk (or chocolate milk) and add chocolate syrup if using plain milk. Whisk until combined.
- Taste and adjust sweetness or add vanilla if desired.
- Pour mixture into the Ninja Slushi pitcher and secure the lid.
- Press the milkshake setting and let the machine run for 15 to 45 minutes.
- Once done, dispense into cups and add optional ice cream if desired for extra thickness.
- Rinse the pitcher and lid immediately after serving to make cleanup easier.
Notes
Use cold milk for a quicker thickening process. Adjust sweetness based on preference and enjoy with fun toppings.
- Prep Time: 5 minutes
- Cook Time: 30 minutes
- Category: Dessert
- Method: Blending
- Cuisine: American
Nutrition
- Serving Size: 1 serving
- Calories: 350
- Sugar: 40g
- Sodium: 120mg
- Fat: 10g
- Saturated Fat: 5g
- Unsaturated Fat: 3g
- Trans Fat: 0g
- Carbohydrates: 50g
- Fiber: 1g
- Protein: 10g
- Cholesterol: 30mg
Keywords: chocolate milkshake, Ninja Slushi, quick dessert, family-friendly, easy recipe


4 thoughts on “Chocolate Milkshake Ninja Slushi”