I still remember summer afternoons as a kid, sticky fingers stained with every bright Kool-Aid color and a little plastic cup of icy slush that felt like pure magic. That same cozy, cheerful feeling is exactly why I come back to this simple Kool-Aid Slushie recipe again and again. If you’ve ever worried that making a slushie at home will be complicated, messy, or taste “off,” I get it—those doubts kept me from trying for a long time. But this post strips everything down to easy steps and friendly tips so you can make a perfect slushie at home, even if it’s your first time. If you want a refreshing treat that’s fast, forgiving, and completely customizable, you’re in the right place. And if you want a little help with tools, check out my own experience with a slushie maker here: my Ninja slushie maker experience.
Highlights
Why I Love This Recipe of Kool-Aid Slushie
There’s something honest and joyful about a Kool-Aid Slushie that a lot of desserts try to copy but rarely capture. It’s colorful, it’s playful, and it’s reliable—no long ingredient lists, no fuss. For beginner cooks, it’s a small-win recipe that builds confidence: you follow three main steps, taste as you go, and end up with a cold, fun treat everyone will enjoy. I love how forgiving it is. If your ice-to-water ratio shifts a bit, or you want it sweeter or tangier, you can fix it in seconds. It also makes me happy because it connects to memories—family barbecues, neighborhood pool days, and those lazy afternoons when a simple slushie felt like an event.
If you’re short on time, you can whip this up in under ten minutes. If you want to get a bit fancier, the slushie is a great canvas for toppings and mix-ins. For ideas on equipment that speeds things up—especially if you plan to make slushies frequently—here’s a helpful write-up I referred to when setting up my own little slushie station: my Ninja slushie maker experience.
Ingredients You’ll Need for Kool-Aid Slushie
Essentials
- 1 cup Kool-Aid powder (any flavor). Pick your favorite—grape, cherry, tropical punch, or lemonade all work beautifully.
- 4 cups cold water. This is what dissolves the powder and provides the base for your slushie.
- 2 cups ice. For texture—this is what creates that frozen, grainy slush.
- 1/2 cup sugar (optional). Many Kool-Aid flavors are already sweet, but a little extra sugar gives a fuller flavor and helps texture. Taste and adjust to your preference.
Optional toppings and add-ons
- Fresh fruit: sliced strawberries, blueberries, diced mango, or citrus slices for a fresh bite.
- Gummy candies: kids love dropping a few gummy bears or fish into their slushie.
- Whipped cream: adds a creamy finish and looks festive.
- Fresh mint leaves: a small handful makes a great contrast for citrusy flavors.
- Sprinkles or sanding sugar for a fun party look.
Substitutions and shortcuts
- Sweetener swaps: If you’d rather not use granulated sugar, try honey, agave, or a sugar substitute. Start with 2–3 tablespoons of honey and adjust since liquid sweeteners change consistency slightly.
- Lower-sugar option: Use less sugar or none at all. Many Kool-Aid packets already carry enough sweetness, especially the names with “no sugar added” options available in stores.
- Pre-made Kool-Aid vs. powder: You can use ready-to-drink Kool-Aid if that’s what you have, though the flavor concentration will change—use less water and more ice to get the right slushie texture.
- Blender shortcut: If you don’t want to blend, put the mixed Kool-Aid in the freezer for 30–45 minutes and stir every 10–15 minutes until slushy. This is more hands-on but can work without a blender.
- Ice quality: Use frozen fruit instead of ice for a bump of real fruit flavor and a smoother texture.
A quick note about equipment: a regular blender works great for this recipe. If you plan on making slushies often, a frozen-drink maker or high-powered blender will give the best texture and take less effort on the ice. If you want to see a friendly review I used while picking gear, here’s another peek: my Ninja slushie maker experience.
How to Make Kool-Aid Slushie Step-by-Step
Before you start
I like to chill my glasses in the freezer for 10–15 minutes so the slushie stays colder longer. Lay out any toppings you plan to use so everything is ready when the slushie is done.
Step 1 — Dissolve the Kool-Aid
Measure 4 cups of cold water into a large pitcher. Add 1 cup of Kool-Aid powder and, if using, 1/2 cup sugar. Stir until everything is completely dissolved. It only takes a minute or two with a spoon. If you’re using flavored Kool-Aid packets sold in small boxes, you might need more or less powder depending on how concentrated you want the flavor—taste before you add ice and adjust.
Step 2 — Build the base
Once the powder is dissolved, taste the mixture. If it needs more sweetness, add sugar a tablespoon at a time. If you like a tangier slushie, a squeeze of lemon or lime can brighten it. Keep in mind that flavors dull slightly when frozen, so it’s okay if the mixture tastes a bit stronger than you want.
Step 3 — Add ice and blend
Pour the Kool-Aid mixture into a blender and add 2 cups of ice. Use a pulse setting a few times to break up the ice, then blend on medium-high for 20–40 seconds until the mixture is a smooth, slushie-like consistency. If your blender struggles, use crushed ice or add ice in stages. For a chunkier texture, blend less; for a smoother drink, blend a little longer.
Step 4 — Check texture and adjust
If the slushie is too thin, add a handful of extra ice and pulse again. If it’s too thick, stir in a splash of water and blend briefly. This is where tasting matters—adjust sweetness or acidity now so the frozen result will taste great.
Step 5 — Serve and garnish
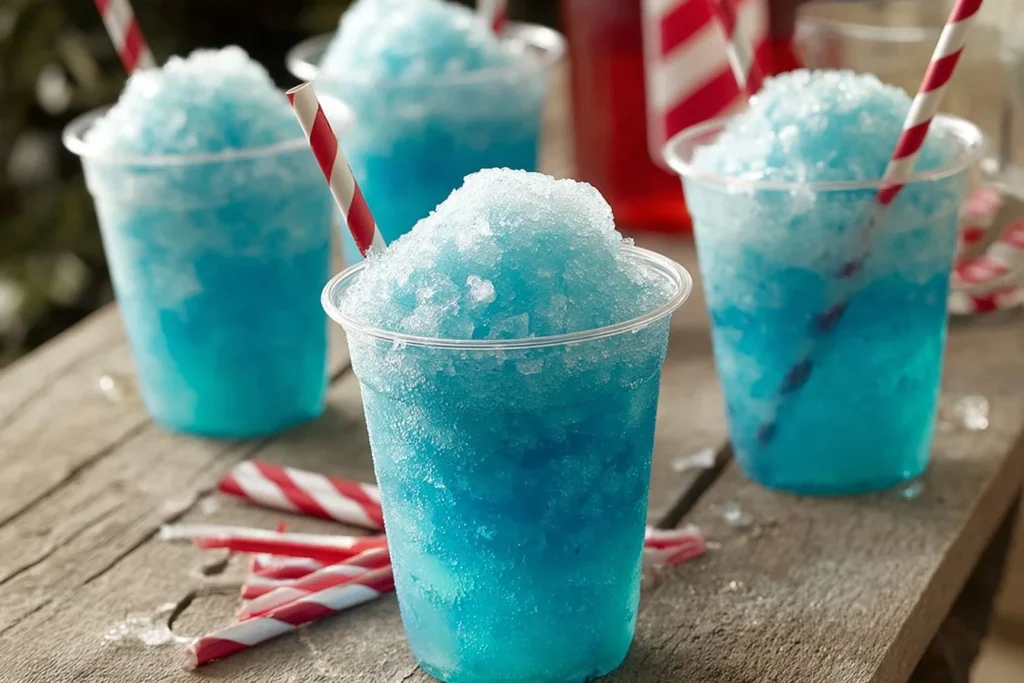
Pour the Kool-Aid Slushie into chilled glasses, top with fresh fruit, gummy candies, or a dollop of whipped cream if you like. Serve immediately with a straw or spoon. If you’re making for a crowd, keep the slushie in a chilled pitcher or thermos and stir occasionally to maintain texture.
Quick tips while blending
- Use short pulses at first to avoid stressing the blender motor.
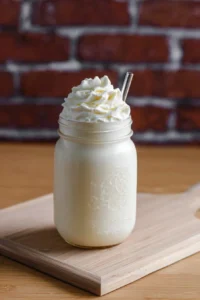
- If you want a creamier slushie, add a splash (about 2 tablespoons) of milk, coconut milk, or half-and-half before blending.
- For a flavored twist, swap in frozen fruit for some of the ice—strawberries pair well with cherry Kool-Aid, while mango brightens tropical punch.
If you want to read about certain gadgets and tips others have shared, I linked a guide I found helpful when getting more serious about slushies here: my Ninja slushie maker experience.
Common Mistakes to Avoid
Using the Wrong Ice Texture
A lot of beginners use whole large ice cubes and expect the blender to transform them instantly into a soft slushie. That can lead to uneven texture or strain your blender. If your machine is small or not super powerful, start with crushed ice or break ice into smaller chunks before blending. Short pulses work better than blending at full speed from the start. If you hear the motor laboring, stop, let it rest a moment, then resume in short bursts.
Over- or Under-Sweetening
It’s tempting to add a lot of sugar because the powdered mix seems mild, but remember that freezing changes perceived sweetness slightly. Taste the liquid base before adding ice—if it already tastes good, you’ll be fine. If it tastes a bit weak, add a teaspoon or two at a time, not a whole spoonful. If you overdo the sweetness, a squeeze of fresh lemon or lime can help balance it.
Letting the Slushie Melt and Refreeze
Another common issue is making a slushie too far ahead of time and letting it melt, then putting it back in the freezer. That can create big ice crystals and a grainy, unpleasant texture. If you must make ahead, store in a chilled insulated container and stir occasionally. For parties, make fresh batches in smaller quantities rather than one big jug left out on the table. If it does melt, don’t refreeze—blend with fresh ice instead for the best texture.
- Serving Suggestions for Kool-Aid Slushie
Family-Friendly Party Cups
I love serving Kool-Aid Slushies in individual cups for kids’ parties. Fill plastic or paper cups, top with gummy candies, and add a little paper flag or straw. Kids love flashing colors and the sweet, cold texture. For variety, make two different flavors side by side and let kids choose or mix them. If you want more tips on making slushies with gadgets that make this easy for groups, check this helpful resource: my Ninja slushie maker experience.
Grown-Up (But Still Alcohol-Free) Twists
You can make adult-friendly versions without alcohol by adding more sophisticated flavors—think a splash of cold brewed tea for a tea-infused slushie, or muddled fresh herbs like basil or mint. Citrus flavors pair beautifully with a twist of fresh herbs. Serve in stemless wine glasses or mason jars with a sprig of mint on top for a charming, grown-up presentation.
Dessert-Style Slushie Bowls
Turn a slushie into a quick dessert by serving it in bowls with spoonable toppings. Add scoops of vanilla ice cream or coconut whipped cream on top, fresh berries, crushed cookies, or shaved chocolate. The contrast between icy slush and creamy toppings makes a fun, textural dessert that’s easy to assemble and always popular with guests.
Print
Kool-Aid Slushie
- Total Time: 5 minutes
- Yield: 4 servings 1x
- Diet: Vegetarian
Description
A quick and easy recipe for a refreshing Kool-Aid Slushie, perfect for summer afternoons and customizable to your taste.
Ingredients
- 1 cup Kool-Aid powder (any flavor)
- 4 cups cold water
- 2 cups ice
- 1/2 cup sugar (optional)
- Fresh fruit (for toppings)
- Gummy candies (for toppings)
- Whipped cream (for topping)
- Fresh mint leaves (for garnish)
- Sprinkles or sanding sugar (for decoration)
Instructions
- Measure 4 cups of cold water into a large pitcher. Add 1 cup of Kool-Aid powder and 1/2 cup sugar (if using). Stir until dissolved.
- Taste the mixture and adjust sweetness with sugar if needed. Squeeze lemon or lime for tanginess if desired.
- Pour the Kool-Aid mixture into a blender and add 2 cups of ice. Blend on medium-high for 20–40 seconds until smooth.
- If too thin, add more ice; if too thick, stir in water and blend briefly.
- Pour the slushie into chilled glasses and top with fresh fruit, gummy candies, or whipped cream. Serve immediately.
Notes
Best enjoyed immediately for the best texture. If stored, may soften and become watery. Can use frozen fruit instead of ice.
- Prep Time: 5 minutes
- Cook Time: 0 minutes
- Category: Dessert
- Method: Blending
- Cuisine: American
Nutrition
- Serving Size: 1 serving
- Calories: 180
- Sugar: 30g
- Sodium: 10mg
- Fat: 0g
- Saturated Fat: 0g
- Unsaturated Fat: 0g
- Trans Fat: 0g
- Carbohydrates: 45g
- Fiber: 0g
- Protein: 0g
- Cholesterol: 0mg
Keywords: slushie, Kool-Aid, summer treat, refreshing drink, kids dessert
Conclusion
You’ve learned how simple and flexible the Kool-Aid Slushie can be—mix the powder, add ice, blend, and enjoy. It’s easier than it looks, and you can change it up to suit taste, occasion, or whatever you have on hand. This recipe is cozy, classic, and perfect for beginners who want a low-pressure win in the kitchen. If you want step-by-step guidance focused on slushie technique and different flavor ideas, I recommend this helpful guide on making slushies: How to Make a Slushies – Eating on a Dime. For a kid-friendly spin and more topping ideas, this page is really useful too: Kool-Aid Slushie.
FAQs About Kool-Aid Slushie
How long will a Kool-Aid Slushie stay good in the fridge?
A Kool-Aid Slushie is best enjoyed immediately for the best texture. If kept in a chilled container in the refrigerator, it may last a few hours, but the texture will soften and become watery. If it melts, blend with fresh ice to restore slushiness.
Can I make a Kool-Aid Slushie without a blender?
Yes. Mix the Kool-Aid powder with water and sugar, then place the mixture in a shallow container in the freezer. Stir every 10–15 minutes as it freezes to break up ice crystals until you reach the slush consistency. It takes more hands-on time but works if you don’t have a blender.
Can I use sugar-free Kool-Aid for a Kool-Aid Slushie?
You can use sugar-free Kool-Aid. Since those mixes use artificial sweeteners, taste the mixed base before freezing and adjust sweetness if needed. You may want to add a bit of natural sweetener, or a small amount of juice, to round out the flavor.
What are fun Kool-Aid Slushie flavor combinations?
Classic combinations include mixing cherry and grape, lemonade and strawberry, or tropical punch with mango. You can also blend a citrus Kool-Aid with iced tea for a makeshift Arnold Palmer slushie. Don’t be afraid to experiment—mixing two flavors often gives a richer result.
How do I make my Kool-Aid Slushie creamier?
For a creamier texture, add a splash (1–2 tablespoons) of half-and-half, coconut milk, or a dairy alternative to the base before blending. Keep in mind that adding too much liquid can thin the slushie, so start small and adjust to taste.