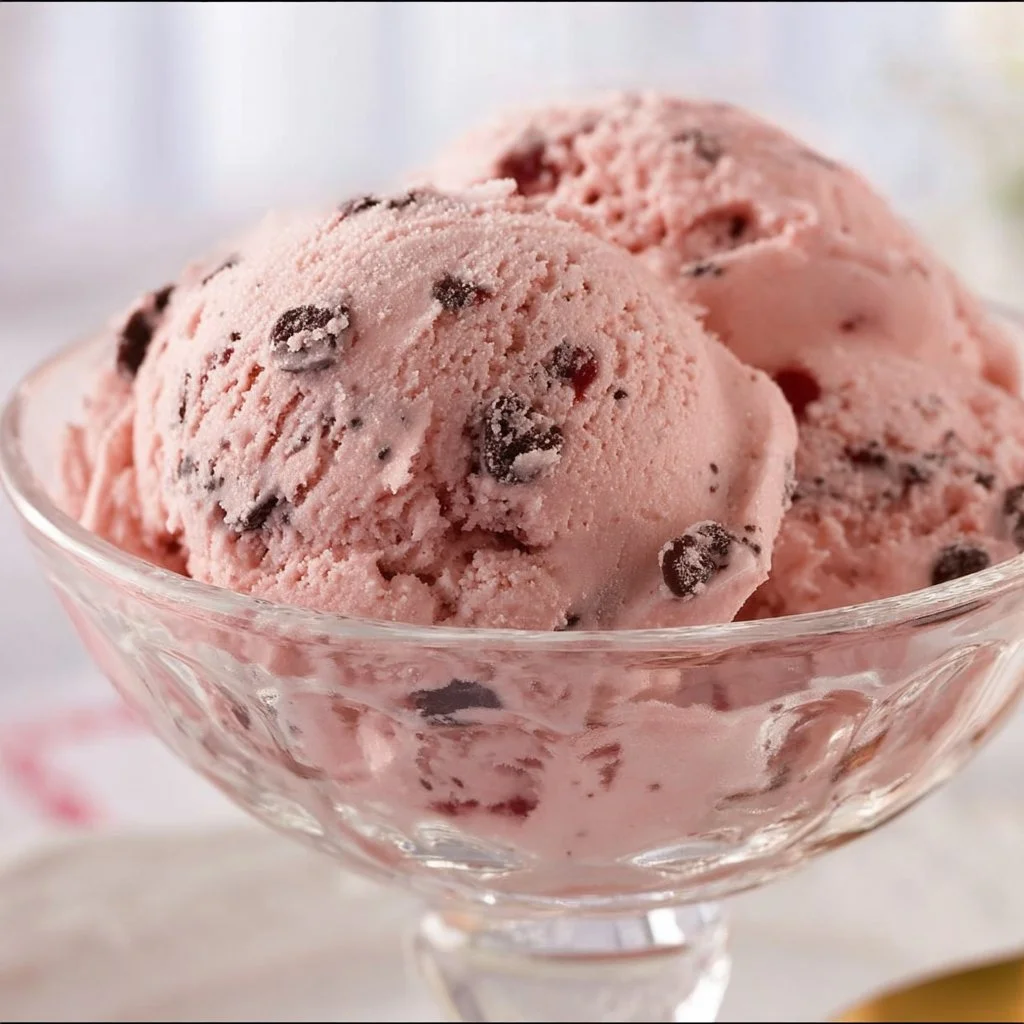
On warm summer days, there’s something that makes you crave a scoop of rich, creamy ice cream. I remember childhood afternoons spent at the neighborhood ice cream shop, eagerly waiting for my cherry chocolate cone—sweet, tart, and utterly delightful. As I embarked on my journey into homemade ice cream, I wondered if I could replicate that classic flavor at home, much to my kids’ delight! Today, I’m excited to share a recipe that’s not only delicious but also incredibly simple. Trust me, even if you’ve never made ice cream before, this Ninja Creami Cherry Chocolate Ice Cream is an effortless, stress-free treat the whole family will love.
Table of Contents
Why I Love This Recipe of Ninja Creami Cherry Chocolate Ice Cream
This recipe holds a special place in my heart for several reasons. First, it perfectly balances the sweet, velvety taste of cherry pie filling with rich chocolate brownie chunks, creating a flavor explosion that brings everyone together. What makes it particularly appealing for beginner cooks is how incredibly straightforward it is. I already love my ice cream gadget and the recipes on these Ninja Creami recipes, so as usual, you don’t need any fancy tools or complicated techniques. It’s all about combining simple ingredients and letting the Ninja Creami do the work. Plus, there’s something cozy about enjoying homemade ice cream while creating memories with loved ones—cheering on the little ones as they scoop and serve their own bowls. It’s practical, emotional, and oh-so-delicious!
Ingredients You’ll Need for Ninja Creami Cherry Chocolate Ice Cream
Before diving into the process, let’s gather the ingredients you’ll need to create your very own Ninja Creami Cherry Chocolate Ice Cream. I’ve broken it down for you:

Essentials:
- 1/2 cup heavy whipping cream: The base for your ice cream, heavy whipping cream gives it that rich and creamy texture we all love.
- 1/2 cup whole milk: This adds to the creaminess while ensuring the mix is pourable.
- 2 tablespoons granulated sugar: A little sweetness brings out the flavors of the cherries and chocolate beautifully.
- 1 cup cherry pie filling: This is the star of the show, providing a burst of tartness and sweetness.
- 1/4 cup brownie chunks (or chocolate chips): These add a delightful fudgy texture and richness, making every scoop feel like a treat.
Optional Add-ons:
- Nuts: Throw in some walnuts or almonds for extra crunch and flavor.
- Maraschino cherries: For those who enjoy a cherry-on-top moment, these can elevate your dessert presentation.
- Other fruits: If cherries aren’t your jam, you can mix it up with strawberries or blueberries!
Substitutions and Shortcuts:
- If you’re out of heavy whipping cream, you can substitute with half-and-half, though this may alter the creaminess slightly.
- If cherry pie filling isn’t available, fresh or frozen cherries blended with a little sugar could work as a substitute.
- For a faster prep time, pre-made brownies or store-bought chocolate chips save you a lot of work.
How to Make Ninja Creami Cherry Chocolate Ice Cream Step-by-Step
Now that you have all your ingredients at the ready, let’s dive into the simple steps to craft your own delicious Ninja Creami Cherry Chocolate Ice Cream.
Mix the Base Ingredients: In a small bowl or a large liquid measuring cup, start by combining 1/2 cup of heavy whipping cream, 1/2 cup of whole milk, 2 tablespoons of granulated sugar, and the entire 1 cup of cherry pie filling. Use a whisk or a spoon to mix everything together until well incorporated. It should be a uniform pink mixture.
Prepare for Freezing: Once mixed, carefully transfer the blend into a Ninja Creami pint. Seal it with its lid and place it in your freezer. It needs to freeze for at least 24 hours to attain that ideal scoopable texture.
Ninja Creami Time: After a full day (or longer, if you can resist!), take the pint out of the freezer and remove the lid. Place the pint back into the outer bowl assembly of your Ninja Creami and close the outer lid securely.
Select Ice Cream Mode: Turn on the Ninja Creami machine and press the Ice Cream button. The cycle takes about 2 minutes, and you’ll soon hear the magical sound of ice cream being created!
Check the Texture: After the initial cycle is complete, remove the pint from the machine. Take a look at the texture. If it seems a bit crumbly, don’t worry. Just re-insert the pint back into the machine and use the Re-spin button. In case it’s still too crumbly, simply add one tablespoon of milk and re-spin again until it’s nice and creamy.
Add the Brownie Chunks: To create a delightful surprise in every bite, carve out a well in the ice cream about 1/2-inch wide and extending to the bottom of the pint. Fill this well with your brownie chunks or chocolate chips.
Mix It All Together: Re-insert the pint back into the machine and select the Mix-in button to evenly distribute those delicious chocolate bits into your ice cream.
Serve It Up: Finally, remove the pint from the machine. Scoop out the deliciousness, serve it up in bowls, and enjoy every single spoonful!
Common Mistakes to Avoid
Making homemade ice cream should be a fun experience, but there are a few common pitfalls that can happen, especially for those just starting. Here’s what to avoid:
1. Forgetting to Freeze
One of the top mistakes is not waiting long enough for the cream to freeze before using the Ninja Creami. This step is crucial! If you skip this, you’ll end up disappointed with a liquid mix instead of creamy ice cream.
2. Not Checking the Texture
After the initial blending in the Ninja Creami, if you don’t check the texture before proceeding to mix-ins, you could miss an opportunity to achieve the perfect consistency. If it’s crumbly, take the time to re-spin—trust me, it’s worth it!
3. Overloading with Mix-ins
While chocolate brownies or chips make it delicious, piling on too many can make the base uneven. When adding them, stick to the recommended amounts for the best balance of flavors.
4. Expecting a Store-Bought Texture
Homemade ice cream has a different texture than commercial products due to the absence of stabilizers. It’s normal for it to be a bit softer. Don’t worry; that creaminess is part of the charm!
Print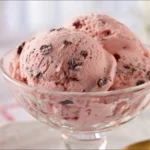
Ninja Creami Cherry Chocolate Ice Cream
- Total Time: 1440 minutes
- Yield: 4 servings 1x
- Diet: Vegetarian
Description
A delightful homemade cherry chocolate ice cream made effortlessly with a Ninja Creami, featuring the perfect balance of sweet cherry and rich chocolate brownie chunks.
Ingredients
- 1/2 cup heavy whipping cream
- 1/2 cup whole milk
- 2 tablespoons granulated sugar
- 1 cup cherry pie filling
- 1/4 cup brownie chunks or chocolate chips
- Nuts (optional)
- Maraschino cherries (optional)
- Other fruits (optional)
Instructions
- Mix the Base Ingredients: Combine heavy whipping cream, whole milk, sugar, and cherry pie filling until well incorporated.
- Prepare for Freezing: Transfer the mixture to a Ninja Creami pint, seal and freeze for at least 24 hours.
- Ninja Creami Time: Remove the pint from the freezer, place it into the Ninja Creami machine, and select Ice Cream mode for about 2 minutes.
- Check the Texture: If the texture is crumbly, re-spin or add a tablespoon of milk and re-spin.
- Add the Brownie Chunks: Carve a well in the ice cream and fill with brownie chunks.
- Mix It All Together: Re-insert the pint and use the Mix-in button to distribute the chocolate bits.
- Serve It Up: Scoop and enjoy!
Notes
Make sure to freeze the mixture for a full 24 hours for the best texture. Adjust mix-ins to avoid an uneven ice cream.
- Prep Time: 15 minutes
- Cook Time: 0 minutes
- Category: Dessert
- Method: Freezing
- Cuisine: American
Nutrition
- Serving Size: 1 serving
- Calories: 320
- Sugar: 25g
- Sodium: 80mg
- Fat: 18g
- Saturated Fat: 10g
- Unsaturated Fat: 8g
- Trans Fat: 0g
- Carbohydrates: 34g
- Fiber: 1g
- Protein: 4g
- Cholesterol: 60mg
Keywords: homemade ice cream, cherry chocolate, dessert recipe, Ninja Creami, summer treat
Easy Variations for Ninja Creami Cherry Chocolate Ice Cream
While the original recipe is a crowd-pleaser, don’t hesitate to play around with different flavors and ingredients. Here are a few fun variations to consider:
1. Berry Blast Version
Substitute the cherry pie filling with a combination of strawberry and blueberry pie filling. The fruity mix will create a refreshing summer treat that brings a burst of flavor in every bite.
2. Minty Chocolate Chip
For a refreshing twist, add a few drops of mint extract into the base mixture before freezing. Incorporate the chocolate chips, and you have a delightful mint-chocolate variant.
3. Peanut Butter Swirl
Love peanut butter? Add a few spoonfuls of peanut butter to the base mix before freezing. After the initial spin, create a well and fill it with swirls of peanut butter for a creamy, nutty treat.
4. Tropical Cherry Delight
Combine cherry pie filling with coconut cream and chopped pineapple instead of brownies. This rendition will provide a tropical vibe, transporting you straight to a beach getaway.
Serving Suggestions for Ninja Creami Cherry Chocolate Ice Cream
Now that you’ve made this delicious ice cream, how can you serve it up for maximum enjoyment? Here are some delectable suggestions:
1. Ice Cream Sundaes
Serve scoops of your Ninja Creami Cherry Chocolate Ice Cream on a bed of crushed graham crackers. Top it off with whipped cream, a drizzle of chocolate syrup, and perhaps a cherry on top for a classic sundae.
2. Ice Cream Sandwiches
Squish the ice cream between two soft chocolate cookies or graham crackers for a delightful ice cream sandwich everyone will enjoy!
3. Milkshakes
Blend a few scoops of this cherry chocolate ice cream with some whole milk for a heavenly milkshake. It’s the perfect treat for warm afternoons!
4. DIY Ice Cream Bar
Set up a DIY ice cream bar where family members can scoop their favorite Ninja Creami Cherry Chocolate Ice Cream and top it with their selection of toppings, like nuts, sprinkles, or extra brownie bits. It makes dessert a fun and interactive experience!
At the end, remember to join our community on Pinterest and Facebook !
Conclusion
As you can see, making Ninja Creami Cherry Chocolate Ice Cream is simpler than you might think. With just a few easy steps, you can create a delicious homemade treat that’s rich, creamy, and customizable—a true family favorite. Remember, it’s not only about the sweet end result but also the moments shared while making it. I encourage you to take on the challenge and bring this cozy classic into your home. You won’t regret it!
Now, it’s your turn to make this delightful treat! Don’t wait—gather your ingredients and give it a try!
FAQs About Ninja Creami Cherry Chocolate Ice Cream
1. Can I use frozen cherries instead of cherry pie filling?
Yes, you can. Blend the frozen cherries with a bit of sugar to mimic the flavor of pie filling, and it works beautifully!
2. How long does the ice cream last in the freezer?
Homemade ice cream is best consumed within 1-2 weeks, but it can last up to a month if frozen properly in an airtight container.
3. Can I make a dairy-free version?
Absolutely! Substitute heavy cream and whole milk with coconut cream and non-dairy milk for a delicious dairy-free treat.
4. What if I don’t have a Ninja Creami?
You can use a standard ice cream maker! Follow the manufacturer’s instructions for homemade ice cream, ensuring to adjust the freezing times as needed.
5. How can I store leftover ice cream?
Store leftover ice cream in an airtight container to prevent freezer burn and maintain its smooth texture. If it hardens too much, let it sit at room temperature for a few minutes before scooping.