Have you ever found yourself craving a treat that brings back childhood memories? For me, it’s the luscious, blue-tinted, cookie-filled wonder that is the Cookie Monster Ice Cream. I can still picture my little brother, eyes wide with delight, as we enjoyed scoops of this colorful dessert after a day filled with adventures. There’s something so whimsical about ice cream that’s not only tasty but also looks like it came straight from a child’s imagination—and that’s exactly what the Ninja Creami Cookie Monster Ice Cream embodies.
Now, if the thought of making ice cream at home intimidates you, I want to reassure you that this post will make it simple and stress-free—even if it’s your first try. I promise you can whip up this playful dessert with very little fuss. Grab your Ninja Creami, and let’s dive into this delightful adventure together!
SKIP TO
Why I Love This Recipe of Ninja Creami Cookie Monster Ice Cream Recipe
This Ninja Creami Cookie Monster Ice Cream Recipe holds a special place in my heart not just because of its nostalgic appeal, but also because it’s so accessible. If you’re anything like me, you cherish those cozy moments when dessert and family come together. This ice cream recipe is not only easy to execute, but it also encourages creativity. You can customize it with your favorite cookie additions, making each batch a little different from the last.
For beginner cooks, it offers a hands-on experience that’s perfectly forgiving. No need for fancy techniques or complicated equipment—just a few ingredients, a blender, and your trusty Ninja Creami. Plus, the creamy, dreamy texture is sure to impress anyone you share it with. And let’s not forget, who wouldn’t want to dig into a scoop of vibrant, blue ice cream dotted with cookie chunks on a hot summer day?
Print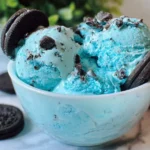
Ninja Creami Cookie Monster Ice Cream
- Total Time: 1455 minutes
- Yield: 4 servings 1x
- Diet: Vegetarian
Description
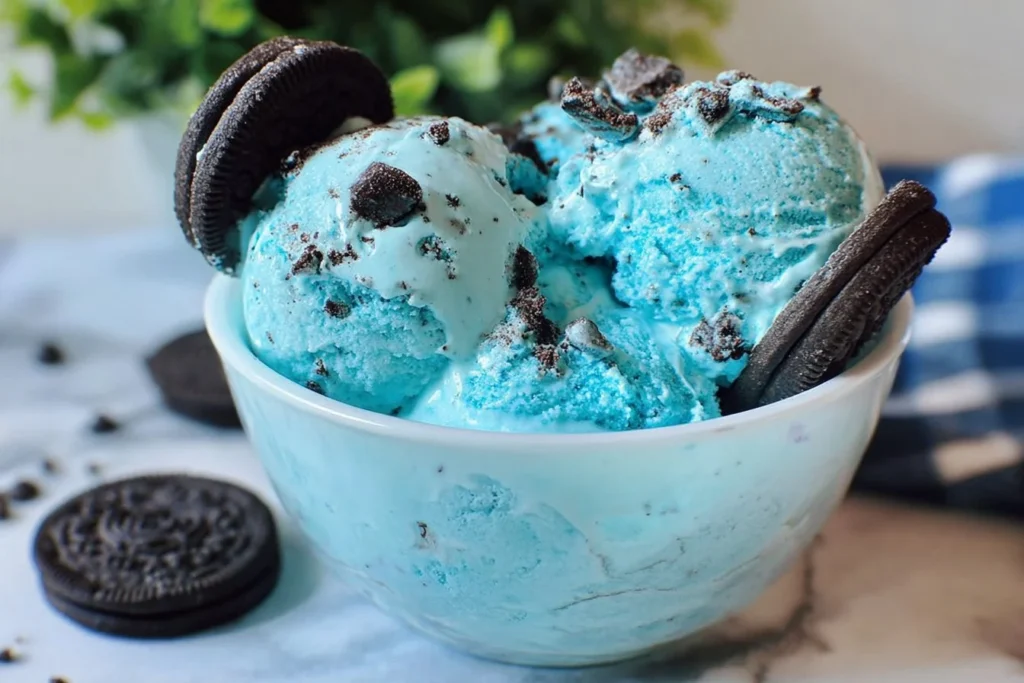
A whimsical, blue-tinted cookie ice cream that combines nostalgia and creativity, perfect for summer treat cravings.
Ingredients
- 2 cups half-and-half
- ½ cup sweetened condensed milk
- 2 teaspoons vanilla extract
- ½ cup cream cheese
- 1 teaspoon blue food color
- 3 pieces Oreo cookies (optional)
- 3 pieces chocolate chip cookies (optional)
Instructions
- In a blender, combine the half-and-half, vanilla extract, sweetened condensed milk, cream cheese, and blue food color. Blend until smooth and creamy.
- Pour the mixture into a Ninja Creami pint container, fill slightly below the top line, cover and freeze for 24 hours.
- After 24 hours, remove the pint from the freezer and process in your Ninja Creami on the “Lite Ice Cream” setting.
- Create a well in the center and add crushed Oreo and chocolate chip cookies as mix-ins.
- Scoop into bowls or cones and enjoy!
Notes
Customize with your favorite cookie additions for a unique twist.
- Prep Time: 15 minutes
- Cook Time: 1440 minutes
- Category: Dessert
- Method: Freezing
- Cuisine: American
Nutrition
- Serving Size: 1 serving
- Calories: 400
- Sugar: 28g
- Sodium: 200mg
- Fat: 25g
- Saturated Fat: 15g
- Unsaturated Fat: 5g
- Trans Fat: 0g
- Carbohydrates: 36g
- Fiber: 0g
- Protein: 6g
- Cholesterol: 75mg
Keywords: ice cream, dessert, cookie monster, nostalgic, summer treat
Ingredients You’ll Need for Ninja Creami Cookie Monster Ice Cream Recipe
To bring this delightful treat to life, you’ll need some simple ingredients that you might already have in your kitchen. Here’s what you’ll need:
Essentials
- 2 cups half-and-half: This creamy base is key to achieving the rich, smooth texture of your ice cream. If you find yourself without half-and-half, you can substitute it with one cup of heavy cream and one cup of milk.
- ½ cup sweetened condensed milk: This acts as a sweetener and adds that delicious, creamy mouthfeel that’s a hallmark of good ice cream.
- 2 teaspoons vanilla extract: The warm, familiar flavor of vanilla balances all the other sweet elements perfectly.
- ½ cup cream cheese: This ingredient brings a tangy richness that complements the sweetness and savory cookie bits beautifully.
- 1 teaspoon blue food color: This is where the magic happens! You can adjust the amount based on how vibrant you want your ice cream to be.
Optional Add-Ons
- 3 pieces Oreo cookies: These iconic cookies add a delightful chocolatey crunch—perfect for cookie lovers!
- 3 pieces chocolate chip cookies: A classic addition that contributes both texture and flavor.
Substitutions and Shortcuts
- If you’re vegan or lactose intolerant, consider using coconut cream instead of half-and-half and a plant-based cream cheese alternative.
- You could also swap in different cookie varieties like peanut butter cookies or even gluten-free cookies to customize the flavors to your liking.
How to Make Ninja Creami Cookie Monster Ice Cream Recipe Step-by-Step
Alright, let’s get to the heart of it! Here’s a step-by-step guide on how you will create your very own Ninja Creami Cookie Monster Ice Cream. Trust me, it’s easier than it sounds!
Step 1: Blend the Base Mixture
In a blender, combine the half-and-half, vanilla extract, sweetened condensed milk, cream cheese, and blue food color. Blend it on high until the mixture is perfectly smooth and creamy. Make sure there are no lumps from the cream cheese—it should have a luscious, silky consistency.
Step 2: Freeze the Mixture
Pour this beautifully blue mixture into a Ninja Creami pint container, ensuring you fill it just slightly below the top line. It’s important not to overfill since the ice cream will expand as it freezes. Cover the container and pop it in the freezer for a full 24 hours. I know, it’s tough to wait, but good things come to those who wait!
Step 3: Process in the Ninja Creami
After 24 hours have passed, it’s time for the fun part! Remove the pint from the freezer and insert it into your Ninja Creami machine. Select the “Lite Ice Cream” setting and let the machine work its magic. In just a few moments, you’ll see your colorful ice cream transform from a solid block into a delightful, creamy texture.
Step 4: Add Your Cookie Mix-Ins
Once the process is complete, it’s time to take it up a notch! Create a well in the center of your ice cream using a spoon, then add the crushed Oreo and chocolate chip cookies as mix-ins. This step is perfect for personalizing your creation; feel free to add more or fewer cookies based on your cravings!
Step 5: Scoop, Serve, and Enjoy!
The final step is the best part. Scoop generous servings into bowls or cones, and dig in! Enjoy the delightful interplay of textures from the creamy ice cream and the crunchy cookies. Each bite is a nostalgic reminder of carefree summer days and childhood joy.
Would you be interested in more frozen desserts? I invite you to check the list of 16 Best Iced Coffee Recipes, or the Ninja Creami recipes.
Common Mistakes to Avoid with Ninja Creami Cookie Monster Ice Cream Recipe
When diving into homemade ice cream, there are a few pitfalls to watch out for. Here are some common mistakes, along with tips on how to avoid them:
1. Not Freezing Long Enough
It might be tempting to try to churn the ice cream sooner, but it’s crucial to freeze the base mixture for the full 24 hours. If it’s only partially frozen, the texture will be compromised, and your ice cream won’t reach that perfect creaminess.
2. Skipping the Blending Step
Be sure not to skip the blending step, as it ensures that all ingredients are fully incorporated. This step helps achieve a smooth and creamy texture, preventing lumps of cream cheese in your final product.
3. Overfilling the Container
Avoid overfilling your Ninja Creami pint container when pouring in the base mixture. Leave some space at the top for expansion during freezing; otherwise, you might end up with an overflow mess.
4. Ignoring Personal Taste
Feel free to adjust the amount of blue food coloring or choose different types of cookies based on your personal tastes. Don’t hesitate to experiment with flavors as you develop your own personal twist on this delightful recipe.
Serving Suggestions for Ninja Creami Cookie Monster Ice Cream Recipe
This might be a dessert in its own right, but you can take it a step further by considering unique serving ideas. Here are a few suggestions to elevate your Ninja Creami Cookie Monster Ice Cream experience.
1. Ice Cream Sundae Delight
Serve your Ninja Creami Cookie Monster Ice Cream in a bowl topped with whipped cream, chocolate syrup, and a cherry on top. This nostalgic presentation is reminiscent of classic ice cream shops and is sure to impress friends and family.
2. Ice Cream Sandwiches
Use your ice cream to create fun ice cream sandwiches! Take two chocolate chip cookies (or your favorite cookie) and scoop the Cookie Monster Ice Cream in between. This is a fantastic way to showcase the cookie mix-ins.
3. Milkshake Magic
Turn your ice cream into a delectable milkshake. Simply blend a few scoops of your Cookie Monster Ice Cream with a splash of milk until smooth. Pour into a glass, and consider topping it with whipped cream and cookie crumbles for extra flair.
4. Party Platter
Create a dessert platter by pairing the cookie monster ice cream with various toppings like sprinkles, crushed candies, and different types of cookies. Set this up in your kitchen or dining area for a fun ice cream social!
Pro-Level Tips for When You’re Ready
Once you’ve mastered the basics of making Ninja Creami Cookie Monster Ice Cream, here are some pro-level tips to take your ice cream-making skills to the next level.
1. Experiment with Flavors
While the classic Cookie Monster is delightful, don’t hesitate to experiment with different flavors and color combinations. Have fun with seasonal flavors or even try swirling in fruit purees for an unexpected twist.
2. Homemade Cookie Add-Ins
Consider making your own cookies to add right into the ice cream. Homemade cookies tend to be fresher and can be tailored to your taste. Plus, the aroma of freshly baked cookies mingling with your ice cream is simply divine.
3. Keep Your Ingredients Cold
Ensure all your ingredients are cold before blending. This helps with the freezing process and contributes to a creamier texture. You can even chill your blending jar in the fridge beforehand if time permits.
4. Develop a Signature Creation
Over time, make this recipe your own. Whether adding new cookie varieties, drizzling with different sauces, or incorporating sprinkles to create a fun presentation, embracing creativity can turn your cookie monster ice cream into a signature dish.
Conclusion
So there you have it! Making your own Ninja Creami Cookie Monster Ice Cream is simpler than you may have imagined. It’s all about combining a few easy ingredients, letting it freeze, and then enjoying each scoop brimming with cookie goodness. Remember, you can customize your ice cream with your favorite cookie mix-ins, and each batch can reflect your personal taste.
Next time the craving for a whimsical yet delicious dessert strikes, grab your Ninja Creami and whip up this delightful treat. Don’t forget to share your creations with friends and family—they will admire your ice cream skills and love every sweet bite!
FAQs About Ninja Creami Cookie Monster Ice Cream Recipe
1. Can I make Ninja Creami Cookie Monster Ice Cream without cream cheese?
Yes, you can skip the cream cheese, but it adds a creamy tang that enriches the flavor. If you prefer, you can substitute it with additional whipped cream or a dairy-free alternative.
2. How do I store the Ninja Creami Cookie Monster Ice Cream?
Keep your ice cream in the Ninja Creami pint container with the lid tightly sealed to maintain freshness. Store it in the freezer, and it should last a few weeks.
3. Can I add fruits or other candies to the mix-ins?
Absolutely! Feel free to add fruits like strawberries or fun candies for a twist on the classic recipe. Just make sure whatever you’re adding is cut into small pieces for even distribution.
4. What if I don’t have a Ninja Creami?
You can still make ice cream without a Ninja Creami. Just pour your blended mixture into an airtight container and freeze it. Every 30-60 minutes, stir with a fork to break up any ice crystals until it’s fully frozen.
5. How can I adjust the sweetness of the Ninja Creami Cookie Monster Ice Cream?
If you prefer a sweeter ice cream, feel free to add a little more sweetened condensed milk during the blending step. Taste as you go to find the balance that’s just right for you!
Now, with this guide in hand, you’re ready to embark on your ice cream-making journey. Enjoy creating and sharing the magic of Ninja Creami Cookie Monster Ice Cream!
Looking for more delicious recipes? Follow us on Pinterest and Facebook!