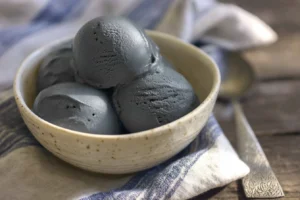
Do you remember those hot summer days when a scoop of chocolate ice cream could instantly turn a frown into a smile? I can’t help but smile every time I think of those moments, especially with my family gathered around the table, enjoying sweet delights and sharing laughter. It’s moments like these that remind me of the simple joys of life. Today, I’m excited to share a recipe that will bring those memories back and keep your family cool and happy: Ninja Creami Dairy Free Chocolate Ice Cream. Whether you’re a seasoned ice cream maker or trying your hand at it for the first time, I promise this recipe is simple, stress-free, and totally doable. It’s time to get started on this delightful treat!
Highlights
Why I Love This Recipe of Ninja Creami Dairy Free Chocolate Ice Cream
What makes this recipe special to me is its commitment to being both delicious and dairy-free. I’ve often found myself on the hunt for sweet treats that everyone in my family can enjoy, especially for those who are lactose intolerant or simply prefer plant-based options. This Ninja Creami Dairy Free Chocolate Ice Cream ticks all the boxes! It’s incredibly easy to make—you’ll hardly believe that you crafted something so rich and creamy at home. The structure of the recipe allows beginners to feel successful without any fuss. Plus, it gives our family a cozy activity we can all partake in, whether we’re mixing up the ingredients or enjoying a bowl together.
Ingredients You’ll Need for Ninja Creami Dairy Free Chocolate Ice Cream
Creating this delicious ice cream doesn’t require a long shopping list or fancy ingredients. Here’s what you’ll need:
Essentials
- 1 1/2 cups non-dairy milk (I used oat milk): You can use almond, soy, or coconut milk if you prefer, but oat milk gives it a creamy texture.
- 4 tablespoons instant chocolate pudding mix: This adds great flavor and thickness to your ice cream, and typically doesn’t include dairy, but always check the label just to be sure.
- 1/2 cup coconut cream: This will give your ice cream that creamy mouthfeel we all love—make sure to get the full-fat coconut cream for the best results.
Optional Add-Ons
- 1/2 teaspoon vanilla extract: While this is optional, adding it can enhance the flavor profile, giving it a nice kick.
Substitutions and Shortcuts
What I love about this recipe is its versatility. If you don’t have oat milk, feel free to substitute with any non-dairy milk on hand. Want to take a shortcut? You can mix the ingredients using a regular blender instead of an immersion blender—whatever makes it easier for you!
How to Make Ninja Creami Dairy Free Chocolate Ice Cream Step-by-Step
Alright, let’s get into the nitty-gritty of making your own Ninja Creami Dairy Free Chocolate Ice Cream! Follow these steps, and you’ll have a delicious reward waiting for you in your freezer.
Step 1: Whisk the Base Together
In a small bowl or large measuring cup, begin by whisking together the oat milk and chocolate pudding mix until fully combined. It’s important to make sure there are no lumps, as this will help ensure a smooth texture in your final ice cream.
Step 2: Add Coconut Cream and Vanilla
Next, add the coconut cream into your mixture. If you choose to use vanilla extract, this is the time to toss that in as well! You want this mixture to be as smooth as possible, so use an immersion blender to blend everything together until it reaches a creamy consistency. If you don’t have an immersion blender, a regular blender will work just fine too—pour everything in and blend away!
Step 3: Pour into Pint Container
Carefully pour the mixture into your Ninja Creami pint container. Be cautious not to exceed the max fill line—this is key to making sure your ice cream freezes perfectly. Close the lid tight.
Step 4: Freeze the Mixture
Place the pint container flat on a level surface in your freezer and freeze for a minimum of 24 hours. This is the hardest part of the process—waiting! But I promise the result will be worth it.
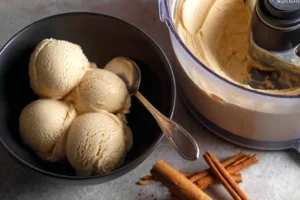
Step 5: Processing with the Ninja Creami
Once your mixture is frozen solid after 24 hours, remove it from the freezer and take off the lid. Next, place the pint container into the outer bowl of the Ninja Creami machine. Secure the outer bowl lid tightly.
Step 6: Use the Lite Ice Cream Function
Select the Lite Ice Cream function on your Ninja Creami and let the machine work its magic. Once it’s done, remove the pint from the machine and check the texture of your ice cream.
Step 7: Perfecting Texture
If the ice cream appears a little crumbly, simply pop it back into the machine and use the Re-spin function to process it again. If it still feels a bit off, add a tablespoon of your chosen dairy-free milk and Re-spin it one more time.
Step 8: Adding Mix-Ins
If you’re feeling adventurous and want to add some mix-ins—like dairy-free chocolate chips, crushed nuts, or cookie pieces—create a well in the ice cream that’s about 1/2 inch wide and extends to the bottom of the pint. Fill that well with your choice of mix-ins, then reinsert the pint back into the machine for the final Mix-in function to incorporate those goodies!
Common Mistakes to Avoid
Here are some common pitfalls when making Ninja Creami Dairy Free Chocolate Ice Cream and helpful tips on how to avoid them:
Not Waiting Long Enough to Freeze
It could be tempting to rush the process and take the ice cream out early, but patience is key! Be sure your mixture is entirely frozen for at least 24 hours to ensure a creamy texture.
Overfilling the Pint Container
Make sure you fill the pint container to the max fill line—overfilling could lead to messy situations and subpar ice cream!
Ignoring the Texture
Before assuming your ice cream is done, take the time to check the texture. If it’s crumbly, put it back in and try the Re-spin option. It makes a significant difference!
Forgetting to Incorporate Mix-Ins Properly
If you want to add any fun extra flavors or textures, remember to create a well in the ice cream before adding those mix-ins, and use the Mix-in function afterward. This will help ensure you get an even distribution throughout your dessert.
Easy Variations for Ninja Creami Dairy Free Chocolate Ice Cream
Now that you’ve mastered the basic recipe, let’s discuss some easy variations to mix things up and keep the flavor fun for the whole family!
Chocolate Mint Delight
If you’re a mint-chocolate lover, adding a few drops of peppermint extract to the base mixture will give a refreshing twist. You can even add a handful of dairy-free chocolate chips for that extra minty crunch!
Peanut Butter Chocolate Swirl
For a rich, nutty flavor, swirl in a little smooth peanut butter right before the Mix-in function. The peanut butter will blend beautifully into the chocolate base, creating an irresistible combination.
Cookie Dough Dreams
Incorporate small cookie dough pieces into your ice cream! Just ensure they’re egg-free and safe to eat raw. It’s a fun way to make the experience even more indulgent.
Seasonal Flavor Infusions
Get creative by using seasonal ingredients! Add pumpkin spice in the fall for a cozy flavor, or fresh berries in summer for a fruity twist. The options are virtually endless—get inspired!
Print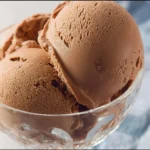
Ninja Creami Dairy Free Chocolate Ice Cream
- Total Time: 1440 minutes
- Yield: 4 servings 1x
- Diet: Vegan
Description
A creamy and delicious dairy-free chocolate ice cream that the whole family can enjoy.
Ingredients
- 1 1/2 cups non-dairy milk (oat, almond, soy, or coconut)
- 4 tablespoons instant chocolate pudding mix
- 1/2 cup full-fat coconut cream
- 1/2 teaspoon vanilla extract (optional)
Instructions
- Whisk together non-dairy milk and chocolate pudding mix in a bowl until fully combined.
- Add coconut cream and vanilla extract, then blend until smooth.
- Pour the mixture into the Ninja Creami pint container without exceeding the max fill line.
- Freeze the mixture for at least 24 hours.
- Remove from the freezer and place pint container in the Ninja Creami machine.
- Select the Lite Ice Cream function and process the mixture.
- If crumbly, use the Re-spin function or add a tablespoon of non-dairy milk and process again.
- For mix-ins, create a well in the ice cream, add your desired ingredients, and use the Mix-in function.
Notes
Ensure to freeze the mixture for a full 24 hours for the best texture. Avoid overfilling the pint container when pouring the mixture.
- Prep Time: 10 minutes
- Cook Time: 0 minutes
- Category: Dessert
- Method: Freezing
- Cuisine: American
Nutrition
- Serving Size: 1 serving
- Calories: 200
- Sugar: 12g
- Sodium: 50mg
- Fat: 10g
- Saturated Fat: 8g
- Unsaturated Fat: 2g
- Trans Fat: 0g
- Carbohydrates: 22g
- Fiber: 1g
- Protein: 2g
- Cholesterol: 0mg
Keywords: chocolate ice cream, dairy-free dessert, Ninja Creami, vegan ice cream, summer treat
Serving Suggestions for Ninja Creami Dairy Free Chocolate Ice Cream
Finally, let’s talk about how to serve this delightful ice cream. Trust me; presentation can add that extra touch!
In a Cone
Scoop your chocolate ice cream into waffle cones for a classic treat. Kids love it, and it adds a creative twist to dessert time.
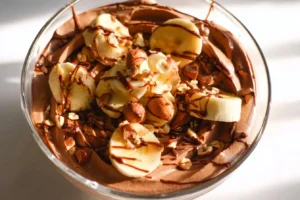
Sundae Style
Turn your ice cream into a sundae by topping it with dairy-free chocolate sauce, nuts, and your favorite fruits. You could even add a dollop of dairy-free whipped cream on top for that added flair!
Ice Cream Sandwiches
For a fun treat, use two dairy-free cookies or brownies to create an ice cream sandwich. It’s an easy and interactive way to serve, especially for kids!
Party Dish
If you’re hosting a get-together, serve the ice cream in individual bowls or cups, and provide an assortment of toppings—think nuts, sprinkles, and fruits. This creates a fun ice cream bar that everyone, especially the kids, can enjoy customizing!
Conclusion
And there you have it! Making Ninja Creami Dairy Free Chocolate Ice Cream is easier than it looks—I swear it really is! Plus, it’s a completely customizable experience, so you can get creative with flavors and textures that your family will love. This cozy, classic dessert is not just for ice cream lovers; it’s beginner-approved for anyone looking to whip up a quick and delightful treat at home. Now that you’re equipped with this recipe, I encourage you to give it a try! In the spirit of simplicity and fun, gather your loved ones, dive into your Ninja Creami, and start blending up some delicious memories together.
FAQs About Ninja Creami Dairy Free Chocolate Ice Cream
1. Can I use regular milk instead of non-dairy options for the Ninja Creami Dairy Free Chocolate Ice Cream?
This recipe is specifically designed to be dairy-free, so using regular milk might compromise the creamy texture and flavor. Stick with non-dairy options for the best results.
2. How long does it take to freeze the Ninja Creami Dairy Free Chocolate Ice Cream?
You need to freeze the mixture for at least 24 hours for optimal texture and creaminess.
3. Why is my ice cream crumbly after processing?
If your ice cream appears crumbly, simply pop it back into the Ninja Creami and use the Re-spin function. If it still seems crumbly afterward, add a tablespoon of dairy-free milk and reprocess.
4. Can I add mix-ins to my Ninja Creami Dairy Free Chocolate Ice Cream?
Absolutely! You can add mix-ins after the ice cream has been processed by creating a well in the mix and incorporating them using the Mix-in function.
5. How can I make my Ninja Creami Dairy Free Chocolate Ice Cream even more decadent?
You can always add flavor enhancements like vanilla or peppermint extracts, or make it a sundae with your favorite toppings. Get creative and enjoy the process!