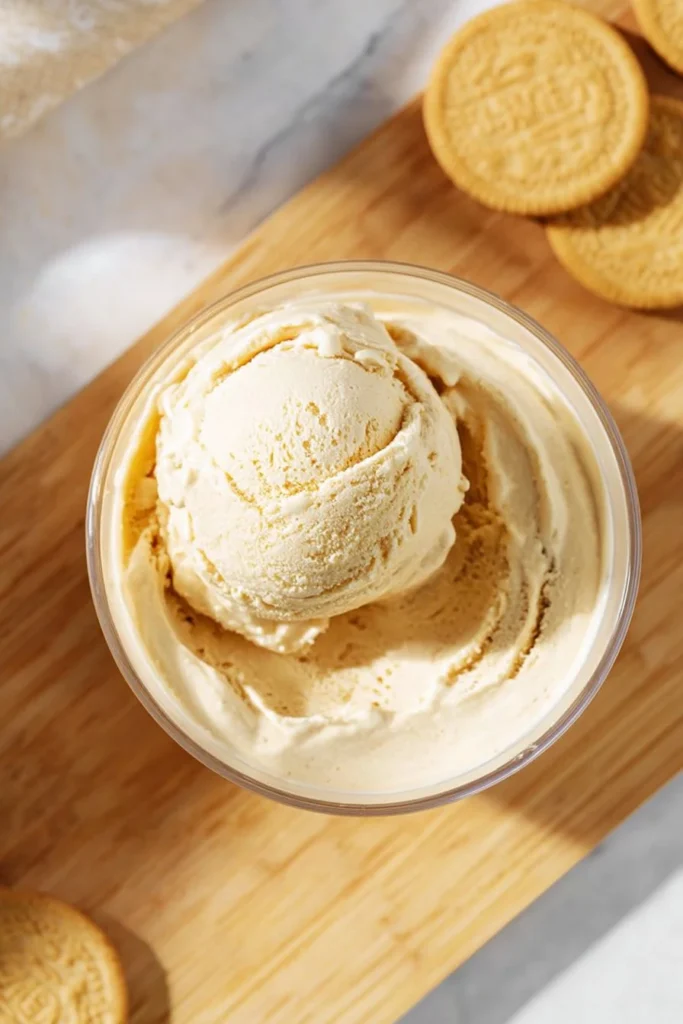
A Cozy Start
Have you ever found yourself craving something sweet on a rainy afternoon and imagined a bowl of creamy, cookie-studded ice cream to lift your mood? I remember the first time I tried a spoonful of Golden Oreo in a homemade base — I laughed at how grown-up and kid-like it felt at once. If you’re a beginner, the Ninja Creami Golden Oreo Ice Cream might sound fancy, but the process is forgiving and low-stress; I’ll walk you through it step by step. If you want a little extra background on how the Ninja Creami works, I often point readers to my favorite guide for more tips: Ninja Creami basics and tips.
A Quick Look at This Ninja Creami Golden Oreo Ice Cream Recipe
This Ninja Creami Golden Oreo Ice Cream gives you a treat that’s enjoyable without being overcomplicated. With dairy-based ingredients like milk and heavy cream, you get calcium and some protein per serving, and the cream cheese adds a touch of richness along with a small amount of extra protein and vitamin A. The cookies are mostly for fun and texture, so you can control how many you add to keep added sugars moderate. Because you make it at home, it’s easier to portion and adapt—perfect as a lighter comfort food or an occasional dessert within a balanced meal plan.
If you’re watching sugar, you can reduce the granulated sugar or swap in alternative sweeteners; if you want more protein, serve a smaller scoop alongside Greek yogurt or a handful of nuts. This recipe fits well into meal prep when you freeze pints ahead of time for portion-controlled indulgence.
Ingredients You’ll Need for Ninja Creami Golden Oreo Ice Cream
Below I expand on each ingredient and why it matters, plus friendly substitutions so you can tailor the recipe to your health goals.
Essentials
- 1/2 oz cream cheese — Adds creaminess, a slight tang, and helps with texture so the ice cream scoops nicely. Choose low-fat cream cheese if you want fewer calories, though the texture will be a touch less rich.
- 1/3 cup granulated sugar — Sweetens the base; you can lower this amount or use a granular sweetener alternative for fewer added sugars.
- 3/4 cup heavy cream — Adds fat for a smooth mouthfeel and helps the ice cream stay scoopable. If you prefer less fat, see options in substitutions.
- 1 cup milk — The primary liquid; whole milk yields a richer result, but 2% or even a fortified plant milk can work in a pinch.
- 1 tsp vanilla extract — Enhances flavor depth and balances the cookie sweetness.
- 7 Golden Oreo cookies — For mix-ins and crunch. You can control how many you fold in to manage sugar and calorie load.
Optional add-ons
- Chopped toasted nuts (e.g., almonds or pistachios) — For added protein, healthy fats, and crunch.
- A tablespoon of powdered milk — To boost protein and reduce iciness.
- A pinch of sea salt — Enhances overall flavor, especially if you reduce sugar.
- Cinnamon or citrus zest — A little twist can make the Golden Oreo flavor feel brighter.
Substitutions and shortcuts
- Heavy cream substitute: Use half-and-half for a lighter texture, or blend 1/2 cup milk with 1/4 cup plain Greek yogurt to increase protein while keeping creaminess (note: texture will be slightly different).
- Sugar alternatives: Use erythritol or monk fruit blend cup-for-cup to lower added sugars; some people prefer a 1:1 sugar substitute labeled for baking.
- Milk alternatives: For a dairy-free version, use unsweetened oat milk plus a vegan cream substitute; the Ninja Creami can handle it but texture may be softer.
- Shortcuts: Soften the cream cheese in the microwave (as the recipe instructs) or let it sit at room temperature for 15–20 minutes to speed mixing. You can crush the Golden Oreos ahead of time and store them in an airtight container so you’re ready to add mix-ins quickly.
How to Make Ninja Creami Golden Oreo Ice Cream Step-by-Step
I like keeping things simple and steady. The goal is a smooth base and nice cookie distribution without overworking the machine. Here’s how I do it, focusing on preserving flavor and a pleasant texture.
Prep the cream cheese: Place the 1/2 oz cream cheese in a medium microwave-safe bowl and microwave it for about 15 seconds until it’s just softened or slightly melted. This makes it easier to incorporate and avoids lumps in your final ice cream. Softening rather than fully melting helps preserve the cream cheese’s flavor and prevents it from becoming grainy when chilled.
Make the sugar paste: Stir in the 1/3 cup granulated sugar into the warmed cream cheese until it forms a smooth paste. This step ensures the sugar begins dissolving into the fat of the cream cheese, helping the ice cream base feel less gritty.
Combine the dairy: In a separate bowl, whisk together 3/4 cup heavy cream, 1 cup milk, and 1 tsp vanilla extract until smooth. Mixing briefly but thoroughly distributes the vanilla and helps lift the cream’s texture without over-whisking.
Dissolve the sugar: Slowly add the milk-and-cream mixture to the sugar-cream cheese paste, a tablespoon at a time, stirring as you go. Taking it slow helps the sugar dissolve more completely and creates a stable emulsion—this reduces icy crystals and improves mouthfeel. If you’re using a sugar substitute that doesn’t dissolve as easily, whisk a bit more vigorously or let the combined base rest in the fridge for 10–15 minutes, then whisk again before pouring.
Freeze the pint: Pour the fully combined mixture into your Ninja Creami pint, seal, and freeze upright for at least 24 hours. Proper freezing time is key: the Ninja Creami needs a fully frozen base to churn correctly and produce that creamy texture we all want.
Process in the Ninja Creami: Remove the pint from the freezer and place it into the Ninja Creami. Set the machine to the “Ice Cream” program. If after the first spin the texture is crumbly, use the “Re-Spin” or “Respin” option to achieve a smoother result. The machine works by shaving and aerating the frozen base; if it’s too hard for the first spin, one respin usually does the trick.
Add the cookies: Once you have a creamy base, make a small well in the center and add the crumbled or roughly chopped Golden Oreo cookies—about 7 cookies as suggested, or fewer if you wish. Use the “Mix-Ins” function to fold the cookies in evenly without pulverizing them into crumbs. This preserves the pleasant chunks and gives great texture.
Tips for nutrient preservation and better texture:
- Use chilled dairy ingredients to keep the base cold; colder ingredients freeze more uniformly and reduce ice crystal formation.
- Don’t rush the freezing stage—24 hours is the sweet spot for most household freezers.
- If you substitute dairy with plant milk or add yogurt, keep an eye on water content; you may want to add a tablespoon of powdered milk or 1–2 teaspoons of alcohol-free stabilizer (e.g., glycerin-free) to help texture, but most household cooks can rely on the Creami’s churning to create a pleasant result.
The process is forgiving, and I love how each step gives you room to customize without stress.
Common Mistakes to Avoid
Even though this recipe is straightforward, a few small missteps can affect texture or flavor. I’ve made these mistakes myself, so I’ll point them out so you can skirt them easily.
Mistake 1: Not freezing the pint long enough
Placing a partially frozen pint in the Ninja Creami often yields a mushy or overly soft result. The machine needs a fully solid block to shave and aerate properly. Plan ahead and give it at least 24 hours in a reliable freezer—overnight often feels long but makes a huge difference.
Mistake 2: Adding mix-ins too early
If you add your Golden Oreos before the first spin, the cookies will break down and mix too finely into the base. Wait until after you’ve achieved a smooth ice cream texture, then create a small well and add your cookies for a satisfying chunkiness.
Mistake 3: Using warm ingredients
Warm or room-temperature dairy can create slushy pockets and larger ice crystals. Keep your milk and cream chilled and only warm the cream cheese briefly (as instructed) so it blends easily but the overall base remains cool. This simple habit preserves texture and flavor.
Serving Suggestions for Ninja Creami Golden Oreo Ice Cream
This ice cream is a versatile treat—great on its own or as part of a composed dessert. I like serving it in ways that feel mindful and satisfying without being excessive.
Start by scooping moderate portions to keep treats in balance with the rest of your day.
Simple bowl with fruit
Serve a modest scoop with sliced strawberries, blueberries, or a few segments of orange. The bright fruit balances the sweet cookie flavor and adds vitamins and fiber to the plate. For a quick idea inspired by vanilla lovers, check out a classic milkshake variation that pairs well with creamy bases like this one: Creamy Vanilla Bliss milkshake inspiration.
Ice cream sandwich idea
Use the Golden Oreos themselves or thin whole-grain cookies to make mini ice cream sandwiches. Press a small scoop between two cookies for a portable treat—great for portion control and sharing. If you want a lighter twist, I’ve experimented with frozen yogurt versions that are tangy and refreshing: Ninja Creami frozen yogurt variations.
Dessert plate with tea or iced tea
Balance a scoop on a dessert plate with a few toasted nut crumbles and a drizzle of melted dark chocolate (optional). Pair it with a chilled iced tea or a warm cup depending on the season—my favorite is a refreshing slushy-style iced tea on hot days: Ninja Slushi iced tea pairing. For a more decadent sharing plate, consider small scoops alongside a frozen beverage treat: Blizzard Ninja Slushi recipe.

Conclusion
I love that the Ninja Creami Golden Oreo Ice Cream recipe gives you a fast route to a nostalgic, homemade dessert that you can adapt to fit healthier habits—smaller portions, reduced sugar, or more protein if you like. It’s a flexible, practical way to enjoy a creamy treat without feeling like you blew your day’s plan. If you want the original inspiration and a reference to compare notes, I often look at this version: Ninja Creami Golden Oreo Ice Cream | A Taste of Madness. Try making it once, and then play with mix-ins and swaps to make it your own.
FAQs About Ninja Creami Golden Oreo Ice Cream
Q1: How long does Ninja Creami Golden Oreo Ice Cream stay fresh in the freezer?
A1: Properly sealed in the Ninja Creami pint or an airtight container, Ninja Creami Golden Oreo Ice Cream keeps well for about 2–3 weeks for best texture and flavor. Over longer storage, ice crystals can develop and the cookie pieces may soften. I recommend labeling pints with the date you froze them and enjoying within a few weeks.
Q2: Can I make Ninja Creami Golden Oreo Ice Cream with lower-fat milk or a dairy-free milk?
A2: Yes — you can use 2% milk or a plant-based milk substitute, but be aware the texture will be less rich than with whole milk and heavy cream. To preserve creaminess when reducing fat, consider adding a small amount of powdered milk or using Greek yogurt in place of some cream to boost protein and mouthfeel.
Q3: How many Golden Oreos should I realistically add to the Ninja Creami Golden Oreo Ice Cream for a balanced treat?
A3: The recipe suggests seven Golden Oreos, which gives clear cookie flavor and chunks. If you’re watching sugar or calories, try adding 3–4 cookies instead; you’ll still get the signature taste and can bulk up the serving with fresh fruit or nuts for satiety.
Q4: Will the Ninja Creami Golden Oreo Ice Cream be too hard straight from the freezer?
A4: If you followed the freezing directions (at least 24 hours), the texture after the Ninja Creami churn should be scoopable right away. If you store it and it firms up later, let a scoop sit at room temperature for 3–5 minutes before serving, or run a quick re-spin on the machine if you have it handy.
Q5: Can I use different cookies in place of Golden Oreos for this Ninja Creami Golden Oreo Ice Cream recipe?
A5: Absolutely — any cookie you enjoy can work as a mix-in. Shortbread, graham crackers, or sandwich cookies all make great substitutions. Just chop them into chunks before adding in the Mix-Ins stage so you keep those satisfying bites throughout the ice cream.
Ninja Creami Golden Oreo Ice Cream
- Total Time: 1440 minutes
- Yield: 4 servings 1x
- Diet: Vegetarian
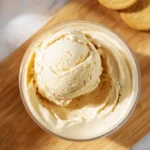
Description
A creamy homemade ice cream featuring Golden Oreos for a sweet and nostalgic treat.
Ingredients
- 1/2 oz cream cheese
- 1/3 cup granulated sugar
- 3/4 cup heavy cream
- 1 cup milk
- 1 tsp vanilla extract
- 7 Golden Oreo cookies
- Chopped toasted nuts (optional)
- 1 tbsp powdered milk (optional)
- A pinch of sea salt (optional)
- Cinnamon or citrus zest (optional)
Instructions
- Soften cream cheese in the microwave for about 15 seconds.
- Mix in granulated sugar with cream cheese to form a smooth paste.
- Whisk together heavy cream, milk, and vanilla extract in a separate bowl.
- Gradually add the cream mixture to the cream cheese paste, mixing thoroughly.
- Pour the mixture into the Ninja Creami pint and freeze for at least 24 hours.
- Process in the Ninja Creami using the ‘Ice Cream’ program.
- Add crushed Golden Oreo cookies during the ‘Mix-Ins’ function.
Notes
Ensure to freeze the pint for at least 24 hours before processing. Optionally serve with fruits or as ice cream sandwiches.
- Prep Time: 15 minutes
- Cook Time: 0 minutes
- Category: Dessert
- Method: Churning
- Cuisine: American
Nutrition
- Serving Size: 1 serving
- Calories: 350
- Sugar: 20g
- Sodium: 150mg
- Fat: 20g
- Saturated Fat: 10g
- Unsaturated Fat: 8g
- Trans Fat: 0g
- Carbohydrates: 34g
- Fiber: 1g
- Protein: 4g
- Cholesterol: 30mg
Keywords: ice cream, dessert, homemade, Golden Oreo, Ninja Creami, summer treat