Do you ever get a craving for something cold, sweet, and a little bit nostalgic — the kind of treat that instantly feels like a small celebration in the middle of a busy week? I do. The Oreo milkshake is one of those easy comforts I turn to when the kids get home from school or when I need a quick, cheerful pick-me-up after a long day. The first time I made it, I forgot to crush the cookies first and ended up with a loud clatter in the blender — we all laughed, learned, and then loved every last sip.
I’ll walk you through a simple, stress-free Oreo Milkshake recipe that’s totally doable even if you’ve never made a milkshake before. I promise short steps, helpful tips, and small shortcuts so busy families can whip this up without breaking the rhythm of the day. If you like, check out a quick twist on fruit and milkshakes I tried once for a busy morning: my strawberry milkshake guide.
Highlights
Why I Love This Recipe of Oreo Milkshake
This Oreo Milkshake feels like a small moment of indulgence that doesn’t ask for much time or special skills. Here’s why I keep coming back to it:
- It’s fast: from fridge to glass in about 5 minutes.
- It’s forgiving: exact measurements aren’t strict — you can tweak thickness and sweetness to taste.
- It brings joy: there’s something about crushed Oreos swirled into vanilla ice cream that makes both kids and adults smile.
- It’s flexible: you can make it richer, lighter, thicker, or add protein for a more filling treat — for example, I sometimes borrow ideas from a protein milkshake recipe I love: a simple protein shake twist.
If you’re short on time or cooking confidence, this shake is forgiving and quick. That’s why it’s my go-to when I want to treat the family without a fuss.
Ingredients You’ll Need for Oreo Milkshake
Here’s the short version of what you need — then I’ll list helpful substitutions and shortcuts.
Essentials (for 2 servings)
- 8 Oreo cookies (standard sandwich cookies)
- 2 cups vanilla ice cream (high quality gives better texture)
- 1 cup whole milk (for a creamier shake) — add more or less to change thickness
- 1/2 teaspoon vanilla extract (optional but lovely)
- Whipped cream and chocolate syrup for topping
- Extra Oreo cookies for garnish (optional)
Optional add-ons (choose what fits your family)
- 1 scoop vanilla protein powder (for extra protein)
- A banana (for natural sweetness and creaminess)
- 1–2 tablespoons chocolate or peanut butter (for richer flavor)
- A few ice cubes (if your ice cream is soft and you want a colder shake)
- Cookie crumbs for rim decoration
Substitutions and Shortcuts
- Milk: Use 2% or skim for a lighter shake, or use oat milk or almond milk to make it dairy-free. Note: texture will be slightly different with plant milk.
- Ice cream: If you don’t have vanilla ice cream, use chocolate or cookies & cream for a twist. For a lower-sugar choice, use a reduced-sugar vanilla ice cream.
- Oreos: Any chocolate sandwich cookie works. If someone has an allergy to wheat, use a suitable gluten-free sandwich cookie.
- Vanilla extract: If you don’t have vanilla, it’s okay to skip. You can also use a drop of almond extract (less is more).
- Whipped cream: Use store-bought aerosol whipped cream or make a quick whipped topping by whipping heavy cream with a tablespoon of sugar.
- No blender? Place ingredients in a large jar and shake vigorously, or use a handheld immersion blender in a deep cup.
Time-saving tips
- Keep crushed Oreos in an airtight container in the freezer so you can make shakes quickly on busy days.
- Scoop ice cream into a covered container and keep a measured amount ready for quick blends.
- Use a tall glass and a spoon — cleanup and serving stay simple for kids who want a treat while you cook dinner.
How to Make Oreo Milkshake Step-by-Step
Below is a detailed, easy-to-follow step-by-step guide that walks you through everything. I keep things simple so busy families can follow along without extra stress.
Step 1 — Prep your workspace (1–2 minutes)
- Pull the vanilla ice cream from the freezer and let it sit for about 2 minutes so it softens slightly (this helps it blend smoother).
- Set out your Oreos, milk, vanilla extract, and blender.
- If you plan to add whipped cream and syrup, set them out now so you can decorate quickly once the shake is poured.
Step 2 — Crush the Oreos (2–3 minutes)
- Place the 8 Oreo cookies into a thick freezer bag. Seal it, pressing out most of the air.
- Lay the bag flat on a firm surface. Use a rolling pin, meat mallet, or even the bottom of a heavy pan to gently pound the cookies until they’re crushed into mostly small crumbs with a few larger pieces for texture.
- Tip: If you want finer crumbs, crush them more thoroughly. If you want noticeable cookie chunks, stop sooner.
Step 3 — Add liquids to the blender (30 seconds)
- Pour 1 cup of whole milk into the blender. Starting with the liquid helps protect your blender blades and ensures even mixing.
Step 4 — Add ice cream and cookie crumbs (30 seconds)
- Add 2 cups of vanilla ice cream to the blender. Then add the crushed Oreo crumbs.
- If you’re using optional add-ins (banana, protein powder, etc.), add them now.
Step 5 — Pulse then blend (1–2 minutes)
- Pulse a few times to break up large chunks and combine ingredients.
- Then blend on medium-high until smooth. Stop and scrape down the sides if needed, and blend again for about 10–20 seconds.
- If the shake is too thick, add a splash more milk and pulse again. If it’s too thin, add a little more ice cream and blend.
Step 6 — Add vanilla and finish blending (10–20 seconds)
- Add 1/2 teaspoon of vanilla extract if you’re using it, and give the blender one quick final pulse to mix it in.
Step 7 — Taste and adjust (30 seconds)
- Give it a quick taste. If you want more Oreo flavor, add one more crushed cookie and pulse once. If you want it sweeter, a small spoonful of chocolate syrup blended in works well.
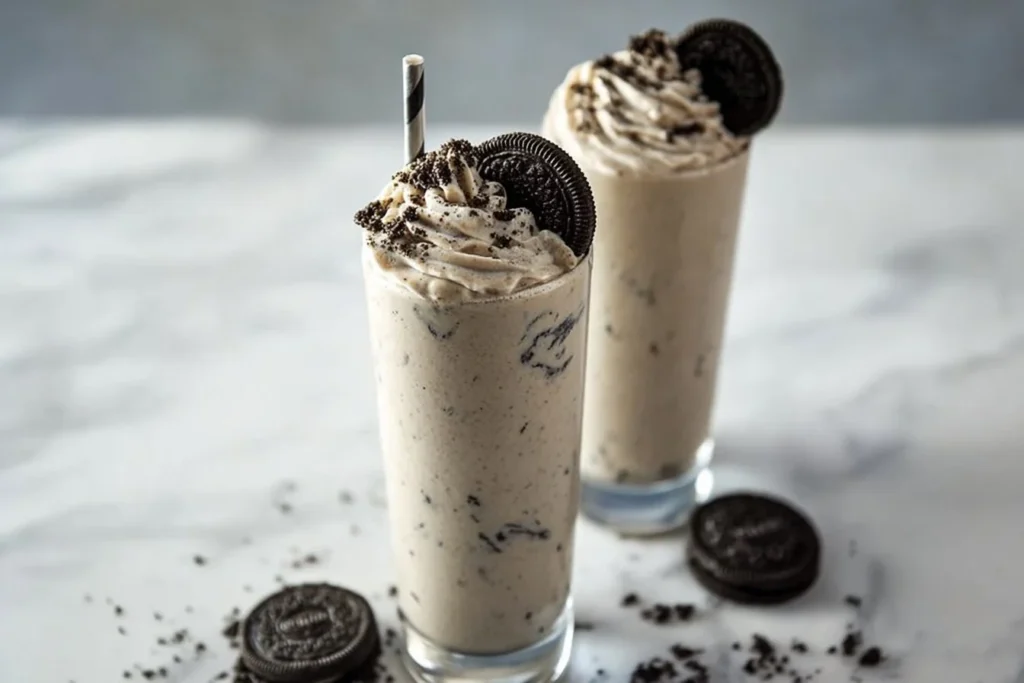
Step 8 — Pour into glasses and garnish (1–2 minutes)
- Pour the milkshake into two tall glasses. Top each with a generous dollop of whipped cream.
- Drizzle chocolate syrup over the whipped cream and press a whole Oreo on top as garnish. You can also sprinkle a few extra crumbs on the whipped cream for texture.
- Serve immediately with a straw and a spoon. Enjoy!
Extra tips for a busy kitchen
- Use pre-portioned ice cream scoops to save time.
- If kids are helping, give them simple tasks like putting cookies into the bag to crush or placing the garnish on top.
- For travel, pour the shake into a lidded cup and add whipped cream just before serving.
If you like experimenting with appliances, I also enjoyed making a thick, slushier version in my Ninja cream tool — see a similar fun experiment here: my Ninja slushie adventure.
Common Mistakes to Avoid
Below are some common slip-ups I’ve seen (and made) with milkshakes, plus clear fixes so your Oreo Milkshake turns out great every time.
Using frozen, rock-hard ice cream
If the ice cream is rock hard, your blender will struggle and it may not blend smooth. The fix: let ice cream sit for 2–3 minutes to soften, or set blender to pulse a few times to break it up before blending fully. Avoid adding a bunch of ice cubes — they water down the flavor.
Over-blending the cookies (and making the shake gritty)
If you crush the Oreos too finely in the blender itself, you can end up with a gritty texture or tiny hard specks. The fix: crush cookies in a bag with a rolling pin for even crumbs. If you must use a blender for crushing, pulse gently and stop when you still have a few small chunks.
Skipping the liquid or adding too much
People sometimes forget to add milk and wonder why their shake is too thick to pour. Conversely, adding too much milk makes the shake thin and less satisfying. The fix: start with 1 cup of milk for 2 cups ice cream and 8 Oreos. Add more milk in small splashes until you reach your desired consistency.
Not tasting and adjusting
A shake straight from the blender might be perfect, but sometimes it needs a tiny tweak — a touch more sweetness, a dash of vanilla, or one more cookie. The fix: taste before pouring and adjust. Busy parents: I promise that one tiny taste test saves wasted cups and grumpy kids.
Easy Variations for Oreo Milkshake
This recipe is a great base. Here are tasty, family-friendly variations that stay quick and easy.
Double Chocolate Oreo Milkshake
- Swap vanilla ice cream for chocolate ice cream or add 1–2 tablespoons of cocoa powder.
- Blend as usual and top with chocolate shavings.
- This is perfect for chocolate lovers and great as an after-dinner treat.
Banana-Oreo Milkshake (sneaky fruit boost)
- Add one ripe banana to the blender with the standard ingredients.
- The banana adds natural sweetness and makes the shake creamier. It’s an easy way to sneak fruit into dessert time.
Peanut Butter Oreo Milkshake
- Add 1–2 tablespoons of peanut butter (or almond butter) to the blender.
- The combination of chocolate cookie and peanut butter is kid-favorite and adds heft if you want a more filling shake.
Protein-Packed Oreo Shake
- Add a scoop of vanilla protein powder to the standard recipe.
- This variation works well for after sports practice or as a quick breakfast replacement when mornings are rushed. If you try a protein twist, you might like the texture tips in this protein milkshake guide: a related protein-ice-cream idea.
All of these variations remain pork-free and alcohol-free, and each one can be mixed up in under 10 minutes to suit busy schedules.
Serving Suggestions for Oreo Milkshake
How you serve the shake can turn a quick dessert into a memorable moment. Here are friendly serving ideas for busy families and small gatherings.
Kid-Friendly Party Cups
- Use small plastic cups and add a little chocolate syrup to the sides of the cup before pouring for a fun look.
- Add a whole Oreo on top of the whipped cream. Kids love the little presentation touches, and this setup keeps cleanup simple.
Shareable Platter
- If you’re making milkshakes for a small group, set up a topping station with extra crushed Oreos, sprinkles, chocolate chips, and whipped cream.
- Let kids pick their own toppings — it’s quick, fun, and makes them feel involved without adding much work for you.
Dessert Pairing
- Serve an Oreo Milkshake with a light, warm dessert like a small chocolate chip cookie or a fruit crisp. The cool, creamy shake complements warm desserts nicely.
- For a lighter combo, pair the shake with fresh fruit skewers — it balances sweetness with freshness.
On-the-go Treats
- Pour the finished shake into lidded mason jars for travel. Keep whipped cream in a small container and add it right before serving to keep it fresh.
- These jars work well for car rides home from school or when you need a quick, portable treat without spill worries.
If you want to explore more basic milkshake techniques or try a simple vanilla shake base for other flavors, this guide helped me refine quick shakes: a simple milkshake method I use.
Conclusion
You now have a no-fuss, cozy Oreo Milkshake recipe that’s built for busy families: quick, flexible, and forgiving. It’s easier than it looks — you can customize the thickness, sweetness, and add-ins to match your family’s taste. Whether you’re making an after-school treat, a dessert for guests, or a small weekend indulgence, this shake is classic, kid-approved, and beginner-friendly.
If you want more inspiration or variations from other home cooks, take a look at this Oreo Milkshake Recipe – The Salty Marshmallow for a slightly different approach, and this version from a popular food blog, Oreo Milkshake, for more ideas on garnishes and textures.
Before you go, try one small habit: keep crushed Oreos in a jar in the freezer. It shaves minutes off the process and makes weekday treats a breeze.
FAQs About Oreo Milkshake
Q1: How long does an Oreo Milkshake last in the fridge?
Once blended, it’s best to drink an Oreo Milkshake right away for the best texture and flavor. If you store it in the refrigerator, it will thin and lose its frothy texture after about 30–60 minutes. For short-term storage, put it in a sealed jar and shake well before drinking. If you must keep it longer, you can freeze it in an airtight container and let it thaw for a few minutes before re-blending.
Q2: Can I make an Oreo Milkshake without a blender?
Yes, in a pinch you can use a large jar with a tight lid and shake vigorously after adding softened ice cream and milk — but it won’t be as smooth. A handheld immersion blender works better for a smooth result. For best texture and to blend cookie pieces evenly, a countertop blender is ideal.
Q3: Can I make an Oreo Milkshake dairy-free?
Absolutely. Use dairy-free vanilla ice cream (coconut, oat, or soy-based) and a plant milk like oat or almond milk. The texture will be slightly different, but it’s still creamy and delicious. Make sure your Oreos are okay with your dietary needs (the classic cookie is dairy-free but check labels for cross-contamination if needed).
Q4: How can I make an Oreo Milkshake thicker or thinner?
To make the shake thicker, add a little more ice cream or a small frozen banana. For a thinner shake, add milk in small splashes until you reach the desired consistency. Blend after each addition for best results.
Q5: Can I use other sandwich cookies instead of Oreos in an Oreo Milkshake?
Yes — any chocolate sandwich cookie will work. For a twist, try mint sandwich cookies or chocolate-covered cream-filled cookies. The flavor will change, but the method stays the same.
If you want anything shorter, printable recipe cards, or a kid-friendly step-by-step photo series for your own kitchen, tell me how you like to serve treats and I’ll help you make a quick printable version.
Print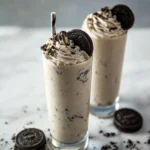
Oreo Milkshake
- Total Time: 5 minutes
- Yield: 2 servings 1x
- Diet: Vegetarian
Description
A quick and indulgent Oreo Milkshake recipe that brings joy to both kids and adults alike, perfect for a busy day.
Ingredients
- 8 Oreo cookies
- 2 cups vanilla ice cream
- 1 cup whole milk
- 1/2 teaspoon vanilla extract (optional)
- Whipped cream for topping
- Chocolate syrup for topping
- Extra Oreo cookies for garnish (optional)
Instructions
- Prep your workspace: Pull the vanilla ice cream from the freezer and let it soften for about 2 minutes.
- Crush the Oreos: Place the Oreo cookies into a freezer bag, seal it, and crush with a rolling pin or heavy pan.
- Add liquids to the blender: Pour the milk into the blender first.
- Add ice cream and cookie crumbs: Add the vanilla ice cream and crushed Oreos to the blender.
- Pulse then blend: Pulse a few times to break up chunks and blend until smooth, adding more milk or ice cream as needed.
- Add vanilla and finish blending: If using, add vanilla extract and blend for a quick pulse.
- Taste and adjust: Taste and add more Oreos or chocolate syrup for sweetness if desired.
- Pour into glasses and garnish: Serve in tall glasses topped with whipped cream, chocolate syrup, and an Oreo garnish.
Notes
Feel free to add protein powder, a banana, or nut butter for extra flavor and nutrition.
- Prep Time: 5 minutes
- Cook Time: 0 minutes
- Category: Dessert
- Method: Blending
- Cuisine: American
Nutrition
- Serving Size: 1 serving
- Calories: 450
- Sugar: 30g
- Sodium: 250mg
- Fat: 18g
- Saturated Fat: 10g
- Unsaturated Fat: 6g
- Trans Fat: 0g
- Carbohydrates: 60g
- Fiber: 2g
- Protein: 7g
- Cholesterol: 50mg
Keywords: Oreo, Milkshake, Dessert, Quick treat, Easy recipe