I still remember a rainy afternoon when I craved something soothing and a little fancy — a warm cup of Earl Grey, but in ice cream form. If you’ve ever wanted to turn that bergamot-scented comfort into something cool and creamy, you’re not alone. I know trying a chilled tea-based dessert can feel intimidating if you’re new to stabilizers, blenders, or countertop machines, but this Sugar-Free London Fog Ice Cream is deliberately simple and forgiving. If you’re curious about variations and want a deeper dive into technique, I often point readers to my go-to method for a slightly different texture in this detailed London Fog ice cream recipe.
Highlights
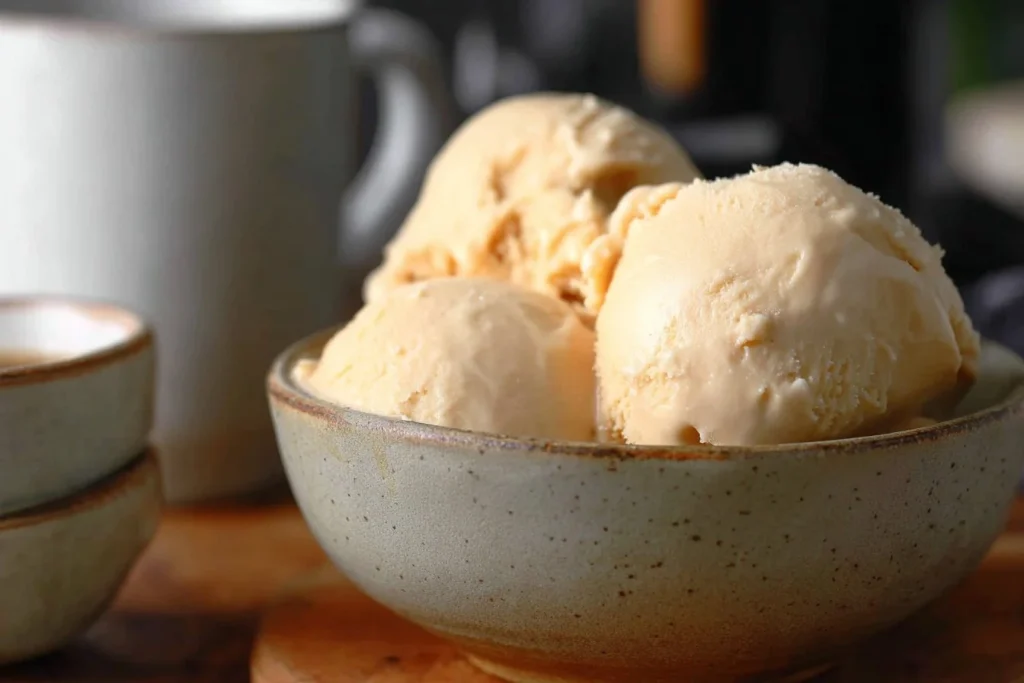
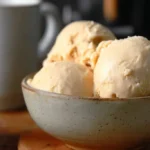
A Quick Look at This Sugar-Free London Fog Ice Cream Recipe
This Sugar-Free London Fog Ice Cream is a lighter take on a classic: it’s low in added sugars and relies on unsweetened vanilla almond milk for most of the base, which keeps calories moderate and adds vitamin E and calcium. The recipe includes a small amount of heavy cream to give a satisfying richness and mouthfeel without going overboard on saturated fat. Earl Grey tea brings antioxidants and a fragrant flavor punch without added calories. It’s a naturally wholesome dessert that fits well into a balanced eating pattern — a lighter comfort food option for those evenings when you want something indulgent but mindful. If you want to compare versions or find alternate ingredient ideas, you can also read this sugar-free London Fog ice cream write-up for more inspiration.
Ingredients You’ll Need for Sugar-Free London Fog Ice Cream
Essentials
- 1.5 cups Earl Grey tea, brewed and cooled — the aromatic backbone of this recipe. Use good-quality tea bags or loose leaf for best flavor.
- 3/4 cup unsweetened vanilla almond milk — keeps the base light, adds vitamin E and calcium, and provides a gentle vanilla note.
- 1/2 teaspoon guar gum — a stabilizer that helps prevent ice crystals and keeps the texture creamy without adding sugar.
- 1 teaspoon vanilla bean paste — for deep vanilla flavor and tiny flecks of bean for visual appeal.
- 1 tablespoon Simply Delish sugar-free instant vanilla pudding mix — acts as a sugar-free thickener and contributes to scoopable texture.
- 1/4 cup powdered sweetener — choose a powdered erythritol blend or monk fruit blend that measures like sugar; powdered form prevents graininess.
- 30 ml (about 2 tablespoons) heavy whipping cream (35% fat) — added at the end to round out mouthfeel and richness.
Optional add-ons
- Zest of lemon or orange — a small sprinkle of citrus zest can brighten the bergamot notes in Earl Grey.
- A pinch of finely ground black tea leaves — for extra tea intensity, especially if your brewed tea is mild.
- Low-sugar cookie crumbs or chopped toasted almonds — to add crunch at serving time.
- A few drops of liquid stevia (if you prefer stronger sweetness) — taste and adjust, but be cautious since stevia is very concentrated.
- A swirl of no-added-sugar jam (like raspberry) — for a fruity counterpoint, added right after the base is processed.
Substitutions and shortcuts
- Heavy cream: If you need a dairy-free alternative, substitute full-fat coconut cream for a similar richness; expect a subtle coconut background flavor. Refrigerate the coconut cream overnight and scoop the solid portion.
- Almond milk: Any unsweetened plant milk (soy, oat, cashew) can work. Choose unsweetened versions to keep sugar low and adjust pudding mix if thickness varies.
- Guar gum alternatives: Xanthan gum works similarly; use about the same amount (1/2 teaspoon). If you don’t have either, increase the pudding mix to 1.5 tablespoons, but texture may be slightly different.
- Powdered sweetener: If your sweetener is granular, pulse it in a spice grinder to avoid gritty texture. Stevia or liquid sweeteners are possible, but you’ll need to reduce other thickeners to keep texture balanced.
- Instant pudding: If you can’t find Simply Delish sugar-free pudding mix, look for a sugar-free vanilla instant pudding with similar ingredients; avoid mixes that contain alcohol-based flavorings.

How to Make Sugar-Free London Fog Ice Cream Step-by-Step
I like to keep this process calm and predictable so anyone can try it. The key is to brew the tea just long enough to wake up the bergamot without making the mixture bitter, to chill the base fully, and to use the stabilizers sparingly so the ice cream stays silky.
Brew the tea:
- Boil 1.5 cups of water and steep 2 Earl Grey tea bags for about 2 minutes. Press the tea bags gently against the side of the cup or pot to extract flavor, then remove them. Over-steeping can introduce bitterness, so keep your timing consistent.
- Allow the brewed tea to cool at room temperature for 10–15 minutes, then refrigerate until fully chilled. Chilling the tea helps the blended base freeze evenly and reduces the chance of ice crystals forming.
Prepare the base:
- In a blender, combine the chilled Earl Grey tea, 3/4 cup unsweetened vanilla almond milk, 1/2 teaspoon guar gum, 1 teaspoon vanilla bean paste, 1 tablespoon Simply Delish sugar-free instant vanilla pudding mix, and 1/4 cup powdered sweetener.
- Blend on high for about 30 seconds. The guar gum needs a short period of high-shear mixing to hydrate fully; this helps the ice cream reach a creamy, uniform texture.
Chill and freeze:
- Pour the blended mixture into your Ninja Creami container (or an equivalent freezer-safe, airtight container). Secure the lid and place the container in the freezer for 24 hours. A full 24-hour freeze ensures the mixture sets consistently and the Creami can work its magic.
Process in the Ninja Creami:
- After freezing, remove the container and place it into the Ninja Creami outer bowl according to the manufacturer’s directions.
- Use the “smoothie bowl” or “lite ice” function to blend the frozen base. These settings help break down the ice into a scoopable, soft-serve-like texture.
- Add 30 ml (about 2 tablespoons) of heavy whipping cream to the center of the processed ice cream and use the “mix in” function to incorporate the cream. This step rounds out the texture and gives you that decadent mouthfeel with just a small amount of cream.
Final adjustments and storage:
- If the texture is denser than you prefer, very gently stir in another tablespoon of cream or a splash of almond milk and re-spin using the “mix in” feature.
- Transfer to an airtight container and freeze for 1–2 hours to firm up to a scoopable consistency, or serve immediately for a softer, gelato-like experience.
- Store leftovers in the freezer for up to 2 weeks; allow to soften in the fridge for 10–15 minutes before scooping for the best texture.
Nutrient preservation tips:
- Brew the tea at the right temperature and time to preserve aroma and avoid bitter tannins. Earl Grey’s delicate bergamot oils are volatile; a quick 2-minute steep is ideal.
- Use chilled components to avoid overworking dairy proteins. Blending warm or room-temperature ingredients can affect texture and cause separation.
- Keep the stabilizer amounts measured — too much guar gum can create an almost gummy texture; too little and you risk icier results.
A note about equipment:
- The Ninja Creami makes this particularly user-friendly because it’s designed to process fully frozen bases into smooth ice cream. If you don’t have one, you can freeze the base in a shallow pan and break it up with a fork every 30 minutes while freezing, or use an ice cream maker and follow the manufacturer’s instructions.
Common Mistakes to Avoid
I’ve experimented with this recipe a lot, and a few recurring missteps keep showing up when readers first try it. Fixing these will give you a reliably smooth, flavorful dessert.
Mistake 1: Oversteeping the tea
Running the tea too long is an easy way to introduce bitterness. Earl Grey is fragrant and delicate; steep for about 2 minutes and press gently, then remove the bags. If you find a bitter edge in your first batch, brew your next batch for 30–60 seconds less or use slightly cooler water.
Mistake 2: Skipping the chill step
Blending or freezing a warm base leads to larger ice crystals and a less creamy result. Make sure the brewed tea is fully chilled before blending. If you’re in a hurry, chill the tea in an ice bath for 5–10 minutes, then refrigerate until cold.
Mistake 3: Using too much or too little stabilizer
Guar gum (or xanthan gum) should be used sparingly. Too much creates a gummy, pasty mouthfeel; too little leaves the ice cream icy and crumbly. Measure carefully (about 1/2 teaspoon) and blend well to hydrate the gum fully — a short high-speed blend is usually sufficient.
Serving Suggestions for Sugar-Free London Fog Ice Cream
This ice cream is versatile: it’s delicate enough for a tea-time treat and rich enough to finish a simple meal. Here are a few approachable serving ideas that keep things light and balanced.
Simple tea-time scoop
Scoop a small portion into a chilled bowl and top with a sprinkle of lemon zest and a few toasted almond slivers. The citrus brightens the bergamot and the almonds add crunch without adding much sugar.
Parfait-style
Layer small scoops with plain Greek yogurt (for extra protein) and a spoonful of no-sugar-added berry compote. This creates a satisfying dessert that doubles as a fortified snack — and I sometimes enjoy it for a weekend brunch.
Toasted oat crumble topping
Make a quick crumble with rolled oats, a small amount of melted coconut oil, and a pinch of cinnamon. Toast in a skillet until golden and sprinkle over your ice cream for texture and a cozy, cereal-like contrast. For inspiration on other ways to enjoy tea-flavored desserts, I reference different texture ideas in this London Fog ice cream recipe, which highlights pairings I tested.
Conclusion
I love that this Sugar-Free London Fog Ice Cream offers the comfort of a classic teatime flavor with fewer added sugars and a lighter base. It’s flexible — easy to tweak for dairy-free diets, sweetness preferences, or extra texture — and it fits into a thoughtful eating plan as a satisfying, portion-friendly dessert. Whether you’re making a single batch for an indulgent afternoon or prepping a few containers for easy, mindful treats, this recipe rewards small adjustments and gentle technique. If you try it, let me know what twist you added or which pairing became your favorite — I enjoy hearing how people make this cozy dessert their own.
FAQs About Sugar-Free London Fog Ice Cream
Q1: Can I make Sugar-Free London Fog Ice Cream without a Ninja Creami?
A1: Yes — you can still make this ice cream by freezing the blended base in a shallow, freezer-safe pan and stirring vigorously every 30 minutes to break up ice crystals until it’s evenly frozen (about 3–4 cycles). An ice cream maker also works well; follow the manufacturer’s churn and freeze directions.
Q2: Is Sugar-Free London Fog Ice Cream suitable for a dairy-free diet?
A2: The base is mostly almond milk, which is dairy-free, but the recipe uses a small amount of heavy cream for texture. To make it fully dairy-free, substitute full-fat coconut cream for the heavy cream and ensure your vanilla pudding mix is also dairy-free.
Q3: How long does Sugar-Free London Fog Ice Cream keep in the freezer?
A3: Stored in an airtight container, it will stay good for about 1–2 weeks for best texture and flavor. Over time, even stabilized recipes can develop ice crystals; letting it soften in the refrigerator for 15–20 minutes before scooping helps.
Q4: Can I increase the tea flavor in Sugar-Free London Fog Ice Cream?
A4: Yes — you can add a small pinch of finely ground Earl Grey leaves or slightly increase the strength of the brewed tea (shorter steeping time at slightly higher leaf-to-water ratio). Be cautious not to oversteep, which can turn the flavor bitter.
Q5: Will sugar-free sweeteners affect the texture of Sugar-Free London Fog Ice Cream?
A5: Powdered sweeteners are recommended to avoid grittiness. Granular erythritol can crystallize; grinding it to a powder helps. If using liquid sweeteners, reduce stabilizers slightly because less bulk can change the mouthfeel, and taste as you go to avoid over-sweetening.
Sugar-Free London Fog Ice Cream
- Total Time: 1455 minutes
- Yield: 4 servings 1x
- Diet: Vegan-friendly (with substitution)
Description
A lighter take on a classic London Fog, this sugar-free ice cream captures the bergamot flavors in a creamy, delicious dessert.
Ingredients
- 1.5 cups Earl Grey tea, brewed and cooled
- 3/4 cup unsweetened vanilla almond milk
- 1/2 teaspoon guar gum
- 1 teaspoon vanilla bean paste
- 1 tablespoon Simply Delish sugar-free instant vanilla pudding mix
- 1/4 cup powdered sweetener
- 30 ml (about 2 tablespoons) heavy whipping cream
- Optional: Zest of lemon or orange
- Optional: A pinch of finely ground black tea leaves
- Optional: Low-sugar cookie crumbs or chopped toasted almonds
- Optional: A few drops of liquid stevia
- Optional: A swirl of no-added-sugar jam
Instructions
- Brew the tea by boiling 1.5 cups of water and steeping 2 Earl Grey tea bags for about 2 minutes. Allow to cool and refrigerate until chilled.
- In a blender, combine the chilled Earl Grey tea, almond milk, guar gum, vanilla bean paste, pudding mix, and powdered sweetener. Blend on high for about 30 seconds.
- Pour the blended mixture into a freezer-safe container and freeze for 24 hours.
- Process the frozen base in a Ninja Creami or equivalent using the “smoothie bowl” or “lite ice” function.
- Add heavy whipping cream to the processed ice cream and mix in to incorporate.
- If needed, adjust texture by gently stirring in more cream or almond milk. Freeze for 1-2 hours for firmer consistency.
Notes
For best results, brew the tea properly and ensure all components are chilled before blending.
- Prep Time: 15 minutes
- Cook Time: 1440 minutes
- Category: Dessert
- Method: Freezing
- Cuisine: British
Nutrition
- Serving Size: 1 serving
- Calories: 150
- Sugar: 2g
- Sodium: 50mg
- Fat: 7g
- Saturated Fat: 3g
- Unsaturated Fat: 4g
- Trans Fat: 0g
- Carbohydrates: 18g
- Fiber: 1g
- Protein: 2g
- Cholesterol: 15mg
Keywords: ice cream, sugar-free, dessert, Earl Grey, vegan-friendly