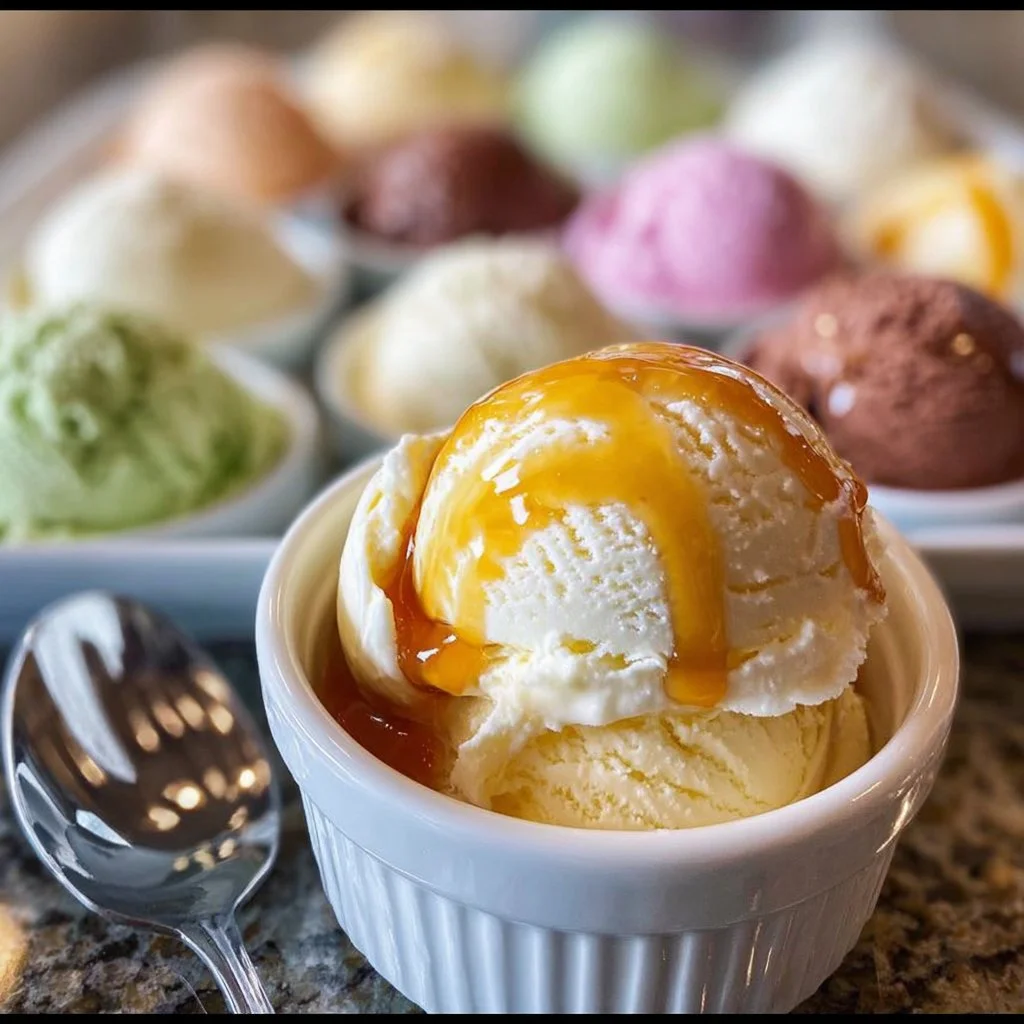
Welcome to the world of homemade ice cream! There’s nothing quite like enjoying a bowl of creamy, rich ice cream on a warm day. With the Perfect Ninja Creami Ice Cream Recipe, you can create your own delightful treats right in your kitchen. This recipe is crafted for simplicity and flavor, ensuring everybody can achieve the perfect scoop of ice cream without a fuss.
The Ninja Creami makes the process effortless. Not only does it simplify the ice cream-making technique, but it also opens up a universe of flavor possibilities. Whether you are planning a summer family gathering or just want to indulge in a sweet treat, this recipe delivers.
So, let’s dive in and discover why this vanilla ice cream is a must-try!
Highlights
Why You’ll Love This Perfect Ninja Creami Ice Cream
You might wonder, “What makes this recipe stand out?” It’s simple! Here are a few reasons to love this Perfect Ninja Creami Ice Cream recipe:
Easy to Make: With just a few ingredients and straightforward steps, making ice cream at home has never been easier.
Customizable Flavors: Feel free to experiment! Add fruits, syrups, or other mix-ins for a personal touch to your ice cream.
Rich and Creamy: Enjoy a luscious texture that rivals any store-bought option.
Family-Friendly: Involve friends and family in the process. Kids will love helping to choose flavors and mix-ins.
Perfect for Any Occasion: Whether it’s a hot day, a birthday party, or just a sweet craving, this ice cream fits perfectly.
With these enticing benefits, it’s clear why you should make this heavenly treat!
Print
Perfect Ninja Creami Ice Cream
- Total Time: 1440 minutes
- Yield: 4 servings 1x
- Diet: Vegetarian
Description
A delightful and customizable homemade vanilla ice cream recipe that utilizes the Ninja Creami for a rich and creamy treat.
Ingredients
- 2 cups Whole Milk
- 2 cups Heavy Cream
- 3/4 cup Granulated Sugar
- 1 tablespoon Vanilla Extract or Vanilla Paste
- Optional Add-Ons: Fresh Strawberries, Chocolate Syrup, Peanut Butter
Instructions
- In a mixing bowl or blender, combine the whole milk, heavy cream, granulated sugar, and vanilla extract. Stir until well combined and sugar is dissolved.
- Pour the mixture into the Ninja Creami container and freeze it for 24 hours on a flat surface.
- After freezing, take the container out and insert it into the Ninja Creami machine.
- Select the Ice Cream function to churn the mixture into ice cream.
- Check the texture; if it’s icy, use the Re-spin function.
- Add optional mix-ins like strawberries or chocolate syrup and use the Mix-In function to incorporate.
- Serve immediately or store in a sealed container in the freezer for later.
Notes
For best results, chill your mixture before freezing and allow enough freezing time.
- Prep Time: 10 minutes
- Cook Time: 24 hours
- Category: Dessert
- Method: Churning
- Cuisine: American
Nutrition
- Serving Size: 1 serving
- Calories: 350
- Sugar: 30g
- Sodium: 50mg
- Fat: 20g
- Saturated Fat: 12g
- Unsaturated Fat: 6g
- Trans Fat: 0g
- Carbohydrates: 30g
- Fiber: 0g
- Protein: 5g
- Cholesterol: 80mg
Keywords: ice cream, homemade dessert, Ninja Creami, vanilla ice cream, family treat
Ingredients You’ll Need for Perfect Ninja Creami Ice Cream
To whip up this delicious ice cream, you’ll need to gather some essential ingredients:
Essential Ingredients:
Whole Milk (Lait entier): This is the base for your ice cream. Using whole milk ensures that your ice cream is rich and creamy.
Heavy Cream (Crème épaisse): Adds extra creaminess and a velvety texture to your ice cream.
Granulated Sugar (Sucre granulé): Sweetens your mixture. You can adjust the amount according to your taste.
Vanilla Extract (Extrait de vanille) or Vanilla Paste (Pâte de vanille): Provides the classic vanilla flavor that pairs beautifully with other ingredients.
Optional Add-Ons:
You can also elevate your ice cream with some fun add-ins:
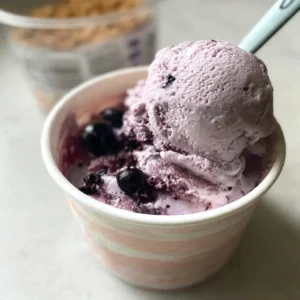
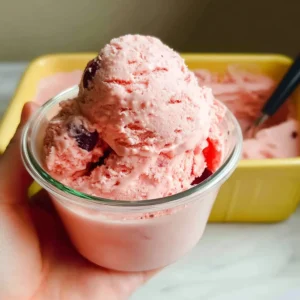
Fresh Strawberries (Fraises fraîches): Chopped or blended, they add a fruity punch to your ice cream.
Chocolate Syrup (Sirop de chocolat): Swirl in chocolate syrup for a decadent touch.
Peanut Butter (Beurre de cacahuète): A spoonful of peanut butter add a nutty flavor and a creamy texture.
With these ingredients, you’ll be well on your way to creating your perfect ice cream.
How to Make Perfect Ninja Creami Ice Cream: Step by Step
Let’s walk through the steps to make your ice cream! Make sure you have your Ninja Creami ready and get set for some sweet fun.
Step 1: Prepare the Ice Cream Base
In a mixing bowl or blender, combine the following:
- 2 cups of Whole Milk
- 2 cups of Heavy Cream
- 3/4 cup of Granulated Sugar
- 1 tablespoon of Vanilla Extract or Vanilla Paste
Stir or blend the mixture until it is well combined and the sugar has fully dissolved. This should take just a few minutes.
Step 2: Freeze the Mixture
Pour your smooth mixture into the Ninja Creami ice cream container. Be careful not to exceed the maximum fill line indicated on the container.
Cover the container with its lid and freeze it for 24 hours on a flat surface. Setting aside time for freezing is crucial for achieving a perfect texture.
Step 3: Process Your Ice Cream
Once the freezing time is up, take the container out of the freezer. Next, insert the container into your Ninja Creami machine.
Select the Ice Cream function and let the machine work its magic. The machine will churn the frozen mixture, turning it into smooth ice cream.
Step 4: Check the Texture
After a few moments, check the texture of your ice cream. If it seems a bit icy or crumbly, don’t worry! Simply use the Re-spin function until the ice cream becomes smooth and creamy.
Step 5: Add Mix-Ins
If you want to take your ice cream to the next level, this is where you can add your optional ingredients! Feel free to fold in chopped fresh strawberries, chocolate syrup, or a dollop of peanut butter. Use the Mix-In function to incorporate these flavors evenly.
Step 6: Serve or Store
Your ice cream will be ready to serve immediately! Scoop it out into bowls and enjoy a delicious homemade treat. If you choose to save some for later, simply return it to the freezer, and you can enjoy it at another time.
Using a sealed container will help preserve the ice cream’s flavor and texture for the next time you want to treat yourself.
Serving Suggestions for Perfect Ninja Creami Ice Cream
Now that you have your homemade ice cream ready, here are some serving suggestions to make it even more special:
- Sundae Style: Top your ice cream with whipped cream, a drizzle of chocolate syrup, sprinkles, or crushed nuts.
- Banana Split: Create a classic banana split with slices of banana, dollops of ice cream, syrup, and nuts.
- On a Cone: Serve scoops of your perfectly creamy ice cream on a waffle or sugar cone for a fun and portable treat.
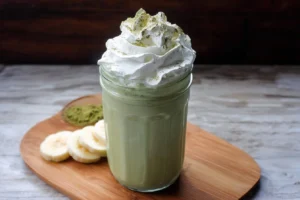
- In a Milkshake: Blend your ice cream with some milk for a thick, delicious milkshake.
- Pair with Desserts: Serve alongside warm brownies or a slice of pie for an incredible dessert experience.
Let your creativity flow and personalize your serving ideas!
Pro Tips for Perfecting Your Perfect Ninja Creami Ice Cream
Enhancing the process can make a big difference in your ice cream-making journey. Here are some expert tips:
Use High-Quality Ingredients: The better the ingredients, the more delicious your ice cream. Use pure vanilla extract and fresh dairy.
Allow Enough Freezing Time: Do not rush the freezing process! The longer your ice cream base is frozen, the smoother the final product.
Experiment with Flavor Combinations: Don’t hesitate to mix different flavors! Try adding cocoa powder for chocolate ice cream or crushed cookies for a cookies and cream version.
Chill Before Freezing: For best results, chill your ice cream mixture in the refrigerator for an hour before pouring it into the Ninja Creami container to ensure it freezes evenly.
Keep Your Container Frozen: Always store your Ninja Creami container in the freezer when not in use. This way, it will always be ready to churn up some ice cream at a moment’s notice.
Follow these tips, and you will consistently produce delicious, creamy ice cream!
Ninja Creami Pro tips
Has the Ninja CREAMi been discontinued?
- As of now, the Ninja CREAMi has not been discontinued. It remains widely available through major retailers and online stores. Ninja frequently updates their product lineup, so it’s a good idea to check official sources for the latest info.
How long does it take for Ninja CREAMi to make ice cream?
- The actual processing time with the Ninja CREAMi is usually around 5 minutes per cycle. However, the base mixture needs to be frozen solid in the pint container for about 24 hours before processing.
Is the Ninja CREAMi better than a traditional ice cream maker?
- The Ninja CREAMi offers unique benefits like creating a variety of frozen treats (ice cream, gelato, sorbet, and more) from pre-frozen bases, with customizable textures. Traditional ice cream makers typically churn while freezing. Whether it’s better depends on your preferences—CREAMi is great for convenience and variety, while traditional makers offer hands-on control during freezing.
Do you really need to wait 24 hours for Ninja CREAMi?
- Yes, for best results, you need to freeze the mixture in the special pint container for about 24 hours to ensure it is fully frozen solid. This step is essential for the machine to properly process and achieve the perfect creamy texture.
Easy Variations for Perfect Ninja Creami Ice Cream
There are endless options when it comes to personalizing your ice cream. Here are some easy variations to consider:
Chocolate Ice Cream: Add 1/2 cup of cocoa powder to the base mixture for rich chocolate ice cream.
Mint Chocolate Chip: Stir in 1 teaspoon of peppermint extract and mini chocolate chips for a refreshing minty treat.
Coffee Flavored Ice Cream: Mix in 1 cup of brewed coffee for a delightful coffee-flavored ice cream.
Fruit Sorbet: For a fruity twist, use 2 cups of blended fruit (e.g., mango or berries) in place of milk and cream for a lighter sorbet.
Cookie Dough Ice Cream: Add bits of cookie dough for a sweet and chewy surprise in every bite.
The options are endless; so be creative and have fun with it! For more options I created a didicated category related to creative and seasonal ice cream recipes. Also, you can check the list of Ninja Creami recipes, and remember to Follow us on Pinterest and Facebook!
Storage Tips to Store Perfect Ninja Creami Ice Cream
Once you have your ice cream ready, you’ll need to store it properly to maintain its texture and flavor. Here are some tips for storage:
Use an Airtight Container: Transfer any leftover ice cream into an airtight container. This prevents ice crystals from forming and helps retain creaminess.
Label with a Date: Always label your container with the date you made the ice cream. It’s best enjoyed within two weeks of making.
Keep it Frozen: Store your ice cream in the coldest part of the freezer to ensure it stays firm and delicious.
Avoid Frequent Thawing: Try to limit the number of times you take the ice cream in and out of the freezer. Frequent temperature changes can lead to a less-than-perfect texture.
Follow these storage tips to keep your ice cream fresh for future indulgence!
Conclusion
In conclusion, the Perfect Ninja Creami Ice Cream Recipe is a fantastic way to bring joy and sweetness into your life. It’s easy, fun, and deeply satisfying to create your own ice cream at home. Whether you’re serving it at a gathering or enjoying it solo, this recipe provides a perfect canvas for any flavor your heart desires.
So, gather your ingredients, fire up your Ninja Creami, and let the ice cream magic begin! With this guide, you’ll impress family and friends with your homemade creations, all while enjoying the delightful taste of fresh ice cream.
Enjoy your ice cream-making adventures, and don’t hesitate to mix up new flavors and combinations! Happy scooping!
FAQs About Perfect Ninja Creami Ice Cream
1. Can I use low-fat milk instead of whole milk?
While you can use low-fat milk, the ice cream may not be as creamy or rich. Whole milk is recommended for the best texture.
2. How long can I store the ice cream in the freezer?
Homemade ice cream is best enjoyed within two weeks for the best flavor and texture. After this, it may develop ice crystals.
3. Can I use a different flavor of extract?
Yes! Feel free to use almond, coconut, or any other extract to create different flavor profiles for your ice cream.
4. Do I need to chill the mixture before freezing?
Chilling the mixture for at least an hour before freezing can help achieve a smoother texture when whipped in the Ninja Creami.
5. What if my ice cream is too hard after freezing?
If your ice cream is too hard, let it sit at room temperature for about 5-10 minutes before scooping. You can also use the “Re-spin” function on the Ninja Creami to soften it.


7 thoughts on “Perfect Ninja Creami Ice Cream Recipe”