Picture this: It’s a sweltering summer afternoon. The sun is blazing overhead, and all you want is something cool, creamy, and oh-so-delicious. Ice cream comes to mind, but you’re also aware of the guilt that can accompany those sweet, creamy indulgences. Sound familiar? I’ve been there too, craving that sweet treat while also wanting to stick to my nutritious goals. That’s when I stumbled upon a delightful solution – Small-batch Chocolate Avocado Protein Ice Cream!
I remember the first time I tried to make this ice cream at home. I was nervous, thinking, “What if it doesn’t taste good?” or “What if I ruin my kitchen with a mess?” But let me tell you, it was a delightful experience! I realized that even someone like me, with little to no ice cream-making experience, could whip up this delightful, healthy treat with ease.
The key challenge for many beginner cooks is the fear of messing things up, especially when it comes to something as beloved as ice cream. The good news is that this post will guide you through every simple step, making this yummy chocolatey ice cream stress-free and totally doable—even if you’re making it for the very first time. So grab your blender, and let’s get into it!
TABLE OF CONTENTS
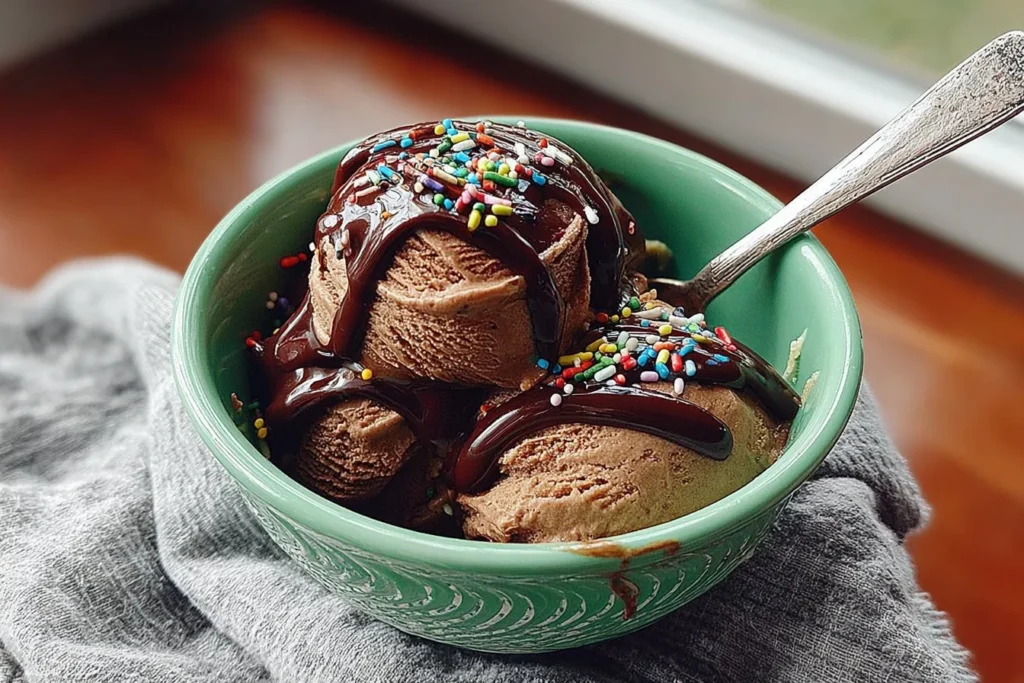
Small-batch Chocolate Avocado Protein Ice Cream
- Total Time: 40 minutes
- Yield: 2 servings 1x
- Diet: Vegetarian, Vegan-friendly
Description
A creamy and healthy chocolate ice cream made with ripe avocados and protein powder, perfect for a guilt-free treat.
Ingredients
- 1/2 ripe avocado (about 75 g)
- 1/2 ripe banana or 1/4 cup water/milk/nut milk (60 g)
- 1/2 cup water/milk/nut milk (120 g)
- 1–2 tbsp granulated sweetener (12–24 g)
- 1 tbsp cocoa powder (6 g)
- 1 scoop vanilla or chocolate protein powder (30 g)
- 1/4 tsp xanthan gum (optional)
- About 1/4 cup chopped chocolate, nuts, brownie, or cookie pieces (optional)
Instructions
- Blend your base ingredients: Add the avocado, banana (or water/milk), almond milk, sweetener, cocoa powder, and protein powder to your blender. Blend until smooth.
- Add the xanthan gum: Sprinkle the xanthan gum into the blended mixture and blend until thick.
- Churn it: Pour the mixture into an ice cream maker and churn per instructions, or pour into a container and stir every 30 minutes for 3 to 4 hours.
- Enjoy: Serve once creamy or let thaw slightly if too firm.
Notes
Use ripe avocados for the best flavor. Adjust sweetness according to your preference.
- Prep Time: 10 minutes
- Cook Time: 30 minutes
- Category: Dessert
- Method: Blending and Freezing
- Cuisine: American
Nutrition
- Serving Size: 1 serving
- Calories: 180
- Sugar: 8g
- Sodium: 50mg
- Fat: 7g
- Saturated Fat: 1g
- Unsaturated Fat: 5g
- Trans Fat: 0g
- Carbohydrates: 24g
- Fiber: 5g
- Protein: 7g
- Cholesterol: 0mg
Keywords: chocolate ice cream, avocado dessert, protein ice cream, healthy ice cream, summer treat
Ingredients You’ll Need for Small-batch Chocolate Avocado Protein Ice Cream
Let’s break down the ingredients you’ll need to create your Small-batch Chocolate Avocado Protein Ice Cream. It’s simple, and you’ll find most items in your kitchen.
Essentials
1/2 ripe avocado (about 75 g): This is your secret ingredient that makes the ice cream so creamy without adding a lot of calories. Make sure it’s ripe for the best flavor.
1/2 ripe banana or 1/4 cup water/milk/nut milk (60 g): The banana will add sweetness and creaminess. If you’re using water or milk, just remember to adjust the sweetener.
1/2 cup water/milk/nut milk (120 g): I like using unsweetened almond milk for its mild flavor, but you can choose whatever milk fits your preference.
1-2 tbsp granulated sweetener (12-24 g): This is to balance the bitterness of the cocoa powder. I prefer lakanto sweetener, but any sweetener you like works here.
1 tbsp cocoa powder (6 g): The star of the show! Cocoa powder gives our ice cream that deep, rich chocolate flavor.
1 scoop vanilla or chocolate protein powder (30 g): This adds protein, making the dessert fulfilling and nutritious. You can opt for whey or a plant-based protein powder, depending on your dietary preference.
1/4 tsp xanthan gum (optional): This is a thickening agent that helps to create creaminess. If you want a softer texture, feel free to skip it.
Optional Add-Ons
- About 1/4 cup chopped chocolate, nuts, brownie, or cookie pieces: These are for those who want to add a fun twist to their ice cream. Toss in what you love for extra texture and flavor!
Substitutions and Shortcuts
Avocado substitutes: If you have a sensitivity to avocados, you could substitute it with extra banana or even Greek yogurt for a creamy texture.
Sweeteners: You could use honey or maple syrup if you prefer natural sweeteners—just remember to adjust the quantity based on sweetness.
Milk Alternatives: Any type of milk will work here. Dairy, coconut, soy, or oat milk can replace almond milk easily.
The beauty of this recipe lies in its flexibility. You can tweak it according to your taste and dietary needs.
How to Make Small-batch Chocolate Avocado Protein Ice Cream Step-by-Step
Ready to get blending? Making your Small-batch Chocolate Avocado Protein Ice Cream is a breeze with this step-by-step guide. Let’s dive right in!
Step 1: Blend Your Base Ingredients
Start by adding everything to your blender except for the xanthan gum. Remember to stick to the order listed to ensure the best blending consistency. This means adding the avocado, banana (or water/milk), almond milk, sweetener, cocoa powder, and protein powder first. Blend them all together until the mixture is completely smooth and silky. You can add a pinch of salt or a splash of vanilla extract here if you’d like. These are optional but can really enhance the flavor.
Step 2: Add the Xanthan Gum
Once everything is blended to perfection, sprinkle in the xanthan gum. Blend again until you achieve a very thick, smoothie-like consistency. Honestly, at this point, you could just eat it as a soft-serve treat right away. It’s that delicious!
Step 3: Churn It (or Not!)
Next up is the ice cream machine. Pour your blended mixture into the machine and churn it according to your machine’s instructions. If you don’t have an ice cream maker, no worries! You can pour the mixture into a freezer-safe container, and every 30 minutes, stir it for about 3 to 4 hours. This prevents ice crystals from forming and keeps it creamy.
If you’re adding any optional mix-ins like chocolate chunks or nuts, stir them in before you start the churning process.
Step 4: Enjoy!
Once your ice cream is churned and reaches that perfect, creamy consistency, you can serve it right away. If it’s too firm, just let it thaw for about 5 to 10 minutes before scooping it into your bowl. If you’re in a hurry, a quick 5-10 second zap in the microwave can do wonders to soften it up—just don’t overdo it!
Looking for more frozen desserts? you can check the list of Ninja Creami recipes, or the Best Iced Coffee Recipes and remember to join our community on Pinterest and Facebook !
Common Mistakes to Avoid
Making ice cream can feel intimidating when you’re a beginner, but the process doesn’t have to be stressful. Here are a few common mistakes to avoid:
Not Using Ripe Avocados
Using unripe avocados can lead to a bitter-tasting ice cream. Make sure you pick avocados that yield slightly to pressure when you squeeze them gently.
Over-Blending
While you want a smooth consistency, over-blending can incorporate too much air, leading to a less dense ice cream. Aim for smooth without excessive air bubbles.
Skipping the Churning Step
Churning the mixture helps incorporate air, resulting in creaminess. If you skip this step and just freeze it, your ice cream may turn out icy and not as enjoyable.
Adding Too Much Sweetener
Different sweeteners have different sweetness levels, so always taste your mixture before churning. Adjust as needed, but start with less; you can always add more later!
Quick Wins for Beginner Cooks
If you’re just starting in the kitchen, there are a few quick wins that can make your cooking journey smoother:
Invest in a Good Blender
A reliable blender can make all the difference. It doesn’t have to be expensive, but a decent-quality blender will provide smoother results, making your ice cream texture ideal.
Gather and Prepare Your Ingredients Ahead of Time
Before you start blending, have all your ingredients out and measured. This not only saves time but also makes the process feel less overwhelming.
Don’t Sweat It!
Remember, cooking is as much about enjoying the journey as it is the final product. If something doesn’t turn out perfectly the first time, don’t worry! Learn from it and try again!
Experiment
Feel free to play around with flavors. Perhaps a dash of cinnamon or a scoop of peanut butter could take your chocolate avocado ice cream to the next level!
Pro-Level Tips for When You’re Ready
Once you’ve got the basics down, here are some pro tips to elevate your ice cream making:
Infuse Flavors
Consider infusing the milk with herbs like mint or cinnamon before adding it to your blender. It adds a wonderful depth of flavor to your ice cream. Plus you can make classic ice creams, fruity shakes, or straight-up dessert shakes. If you need help, check the general Ninja Creami recipes for inspiration.
Try Different Bases
Expand beyond chocolate; try using different proteins or base flavors. You could create a berry protein ice cream by using frozen berries instead of cocoa.
Creating a Ripple Effect
If you love swirls, after pouring your blended mixture into the container, add any sauces (like chocolate or caramel) and then gently swirl them in with a knife for a fun and beautiful effect.
Make it Presentation Worthy
Invest in some cute ice cream bowls and spoons. A lovely presentation always adds to the enjoyment of your homemade dessert!
Conclusion
There you have it! You’ve made your very own Small-batch Chocolate Avocado Protein Ice Cream. It’s easier than it looks, customizable, and perfect for those warm afternoons or whenever you need something comforting and delicious. Remember, this recipe is a beginner-approved way to dive into making ice cream at home!
Now it’s your turn. Go ahead and whip up a batch today, letting your cravings guide you. Once you have the basics down, you can experiment with flavors and add-ins, making it uniquely yours.
If you enjoyed making this delicious treat, I invite you to try your hand at other fun recipes and challenges as you grow your culinary skills. Happy cooking!
FAQs About Small-batch Chocolate Avocado Protein Ice Cream
1. Can I use a different type of protein powder in the Small-batch Chocolate Avocado Protein Ice Cream?
Absolutely! You can replace whey protein with plant-based protein. Just keep in mind that the flavor and texture may vary slightly.
2. What can I use instead of xanthan gum in the Small-batch Chocolate Avocado Protein Ice Cream?
If you don’t have xanthan gum, you can skip it. Alternatively, a bit of arrowroot powder or cornstarch can also work, but use it sparingly.
3. How can I store leftovers of Small-batch Chocolate Avocado Protein Ice Cream?
Store your ice cream in an airtight container in the freezer. To enjoy later, just let it thaw for a bit to soften before scooping.
4. Is it possible to make this Small-batch Chocolate Avocado Protein Ice Cream without an ice cream maker?
Yes! You can freeze the mixture in a container and stir it every 30 minutes for a few hours to create a smooth texture without an ice cream machine.
5. How much protein does the Small-batch Chocolate Avocado Protein Ice Cream contain?
The protein content depends on the protein powder you use. Typically, one scoop of protein powder has around 20-25 grams of protein per serving if you choose a standard whey or plant-based powder.


1 thought on “Small-batch Chocolate Avocado Protein Ice Cream”