When I first laid eyes on the Ninja Creami, I wasn’t sure what to expect from this modern kitchen gadget. But the promise of creamy homemade ice cream, like my favorite childhood treats, pulled me in. Isn’t there something wonderfully nostalgic about ice cream? It brings back memories of hot summer days spent at the local ice cream parlor, scouting out flavors with wide-eyed excitement. And what better way to encapsulate that happiness than with a delicious homemade Ninja Creami Butterfinger Ice Cream?
Let me assure you, this recipe is incredibly simple and stress-free—even if it’s your very first attempt at making ice cream. In just a few easy steps, you will find yourself on your way to whipping up a crunchy, creamy delight that pays homage to one of my favorite candy bars.
TABLE OF CONTENTS
Why I Love This Recipe of Ninja Creami Butterfinger Ice Cream
This Ninja Creami Butterfinger Ice Cream Recipe holds a special place in my heart. Not only does it take me back to those sweet summer evenings, but it also showcases how easy it can be for anyone to create a homemade ice cream experience that rivals store-bought desserts. For beginner cooks especially, this recipe is approachable. It involves a handful of steps that are straightforward and uncomplicated, making it perfect for those learning their way around the kitchen.
Moreover, the combination of creamy richness from the half-and-half, the sweet hint from the condensed milk, and that unmistakable Crunch of Butterfinger create a harmonious blend that is simply hard to resist. This recipe encourages you to embrace your inner chef while bringing joy to family and friends. Whether you are looking for a fun weekend project with the kids or want to impress guests with your ice cream-making skills, this recipe is practical yet cozy. Let’s dive into the deliciousness!
Interested in more frozen desserts? I invite you to read the list of 16 Best Iced Coffee Recipes, 15 Kid-friendly Ice Cream ideas, or the Ninja Creami recipes.
Ingredients You’ll Need for Ninja Creami Butterfinger Ice Cream Recipe
Before you roll up your sleeves and get started, let’s gather all the ingredients you’ll need for this delightful Ninja Creami Butterfinger Ice Cream Recipe. Here’s your shopping list with a few optional add-ons and substitutions to keep in mind:
Essentials
1¾ cup Half and Half: This creates that luscious, creamy base you crave in ice cream. You can use full-fat milk if you prefer a lighter version, but the half-and-half yields the best texture.
½ cup Sweetened Condensed Milk: This ingredient not only sweetens the mix but also adds creaminess. If you need a dairy-free option, look for coconut or almond-based sweetened condensed milk.
¼ cup PB2 Powdered Peanut Butter: A lighter alternative to regular peanut butter, PB2 brings a delightful flavor while cutting down on the fat content. If you’re looking for a thicker taste, regular creamy peanut butter works, but you may want to reduce the overall liquid slightly.
½ cup Cream Cheese: This adds a rich, tangy note that balances out the sweetness. If you want a lighter option, Neufchâtel cheese makes a good substitute.
2 teaspoons Vanilla Extract: A classic flavor enhancer for desserts. Pure vanilla extract will give you the most fragrant results, but imitation vanilla can work too if you’re in a pinch.
8 Bit-Sized Butterfinger Bars (chopped coarsely): You simply can’t have Butterfinger ice cream without these beloved candy bars! They add a crunchy texture and a caramel-like sweetness that is hard to resist.
Optional Add-Ons
Additional Candy Toppings: Consider adding more chopped Butterfinger pieces on top when serving for extra crunch.
Chocolate Sauce: Drizzling some chocolate sauce over the top just before serving can elevate the experience.
Salted Peanuts: For those who love that sweet and salty combination, sprinkle some roasted salted peanuts into the ice cream for added texture.
Substitutions and Shortcuts
Substitute the Butterfinger bars with any other favorite candies or treats such as Snickers, Reese’s, or even cookie crumbles for a different flavor profile.
For a quicker preparation, instead of waiting the full 24 hours for the base to chill, you can freeze the mixture in smaller containers to speed things up.
How to Make Ninja Creami Butterfinger Ice Cream Recipe Step-by-Step
Here, I’ll break it down into easy steps for you, ensuring that the process is as smooth as the final product!
1. Mix the Base
Start by gathering all your liquid ingredients. In a blender, combine 1¾ cups of half-and-half, ½ cup of sweetened condensed milk, ¼ cup of PB2 powdered peanut butter, and 2 teaspoons of vanilla extract. Blend these together until the mixture is completely smooth and creamy. The goal here is to create a uniform base where all the flavors meld together beautifully.
2. Pour Into Pint Container
Once you have your blissful mixture ready, carefully pour it into your Ninja Creami pint container. Make sure to indulge in the delightful aroma as you go! Secure the lid tightly and place it in your freezer for 24 hours. Patience is key—you’ll want to ensure that it freezes solid for the best results.
3. Process the Frozen Base
After the long wait, it’s finally time for the fun part! Remove the container from the freezer. Use your Ninja Creami and select either the “Lite Ice Cream” or the “Ice Cream” function to churn your frozen base gently. This will transform your hard mixture into that fluffy, creamy ice cream we all love.
4. Add Butterfinger Pieces
Once the ice cream has been churned to a lovely consistency, grab your coarsely chopped Butterfinger bars. Make a well in the center of the ice cream, being careful not to break the texture you’ve just achieved. Pour those lovely chunks in there and then process again using the “Mix-In” function. This will evenly distribute the Butterfinger bits throughout your creamy goodness.
5. Serve and Enjoy
Now, it’s time to dig into your homemade masterpiece! Scoop out the desired amount of butterfinger ice cream and serve it in bowls or cones. If you’re feeling a little extra, top your creation with more chunks of Butterfinger or a drizzle of chocolate sauce. Sit back, savor each bite, and enjoy the sweet satisfaction of your hard work.
Common Mistakes to Avoid with Ninja Creami Butterfinger Ice Cream Recipe
Making ice cream at home can seem daunting, but it doesn’t have to be. Here are some common pitfalls to avoid to ensure your Ninja Creami Butterfinger Ice Cream turns out just right.
Don’t Skip Freezing Time
One major mistake is trying to process the mixture before it’s fully frozen. For the best results, ensure that your base has had a full 24 hours in the freezer. This allows for a creamy texture that prevents ice crystals from forming.
Blend Too Long or Too Short
When mixing the base, avoid over-blending, as this can incorporate too much air, affecting the texture. Aim for a smooth mixture that’s well-combined but still has that luscious creaminess. On the other hand, under-blending will lead to an uneven consistency where ingredients haven’t melded properly.
Forgetting to Organize Ingredients
Before starting, take a moment to gather all your ingredients. This will keep you organized and frustrated while making the ice cream. Trust me—ingredients strewn about can lead to missed items, and you wouldn’t want to forget the Butterfinger!
Mixing in Ingredients Incorrectly
When it comes time to mix in those butterfinger pieces, don’t rush the process. Make sure the ice cream is at the right consistency to allow the pieces to fold in nicely without making a complete mess. Using the “Mix-In” function will help keep the texture intact while still thoroughly combining.
Print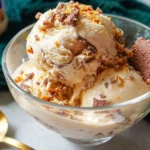
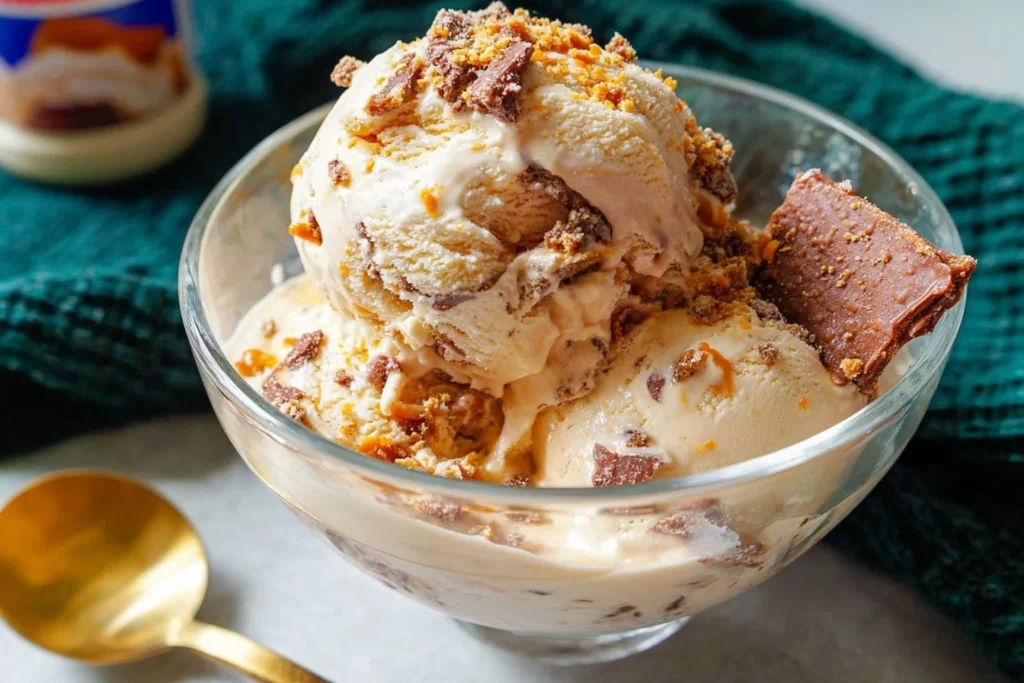
Ninja Creami Butterfinger Ice Cream
- Total Time: 1440 minutes
- Yield: 4 servings 1x
- Diet: Vegetarian
Description
A creamy, nostalgic homemade ice cream recipe featuring the beloved Butterfinger candy.
Ingredients
- 1¾ cup Half and Half
- ½ cup Sweetened Condensed Milk
- ¼ cup PB2 Powdered Peanut Butter
- ½ cup Cream Cheese
- 2 teaspoons Vanilla Extract
- 8 Bit-Sized Butterfinger Bars (chopped coarsely)
Instructions
- Mix the Base: Blend together half-and-half, sweetened condensed milk, PB2 powdered peanut butter, and vanilla extract until smooth.
- Pour Into Pint Container: Transfer the mixture to a Ninja Creami pint container, secure the lid, and freeze for 24 hours.
- Process the Frozen Base: Use the Ninja Creami to churn the frozen mixture using the ‘Lite Ice Cream’ or ‘Ice Cream’ function.
- Add Butterfinger Pieces: Create a well in the ice cream and mix in the chopped Butterfinger bars, then churn with the ‘Mix-In’ function.
- Serve and Enjoy: Scoop the ice cream into bowls or cones and add toppings as desired.
Notes
For a fun twist, experiment with different candies or toppings. Remember to wait the full 24 hours for freezing for the best texture!
- Prep Time: 15 minutes
- Cook Time: 0 minutes
- Category: Dessert
- Method: Freezing
- Cuisine: American
Nutrition
- Serving Size: 1 serving
- Calories: 350
- Sugar: 25g
- Sodium: 180mg
- Fat: 20g
- Saturated Fat: 10g
- Unsaturated Fat: 9g
- Trans Fat: 0g
- Carbohydrates: 40g
- Fiber: 1g
- Protein: 5g
- Cholesterol: 30mg
Keywords: ice cream, Butterfinger, homemade ice cream, dessert recipe, summer treat
Serving Suggestions for Ninja Creami Butterfinger Ice Cream
Once your buttery, crunchy delight is ready to serve, there are plenty of ways to enhance its deliciousness. Here are a few serving suggestions to take your dessert to the next level.
Create an Ice Cream Sundae
Gather your favorite sundae toppings—whipped cream, drizzles of caramel or chocolate sauce, and chopped nuts could all make appearances. Build your sundae starting with a generous scoop of Ninja Creami Butterfinger Ice Cream. Add your desired toppings for a delightful treat that everyone will love!
Pair with Fresh Fruit
Brighten up your dessert by serving your butterfinger ice cream with fresh fruit. Sliced strawberries, bananas, or raspberries complement the richness of the ice cream beautifully while bringing a fresh burst of flavor.
Make Milkshakes
Turn your unctuous ice cream into a milkshake! Blend a few scoops of your butterfinger ice cream with a splash of milk to create a creamy, decadent shake. Top it with whipped cream and a sprinkle of crushed Butterfinger for a delightful twist.
Enjoy with a Warm Cookie
The only thing better than ice cream is warm cookies! Serve a generous scoop of your homemade butterfinger ice cream alongside a warm chocolate chip or peanut butter cookie for a combo that will surely impress.
Pro-Level Tips for When You’re Ready
As you get comfy with this delicious Ninja Creami Butterfinger Ice Cream Recipe, you might want to elevate your kitchen game even further. Here are some pro-level tips for you to consider:
Experiment with Flavors
Once you’ve mastered the original Butterfinger flavor, don’t be afraid to branch out! Try adding different candies, fruit, or even flavor extracts. Mint, almond, or even pumpkin spice could create exciting new variations!
Infuse Your Base
For a gourmet twist, consider infusing your half-and-half with flavors before blending it with the other ingredients. A few mint leaves or vanilla beans steeped in the cream can elevate your ice cream to boutique status.
Customize the Crunch
Why stop at Butterfinger? Feel free to experiment by adding a mix of various crunchy candies to the base. Make a “candy bar explosion” version by combining Butterfinger with Snickers, Reese’s, and M&M’s!
Perfect Your Technique
Make small adjustments as you fine-tune your technique. If your ice cream isn’t as creamy as you want, play around with more cream or less condensed milk until you find that perfect balance.
Looking for more tips? Follow us on Pinterest and Facebook!
Conclusion
As you can see, making your own Ninja Creami Butterfinger Ice Cream is easier than it looks! With just a few simple ingredients and steps, you can treat yourself, your family, or your friends to a classic dessert that feels incredibly indulgent. Remember, the beauty of this recipe lies in its flexibility—feel free to customize it to fit your tastes and preferences.
So, what are you waiting for? Grab your Ninja Creami and get started on making this delightful ice cream experience. Trust me, once you dive into this creamy goodness, you’ll wonder why you ever considered store-bought ice cream!
FAQs About Ninja Creami Butterfinger Ice Cream Recipe
1. Can I make this recipe without a Ninja Creami?
Absolutely! While the Ninja Creami is a fantastic tool, you can also use a steel bowl and a hand mixer. Freeze the ice cream mixture and then mix vigorously every 30 minutes until it’s creamy and smooth.
2. What if I don’t have Butterfinger?
No worries! You can substitute Butterfinger with your favorite candy, such as Twix, Snickers, or even crumbled cookies for varying textures and flavors.
3. Can I make this ice cream dairy-free?
Yes! Use almond milk or coconut milk as a base instead of half-and-half. Make sure to substitute the sweetened condensed milk with a dairy-free version available at grocery stores.
4. How long can I keep this ice cream in the freezer?
Your homemade Ninja Creami Butterfinger Ice Cream can last about 2-3 weeks in the freezer. Just make sure to store it in an airtight container to maintain freshness!
5. Can I add more Butterfinger to the recipe?
Absolutely! If you prefer a more decadent ice cream, feel free to add more Butterfinger pieces into the mix during the churning process.