There’s something about the taste of cotton candy that transports me straight back to my childhood. I can remember the fairgrounds, the vibrant colors swirling before my eyes, and that first melt-in-your-mouth sweetness that made every ride, every game, every moment even more magical. It’s a memory that blends joy and nostalgia into something as light and airy as the clouds where that cotton candy puff once danced.
Today, I want to share my Ninja Creami Cotton Candy Ice Cream Recipe that brings back those delightful flavors and memories right into your kitchen. This recipe is not only fun to make, but it’s also incredibly easy, even for those just starting out in the world of homemade ice cream. Trust me, this post will take you step-by-step through the whole process, ensuring that by the end, you’ll feel like a ice cream pro in your own cozy kitchen.
SKIP TO
Why I Love This Recipe of Ninja Creami Cotton Candy Ice Cream Recipe
What makes this Ninja Creami Cotton Candy Ice Cream special for me is its perfect balance of nostalgia and creativity. As a child, my heart raced whenever I caught sight of the cotton candy stand, and now I get to recreate that same happiness right here at home. This recipe is not only sweet and scrumptious, but it allows me to engage with my family in the kitchen, creating new memories while bringing back those fond moments of the past.
If you’re a beginner cook, you’ll appreciate how straightforward this ice cream is to make. With minimal ingredients and a simple process, it’s a perfect recipe to try out your new Ninja Creami. The cozy, colorful twist of cotton candy brings delight, and let’s not forget, every scoop is a swirl of sweet happiness. There’s no fuss and hassle, just joy—and what’s better than that?
Print
Ninja Creami Cotton Candy Ice Cream
- Total Time: 1455 minutes
- Yield: 4 servings 1x
- Diet: Vegetarian
Description
A delightful homemade ice cream that combines the sweet, nostalgic flavor of cotton candy with a creamy texture, perfect for recreating childhood memories.
Ingredients
- 2 cups Half and Half
- ½ cup Cottage Cheese
- ½ cup Sweetened Condensed Milk
- 1 teaspoon Vanilla Extract or Vanilla Bean Paste
- 1 teaspoon Cotton Candy Flavoring
- 1–2 drops Food Coloring (Red & Blue)
- Sprinkles (optional, for serving)
Instructions
- Blend all ingredients together until smooth and silky.
- Divide the mixture into two pint containers; color one blue and the other red using food coloring.
- Freeze the containers flat for 24 hours.
- Process each pint in the Ninja Creami using the ice cream mode.
- If the texture is crumbly, add a splash of milk and respin.
- Scoop and serve the colorful mixture together in a bowl or cone.
Notes
Consider using dairy-free substitutes for a lighter version. Add sprinkles for a festive touch!
- Prep Time: 15 minutes
- Cook Time: 1440 minutes
- Category: Dessert
- Method: Churning
- Cuisine: American
Nutrition
- Serving Size: 1 serving
- Calories: 250
- Sugar: 22g
- Sodium: 90mg
- Fat: 12g
- Saturated Fat: 7g
- Unsaturated Fat: 4g
- Trans Fat: 0g
- Carbohydrates: 30g
- Fiber: 0g
- Protein: 5g
- Cholesterol: 35mg
Keywords: cotton candy, ice cream, dessert, homemade, nostalgia, Ninja Creami
Ingredients You’ll Need for Ninja Creami Cotton Candy Ice Cream Recipe
Creating this whimsical treat is as straightforward as gathering some pantry staples. Let’s dive into the ingredients you’ll need for your Ninja Creami Cotton Candy Ice Cream:
Essentials
- 2 cups Half and Half: This creamy base adds richness to our ice cream. If you want a lighter version, you can substitute it with whole milk, though I prefer the indulgence of half and half for that luscious mouthfeel.
- ½ cup Cottage Cheese: It may sound unusual, but cottage cheese creates a delightful texture without being overly creamy. Plus, it adds a bit of protein!
- ½ cup Sweetened Condensed Milk: This is the key to that sweetness we all love. The added sugar and creaminess set the stage for that famous cotton candy flavor.
- 1 teaspoon Vanilla Extract or Vanilla Bean Paste: This timeless flavor enhances our mixture and balances the sweetness. Either option works beautifully; I often switch them up depending on what I have on hand.
- 1 teaspoon Cotton Candy Flavoring: For that whimsical twist, I use Lorann oils. This ingredient truly sets the cotton candy tone in our ice cream, making it authentic and delightful!
- 1-2 drops Food Coloring (Red & Blue): While totally optional, adding colors will give you that beautiful, playful look reminiscent of carnival cotton candy. You can even skip this if you prefer a more pastel, understated ice cream.
Optional Add-Ons
- Sprinkles: Who doesn’t love a bit of color? Add some fun sprinkles when serving, especially if you’re making this for kids or a party.
Substitutions and Shortcuts
- If you’re looking to avoid dairy, consider using coconut milk and a dairy-free cottage cheese substitute.
- For a quicker recipe, you can skip the freeze wait time by preparing a smaller batch, but the texture may not be as creamy.
Would you be interested in more frozen desserts? I invite you check the list of 16 Best Iced Coffee Recipes, or the Ninja Creami recipes.
How to Make Ninja Creami Cotton Candy Ice Cream Recipe Step-by-Step
Let’s get into the fun part—making this delightful cotton candy ice cream! Here’s how you can whip it up in a few easy steps:
Step 1: Blend Everything Together
Grab your blender or food processor. Add the 2 cups of half and half, ½ cup of cottage cheese, ½ cup of sweetened condensed milk, 1 teaspoon of vanilla extract, and 1 teaspoon of cotton candy flavoring. Blend these ingredients together until you have a smooth and silky mixture. Make sure it’s well-combined—this sets the foundation for your ice cream’s delightful texture.
Step 2: Divide and Color Your Mixture
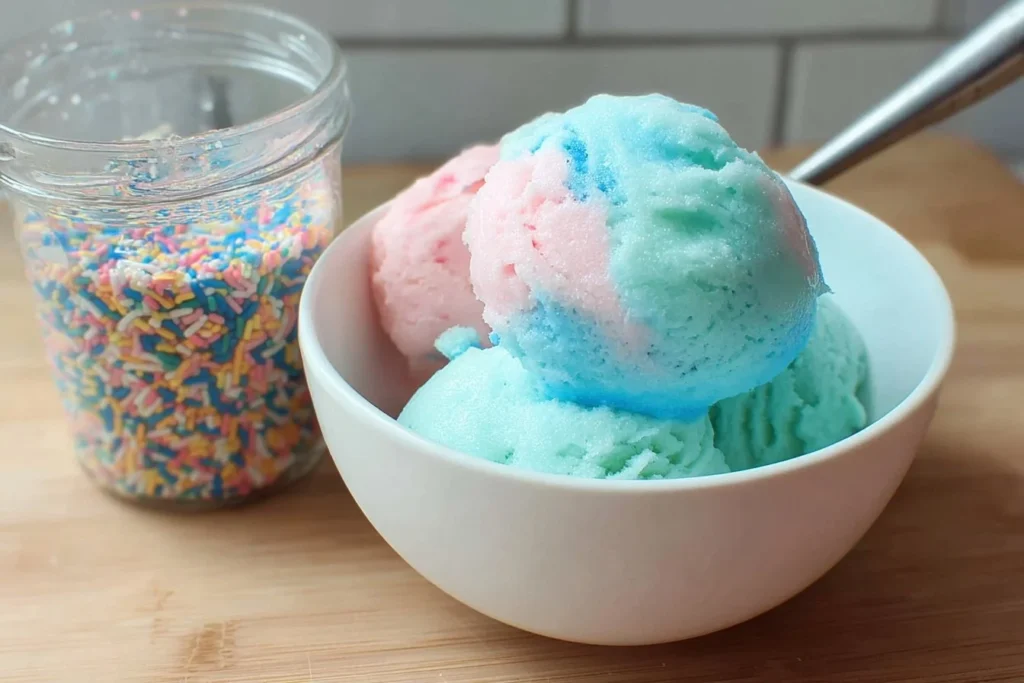
Once your mixture is ready, pour it equally into two Ninja Creami pint containers. In one pint, add 1-2 drops of blue food coloring. In the other, add the same amount of red (or pink) food coloring. Stir gently with a spoon to ensure the colors swirl beautifully but don’t fully mix in. The effect will mimic the look of cotton candy!
Step 3: Freeze
Place the containers flat in your freezer and leave them on a level surface for 24 hours. Patience is key here, but I promise it’ll be worth the wait! Make sure nothing is jostling your containers around, as this could ruin the creamy texture.
Step 4: Spin It in the Ninja Creami
Once frozen, it’s time to use your Ninja Creami. Set it to “ice cream mode” and process each pint separately. This will turn your solid mixture into a fluffy delight, reminiscent of that fairy floss we all adore.
Step 5: Respin If Necessary
After the first spin, take a look at the texture. If it’s a bit crumbly or icy, fear not! Just add a splash of milk and respin it. This quick fix will ensure your ice cream comes out creamy and scoopable.
Step 6: Scoop & Serve
Ready to dive into your creation? Grab your ice cream scooper and take half of the blue ice cream and half of the red. Scoop them together into a bowl or cone for a beautiful cotton candy swirl. It’s a delightful presentation that transports you straight to the carnival!
Common Mistakes to Avoid Ninja Creami Cotton Candy Ice Cream Recipe
When making this recipe, a few common pitfalls can crop up, but don’t worry; I’m here to guide you through them!
Not Blending Enough
Make sure to blend all the ingredients thoroughly! If your mixture is still chunky from the cottage cheese, it may not freeze well, resulting in a less creamy texture.
Overfilling the Containers
When pouring your mixture into the pint containers, leave some space at the top. The mixture expands as it freezes, and overfilling could lead to spills and mess.
Forgetting the Freezing Time
It’s easy to get impatient, but do let it freeze for a full 24 hours. Skipping this step can lead to watery ice cream that won’t churn up right.
Not Respinning
If your ice cream comes out crumbly, don’t be disheartened. A quick respin with a splash of milk will fix those texture issues and bring your creation back to its creamy glory.
Serving Suggestions for Ninja Creami Cotton Candy Ice Cream Recipe
Once you’re ready to serve your vibrant cotton candy ice cream, there are limitless options to help make it extra special.
Garnish with Whipped Cream
What’s a little extra payday for your sweet adventure? Top your scoops with a generous dollop of whipped cream. It adds not just loafy flavor but that festive look, making it even more of a treat!
Add Sprinkles
A handful of colorful sprinkles can take your cotton candy ice cream from simple to spectacular. They add crunch and a fun texture that’s irresistible.
Serve with a Side of Cookies
Take your ice cream to the next level by serving it alongside some delicious homemade sugar cookies. The combination of flavors will transport anyone back to a sweet, fairytale-like state!
Create a Cotton Candy Sundae
Make it a sundae night! Add chopped fruits, chocolate syrup, and a cherry on top for a complete dessert experience. The more colorful, the better!
Pro-Level Tips for When You’re Ready
Once you’ve mastered the basics, you can take your Ninja Creami Cotton Candy Ice Cream to the next level with a few pro tips.
Experiment with Flavors
While cotton candy is delightful, don’t hesitate to experiment with other flavors! Try adding a bit of strawberry or raspberry puree to the mixture before blending. It could create a beautiful flavor contrast with the cotton candy.
Create Layered Ice Cream
For those special occasions, you can create layers of different flavors in the same pint. Just freeze each layer separately until solid before adding another bit of ice cream on top.
Customizations are Key
Feel free to customize your ice cream to suit seasonal flavors or personal favorites. Using peppermint flavoring during the holidays, for example, can brighten up your cotton candy ice cream and make it suitable for festive gatherings.
Personal Touch
Always consider adding your personal touch. Whether it’s a secret stash of chocolate chips or special sprinkles you love, your touches can make this recipe unique to you.
Conclusion
Now that you’ve embarked on your Ninja Creami Cotton Candy Ice Cream journey, I hope you feel empowered in the kitchen and excited to whip up this nostalgic treat. It’s easier than it looks, and anyone—yes, even beginner cooks!—can master it with the guidance provided. Remember, this recipe is completely customizable, allowing you to embrace your creativity as you delve into the world of homemade ice cream.
Now it’s your turn! I invite you to gather your ingredients and bring the fair to your kitchen. If you make this recipe, come back and share your experience in the comments. I’d love to hear how it turned out for you!
FAQs About Ninja Creami Cotton Candy Ice Cream Recipe
What is the Ninja Creami Cotton Candy Ice Cream Recipe?
This recipe is a delightful homemade ice cream that combines the sweet, nostalgic flavor of cotton candy with a creamy texture. It’s made primarily with half and half, cottage cheese, and sweetened condensed milk.
Can I use regular milk instead of half and half for the Ninja Creami Cotton Candy Ice Cream Recipe?
Yes, you can substitute half and half with whole milk, but the ice cream may be slightly less creamy.
Can I skip the food coloring for the Ninja Creami Cotton Candy Ice Cream Recipe?
Absolutely! The food coloring is optional, and you can make a charming, softer-colored ice cream if you prefer.
What if my ice cream comes out icy after spinning in the Ninja Creami?
If your ice cream has a crumbly texture, simply add a splash of milk and respin it in the Ninja Creami for a creamier finish.
How long will the Ninja Creami Cotton Candy Ice Cream last in the freezer?
When properly stored in airtight containers, your cotton candy ice cream should be good for about one to two weeks in the freezer. However, the texture may change slightly over time.
I hope this wheelbarrow of cotton candy delight inspires you to create a swirl of sweet memories at home. Enjoy the experience, and happy scooping!
Looking for more delicious recipes? Follow us on Pinterest and Facebook!