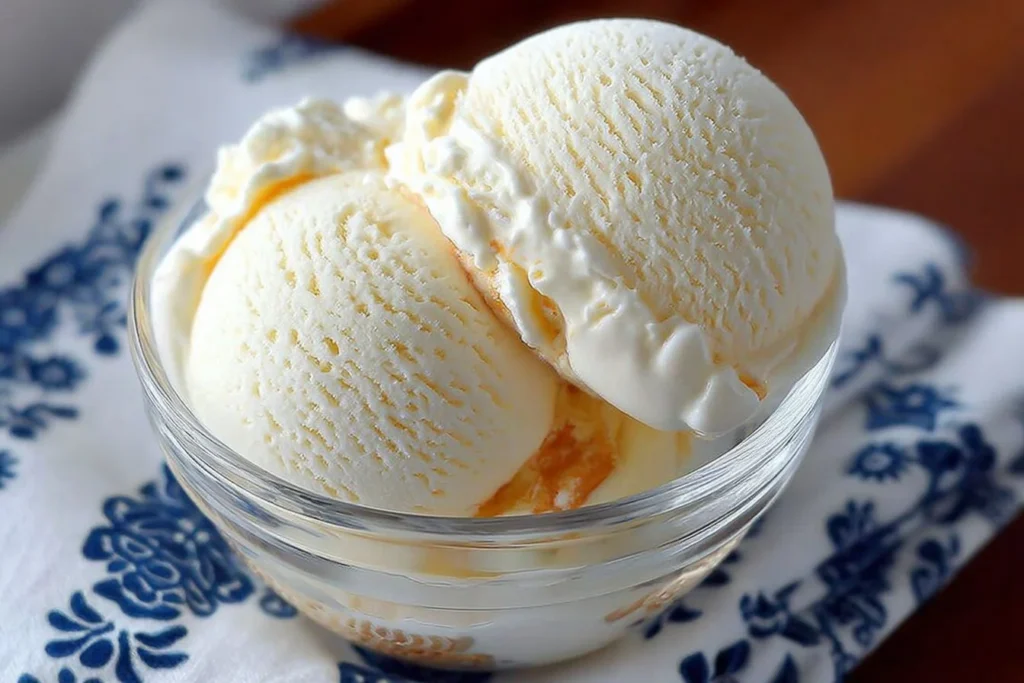
If you’re looking for a delicious treat that checks all the boxes—creamy, delightful, and sugar-free—then the Ninja Creami Sugar Free Vanilla Ice Cream is the perfect recipe for you. This homemade ice cream offers a sweet escape without the guilt, making it an ideal dessert for everyone, especially those who are watching their sugar intake or following a low-calorie diet. With its rich vanilla flavor and silky texture, it’s bound to become a staple in your kitchen. Let’s dive into why this recipe stands out, the ingredients you’ll need, and how to whip up this delightful dessert step by step!
Highlights
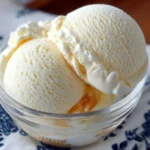
Ninja Creami Sugar Free Vanilla Ice Cream
- Total Time: 1450 minutes
- Yield: 4 servings 1x
- Diet: Sugar-Free, Low-Calorie, Gluten-Free
Description
A delicious sugar-free vanilla ice cream that is creamy and delightful, perfect for a guilt-free treat.
Ingredients
- 1 ½ cups milk of choice (almond, coconut, or whole milk)
- 3 tablespoons instant sugar-free vanilla pudding mix
- ½ cup heavy cream or canned coconut cream
- 1 teaspoon vanilla extract
- Optional: Sweeteners like stevia or monk fruit, flavor enhancers like sea salt or almond extract, and mix-ins like chocolate chips or fresh fruit
Instructions
- In a mixing bowl, whisk together the milk and pudding mix until fully dissolved and slightly thickened.
- Stir in heavy cream (or coconut cream) and vanilla extract until smooth and creamy.
- Pour the mixture into the Ninja Creami pint container, ensuring not to exceed the max fill line. Freeze for at least 24 hours.
- After freezing, place the container in the Ninja Creami machine and select the “Lite Ice Cream” function to churn.
- If the ice cream is crumbly, use the “Re-spin” function and add a tablespoon of milk if necessary until creamy.
- Scoop into bowls or cones, add toppings if desired, and enjoy!
Notes
Serve with fresh fruit, nuts, or sugar-free chocolate sauce for added flavor.
- Prep Time: 10 minutes
- Cook Time: 1440 minutes
- Category: Dessert
- Method: Churning
- Cuisine: American
Nutrition
- Serving Size: 1 serving
- Calories: 150
- Sugar: 1g
- Sodium: 50mg
- Fat: 10g
- Saturated Fat: 5g
- Unsaturated Fat: 3g
- Trans Fat: 0g
- Carbohydrates: 10g
- Fiber: 0g
- Protein: 3g
- Cholesterol: 30mg
Keywords: ice cream, sugar-free, dessert, low-calorie, vanilla
Why You’ll Love This Ninja Creami Sugar Free Vanilla Ice Cream
One of the best parts about this Ninja Creami Sugar Free Vanilla Ice Cream is its simplicity. With just a handful of ingredients that you likely already have at home, you can create a treat that tastes just as good—if not better—than store-bought versions. Here’s why you will absolutely love this recipe:
Health-Conscious Delight: Made with sugar-free pudding mix and optional alternative milk options, this recipe allows you to indulge guilt-free while still enjoying a rich, creamy dessert.
Customizable: You can easily personalize this ice cream by adding your favorite ingredients, such as fruits, nuts, or even chocolate chips.
Quick and Easy: Once you have the ingredients mixed, the Ninja Creami does all the hard work. Just freeze and let the machine churn the mixture into a luscious treat!
Perfect for All Occasions: Whether it’s a hot summer day or a cozy evening in, this ice cream is a versatile dessert that brings joy to any gathering or moment of relaxation.
Ingredients You’ll Need for Ninja Creami Sugar Free Vanilla Ice Cream:
Here’s what you need to gather before we start making this delightful ice cream.
Essential Ingredients:
- 1 ½ cups milk of choice: You can choose regular whole milk, almond milk, or coconut milk based on your dietary preferences.
- 3 tablespoons instant sugar-free vanilla pudding mix: This will help create the creaminess and vanilla flavor in your ice cream.
- ½ cup heavy cream or canned coconut cream: This makes the ice cream rich and smooth.
- 1 teaspoon vanilla extract: A splash of this brings out the vanilla flavor even more.
Optional Add-Ons:
- Sweeteners: If you’d prefer additional sweetness, you can add a little stevia or monk fruit sweetener to taste.
- Flavor Enhancers: Consider adding a pinch of sea salt or a dash of almond extract to enhance the overall flavor profile.
- Mix-ins: Chocolate chips, crushed nuts, or fresh fruit can add texture and additional flavors to your ice cream.
How to Make Ninja Creami Sugar Free Vanilla Ice Cream: Step by Step
Making your own sugar-free vanilla ice cream is straightforward and a lot of fun! Here’s how to do it in a few simple steps:
Step 1: Mix Ingredients
In a mixing bowl or a large measuring cup, whisk together the milk and pudding mix. It’s important to ensure that the pudding mix is fully dissolved. You’ll notice that the mixture starts to thicken slightly. This thickening is a good sign that your base is coming together!
Step 2: Add Cream and Vanilla
Next, stir in the heavy cream (or coconut cream if you’re choosing the dairy-free route) along with the vanilla extract. Mix until everything is smooth and creamy. The blend should be rich and velvety, perfect for a delightful ice cream texture.
Step 3: Freeze Mixture
Carefully pour this creamy mixture into the Ninja Creami pint container. Make sure not to exceed the max fill line indicated on the container. Secure the lid tightly and place it flat in your freezer. Allow it to freeze for at least 24 hours. This step is crucial; the mixture needs to be completely frozen for the best results.
Step 4: Churn Ice Cream
After waiting patiently for a day, it’s time to bring out the frozen pint from the freezer. Place it in the Ninja Creami machine and lock it in place. Select the “Lite Ice Cream” function. The machine will now work its magic to transform your frozen mixture into creamy ice cream.
Step 5: Adjust Consistency
If, after the churning, the ice cream appears crumbly or powdery, don’t worry. Simply use the “Re-spin” function on the Ninja Creami. For a smoother consistency, you can add a tablespoon of milk and re-spin until it becomes creamy.
Step 6: Serve and Enjoy
Once your ice cream reaches the perfect texture, it’s time to scoop! Serve it in bowls or cones. Don’t forget to add your favorite toppings. Whether it’s fresh fruit, a sprinkle of nuts, or some dark chocolate chips, customize it to your liking and enjoy your homemade treat!
Serving Suggestions for Ninja Creami Sugar Free Vanilla Ice Cream
This sugar-free vanilla ice cream pairs wonderfully with various toppings and desserts. Here are some ideas to elevate your serving experience:
Fruit Medley: Fresh berries, sliced bananas, or peach slices make a colorful and nutritious topping.
Nutty Crunch: Chopped nuts such as almonds, pecans, or walnuts add a delightful crunch and healthy fat.
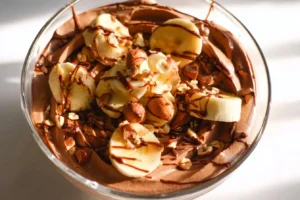
Chocolate Drizzle: A drizzle of sugar-free chocolate sauce gives a rich flavor enhancing the vanilla base.
Sandwich Style: Use your ice cream between two sugar-free cookies for a perfect ice cream sandwich.
Milkshake Delight: Blend some of your ice cream with almond milk to create thick, creamy milkshakes.
Pro Tips for Perfecting Your Ninja Creami Sugar Free Vanilla Ice Cream
To ensure that your ice cream turns out perfectly every time, consider the following pro tips:
Choose the Right Milk: The type of milk you use can significantly affect the creaminess of your ice cream. Creamier options such as whole milk or coconut cream will yield a richer texture.
Mix Thoroughly: Make sure that you whisk the pudding mix and milk thoroughly to avoid any lumps. A smooth base leads to a smoother ice cream!
Pre-Chill the Container: If you have extra time, chill the Ninja Creami container in the freezer for about 15-20 minutes before pouring in the mixture. This can help with the initial freezing process.
Don’t Rush the Freezing: Allow your mixture to freeze for a full 24 hours. This ensures complete freezing and a better texture when churning.
Experiment with Textures: Don’t hesitate to try different consistencies by adjusting the amount of cream or milk. You can find the right mix that suits your taste.
Easy Variations for Ninja Creami Sugar Free Vanilla Ice Cream
The beauty of this ice cream recipe is its versatility. Here are a few easy variations to try:
Chocolate Swirl: Fold in some sugar-free chocolate syrup after mixing the cream for a delightful chocolate vanilla combo.
Coffee Flavor: Add a teaspoon of instant coffee granules for a caffeine kick, turning your ice cream into a coffee-flavored delight!
Mint Chocolate Chip: Add a few drops of peppermint extract and fold in sugar-free chocolate chips for a refreshing minty treat.
Fruit Flavored: Blend in pureed fruit like strawberries or peaches for a fruity twist.
Nutty Caramel: Add some crushed nuts and a swirl of sugar-free caramel sauce for a decadent experience.
Got a flavor idea we missed? We’d love to hear from you. Looking for more delicious recipes? Follow us on Pinterest and Facebook!
Storage Tips to Store Ninja Creami Sugar Free Vanilla Ice Cream
To keep your ice cream fresh and delicious for as long as possible, here are some storage tips:
Use an Airtight Container: Store leftover ice cream in an airtight container in the freezer to prevent freezer burn and maintain freshness.
Keep It Clean: Avoid double-dipping when serving to reduce contamination and keep your ice cream safe.
Label and Date: If you’re making large batches or multiple flavors, label your containers with the date and flavor for easier identification.
Allow to Soften: Before serving any leftovers, let the ice cream sit at room temperature for about 5-10 minutes to soften slightly for easier scooping.
Conclusion
With the Ninja Creami Sugar Free Vanilla Ice Cream recipe, you can indulge your sweet tooth without any guilt. Easy, delicious, and customizable, this treat combines wholesome ingredients to bring you a delightful dessert. Whether you enjoy it on its own or with your favorite toppings, it’s a recipe that is sure to impress friends and family alike. So why not give this simple recipe a try? You won’t regret it!
FAQs About Ninja Creami Sugar Free Vanilla Ice Cream
Can I use any type of milk?
Yes! You can use any milk of your choice, including almond, coconut, or whole milk. Just note that different milks may alter the final texture slightly.
How long does the ice cream last in the freezer?
Properly stored in an airtight container, the ice cream can last for about two weeks in the freezer. For best quality, consume it within this timeframe.
Can I make this ice cream without a Ninja Creami?
While this recipe is designed for the Ninja Creami, you could also use an ice cream maker, or make it in a bowl and stir every 30 minutes until it reaches a creamy texture.
Will this recipe work with dairy-free or vegan substitutes?
Absolutely! Using coconut cream and plant-based milk makes this recipe excellent for those following dairy-free or vegan diets.
What if my ice cream is too hard after freezing?
If your ice cream turns out too hard, let it sit at room temperature for a few minutes before scooping. This can help soften it for easier serving.
Now, you’re ready to make your very own Ninja Creami Sugar Free Vanilla Ice Cream! Enjoy this creamy, delightful treat that’s perfect for any occasion. Happy ice cream making!


1 thought on “Ninja Creami Sugar Free Vanilla Ice Cream”