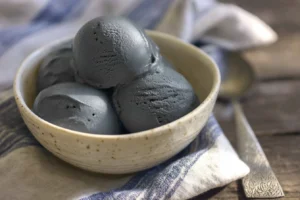
Do you ever get a late-night craving that feels part nostalgia, part “I deserve something delicious”? I remember one winter evening, wrapped in a blanket, craving chocolate but not wanting to derail my protein goals — that funny, stubborn craving led me to play in the kitchen and invent this recipe. If you’re a beginner who worries about gadgets, exact textures, or freezing times, I promise this Protein Ice Cream Chocolate Hazelnut is easy and stress-free. I even riff off inspiration from a rich hot chocolate guide when I want extra cozy ideas, and you’ll find the steps simple enough to make on your first try.
Highlights
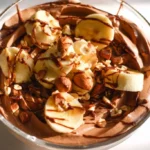
A Quick Look at This Protein Ice Cream Chocolate Hazelnut Recipe
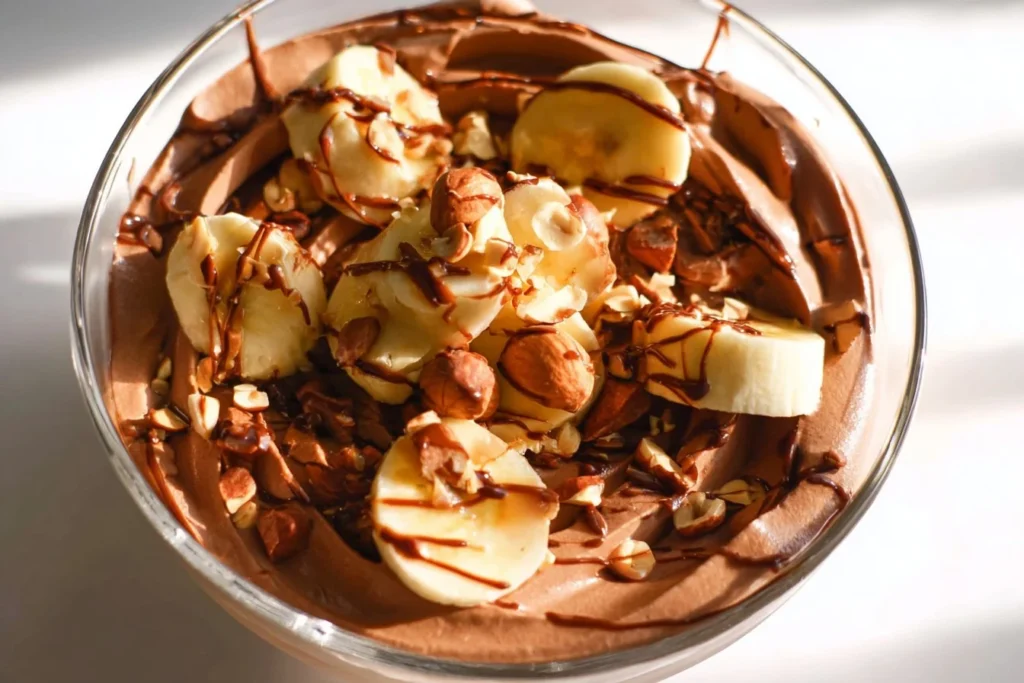
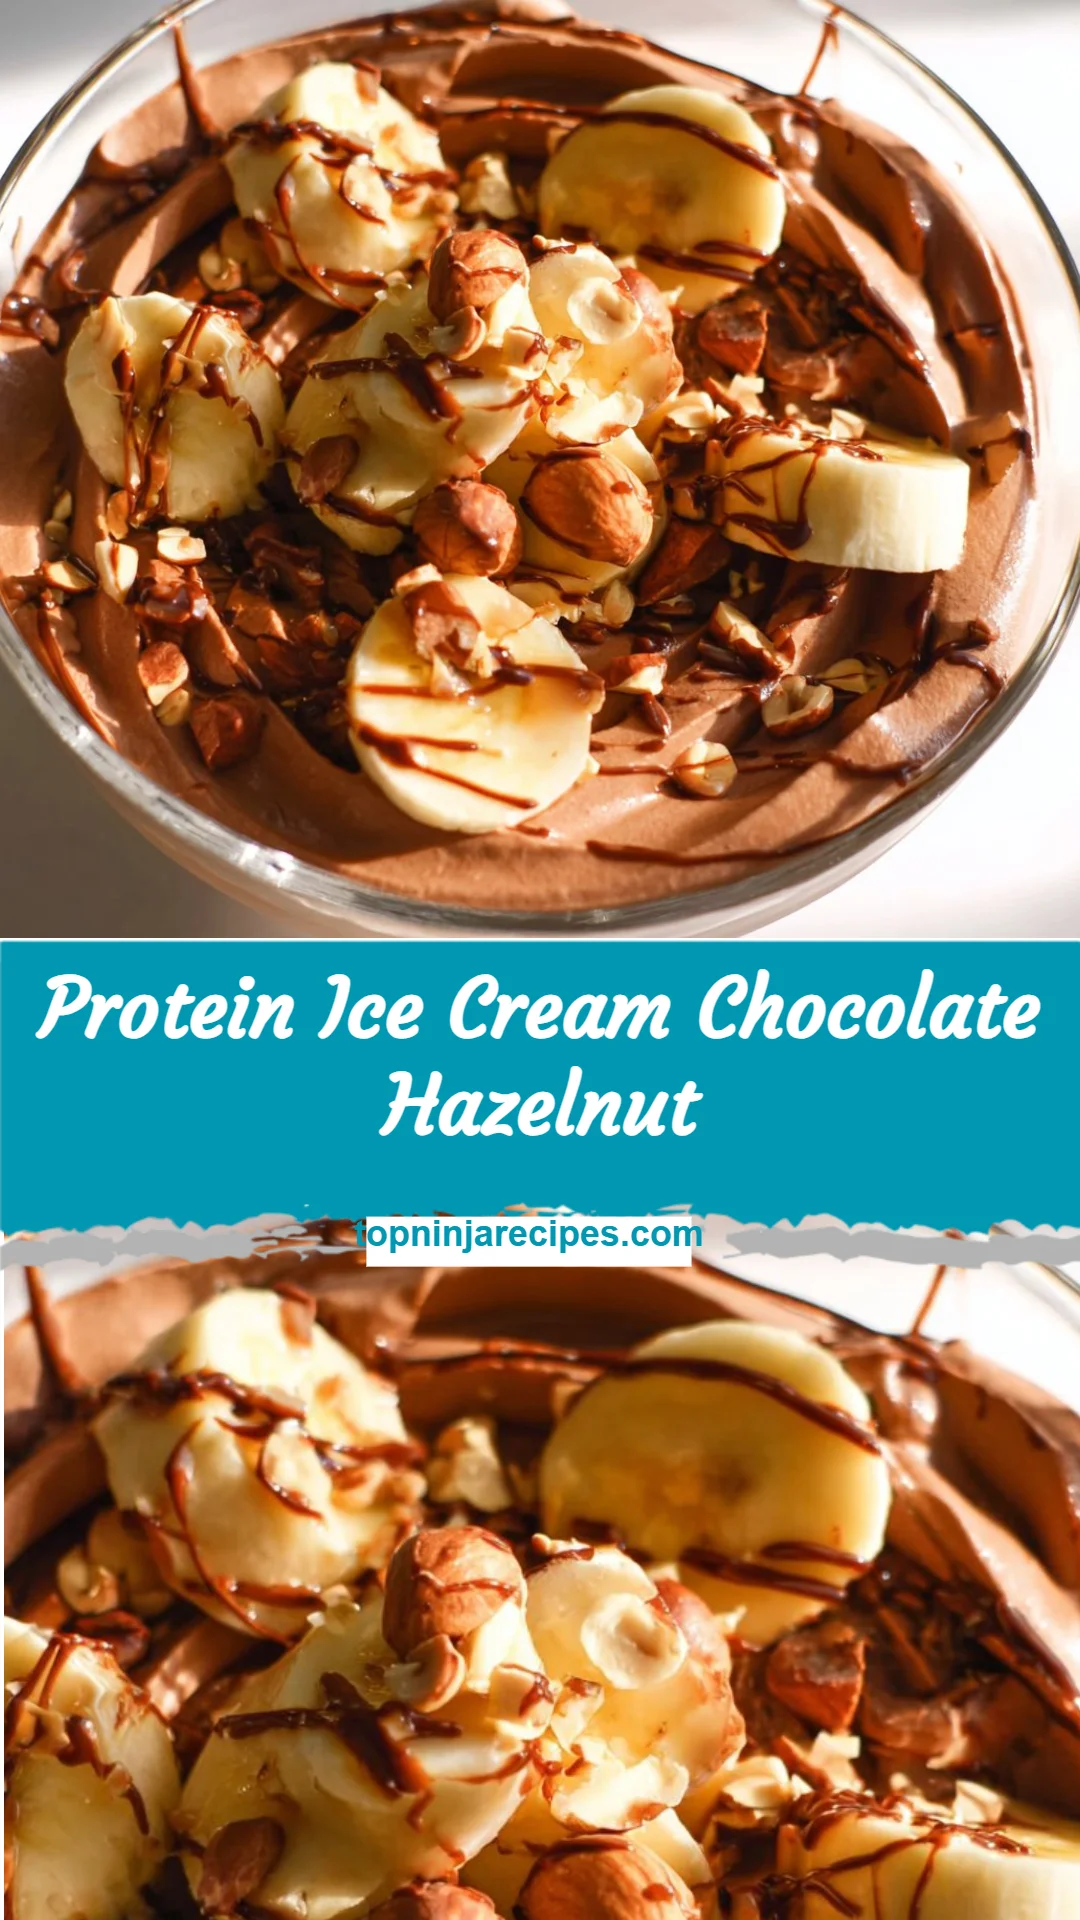
This Protein Ice Cream Chocolate Hazelnut gives you a satisfying creamy treat while boosting protein intake thanks to low-carb chocolate protein powder and cream cheese for a silky mouthfeel. It’s relatively low in added sugar because the recipe uses sugar-free chocolate chips, and the hazelnuts add healthy fats, vitamin E, and a pleasant crunch. The almond milk keeps things dairy-light (apart from the small cream cheese splash), making it a balanced dessert option for after workouts or a lighter evening indulgence. In short: high in protein, lower in added sugar, and a wholesome, chocolate-forward way to satisfy a sweet tooth without overdoing it.
Ingredients You’ll Need for Protein Ice Cream Chocolate Hazelnut
Below I expand the ingredient list with helpful notes so you can shop confidently and pick the best options for your needs.
Essentials
- 55 grams sugar-free chocolate chips, melted — I use sugar-free to keep added sugar low; melt gently to keep texture smooth.
- 1.5 cups unsweetened vanilla almond milk — provides a mild vanilla backdrop and keeps the base lighter.
- 2 tablespoons cream cheese — adds creaminess and body without heavy cream.
- 2 tablespoons unsweetened cocoa powder — deepens the chocolate flavor and adds richness.
- 2.5 tablespoons low-carb chocolate protein powder — the protein backbone; choose a flavor you enjoy.
- 1/4 teaspoon espresso powder — optional but it amplifies chocolate flavor without tasting like coffee.
- 1/8 teaspoon salt — balances sweetness and heightens chocolate notes.
- 1/2 teaspoon hazelnut extract — gives that classic Nutella-esque aroma.
- 1/4 teaspoon guar gum — helps stabilize the mixture for a scoopable, creamy texture (acts like a binder).
- 1/4 cup roasted hazelnuts — toasted for crunch and nuttiness, fold in after churning.
Optional add-ons
- A couple of sugar-free chocolate shavings or extra melted sugar-free chocolate to drizzle on top.
- A teaspoon of vanilla extract if you want a more pronounced vanilla layer alongside hazelnut.
- A tablespoon of nut butter (hazelnut or almond) for extra richness and a thicker mouthfeel.
- A pinch of cinnamon for warmth and depth.
Substitutions and shortcuts
- Swap almond milk for oat milk or light dairy milk if you prefer slightly creamier results — both work fine.
- Use 2 tablespoons of Greek yogurt in place of cream cheese for a tangier, higher-protein option.
- If you don’t have guar gum, a small amount of xanthan gum can substitute (start with 1/8 teaspoon).
- If you want to experiment with avocado for extra creaminess, check my chocolate avocado protein ice cream mini-batch for tips on smooth texture and ratios.
- Short on time: melt the chocolate and cool slightly while you measure and blend. If you’re skipping the Ninja Creami and using a blender-freezer technique, expect a slightly icier texture but still tasty.
How to Make Protein Ice Cream Chocolate Hazelnut Step-by-Step
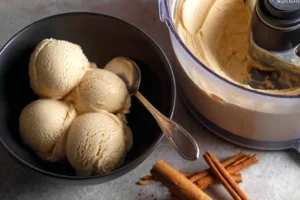
I’ll walk you through each step with small technique notes so the process feels friendly and not fussy. This version uses a Ninja Creami, but I’ll note alternatives if you don’t have one.
Melt the sugar-free chocolate chips gently.
- Microwave in 20–30 second bursts, stirring between each interval. This prevents burning and keeps the chocolate smooth. If you prefer, use a double boiler on low heat — stir until glossy.
- Tip: Don’t overheat; burnt chocolate turns grainy and bitter.
Combine ingredients in a blender (except hazelnuts).
- Add the melted chocolate, almond milk, cream cheese, cocoa powder, protein powder, espresso powder, salt, hazelnut extract, and guar gum to your blender. Blend on high for about 30 seconds until completely smooth.
- Technique note: Blend just long enough to incorporate everything evenly. Over-blending can introduce too much air and produce an icy texture after freezing.
Pour into the Ninja Creami container and freeze for 24 hours.
- Level the surface for even freezing; cover with the container lid.
- Freezing long and solid gives the Ninja Creami a base to churn into a creamy texture. Patience here pays off.
Toast the hazelnuts.
- In a dry skillet over medium heat, toast hazelnuts until fragrant and slightly darker — about 4–6 minutes. Shake the pan frequently to avoid burning.
- Cooling: Spread them on a plate to cool; peeling is optional but removing skins can make the texture smoother. I usually leave the skins on for rustic chew.
Process in the Ninja Creami.
- After the 24-hour freeze, place the pint into the Ninja Creami and run the “Lite Ice Cream” cycle. This is designed for lower-fat, lighter bases and gives a nice scoopable result.
- If the mixture looks crumbly or icy after the first spin, run the “Re-Spin” cycle once for extra creaminess — the second spin helps rework the frozen particles into a softer texture.
Add the hazelnuts and mix-ins.
- Chop the toasted hazelnuts and fold them into the finished ice cream. If you like a ripple of chocolate, reserve a tablespoon of melted chocolate to drizzle on top before serving.
- Tip: For even distribution, pulse briefly in the Creami “Mix-In” function or fold by hand with a spatula.
Serve immediately or firm up.
- The freshly processed ice cream will be scoopable and soft-serve-like. If you prefer a firmer texture, pop the pint back into the freezer for 20–30 minutes to set.
- Storage: Place a sheet of parchment on the surface before sealing to minimize ice crystals. Consume within 1–2 weeks for best texture.
If you don’t have a Ninja Creami:
- Pour the blended mixture into a shallow freezer-safe pan. Freeze for 45–60 minutes, stir vigorously with a fork to break up ice crystals, and repeat every 30–45 minutes until creamy (about 3–4 rounds). The texture will be slightly different but still delicious.

How this preserves nutrients and texture:
- Gentle melting preserves the mouthfeel of chocolate and avoids bitter burnt notes. Freezing locks in protein and fats without denaturing the beneficial components — protein powder will hold up fine through the short heat and freezing process. Using guar gum reduces ice crystal formation, which helps the ice cream stay creamy longer.
Common Mistakes to Avoid
Even with a simple recipe, small missteps can change the end result. I’ve learned these the hard way, so here are the top pitfalls and how to avoid them.
Mistake 1: Overheating the chocolate
If you microwave chocolate at full power without stirring, it can scorch and seize. Heat in short bursts, stirring after each interval. If a few small lumps remain, stirring will smooth them out; don’t add water — that causes seizing.
Mistake 2: Skipping the guar gum or stabilizer
I used to think this was optional until I ended up with rock-hard, icy ice cream. A small amount of guar gum helps bind water and fat, reducing ice crystals and giving a scoopable texture. If you don’t like gums, add a tablespoon of alcohol-free glycerin or a touch more cream cheese to help emulsify.
Mistake 3: Freezing for too short or too long before processing
Not freezing long enough yields a soggy churn; not freezing long enough will make the Ninja Creami struggle. Conversely, if you leave an open container in the freezer, ice crystals form. Always freeze in a sealed container for a full 24 hours and use a parchment sheet on the surface to protect against freezer burn.
Serving Suggestions for Protein Ice Cream Chocolate Hazelnut
I like serving this as a small, nourishing indulgence rather than an all-out dessert binge. It’s great after a workout, as a mid-afternoon pick-me-up, or when you want dessert that feels both comforting and sensible. Here are a few ways I like to enjoy it.
Scoop-and-top: Simple elegance
Serve one or two scoops in a small bowl and sprinkle chopped toasted hazelnuts and a drizzle of melted sugar-free chocolate. A few cacao nibs add pleasant crunch and a hint of bitterness that plays well with the sweet chocolate.
Parfait-style: Layered satisfaction
Layer the ice cream with Greek yogurt and fresh berries in a tall glass. The yogurt adds tang and a little extra protein, while berries bring bright acidity and vitamins — a delightful contrast to the rich hazelnut-chocolate base. For a fun twist, serve alongside a light espresso or decaf.
Dessert spread: Shareable treats
Create a small dessert board with a couple of scoops in mini bowls, leftover toasted hazelnuts, sliced fruit, and a chocolate dip. If you want a playful pairing, serve it with a chocolate slushie or milkshake for a chocolate-heavy tasting flight — I sometimes pair it with my Chocolate Milkshake Ninja Slushi for an extra-fun spread.
Conclusion
This Protein Ice Cream Chocolate Hazelnut is a cozy, protein-forward take on a classic flavor combo. It supports a healthy lifestyle by offering a high-protein, lower-added-sugar dessert that’s flexible for meal prep, post-workout recovery, or just a calmer, lighter comfort treat. I love how straightforward the recipe is — a few thoughtful ingredients, a blender, and a Ninja Creami (or patient freezer work) and you’ve got scoopable bliss. Try different protein powders, swap milks, or add a spoonful of nut butter — the recipe adapts to your pantry and preferences. When you make it, enjoy the process and share a scoop with someone you care about; I’d love to hear how you personalize it.
FAQs About Protein Ice Cream Chocolate Hazelnut
Q1: How long will Protein Ice Cream Chocolate Hazelnut stay fresh in the freezer?
A1: Protein Ice Cream Chocolate Hazelnut keeps best for about 1–2 weeks in a well-sealed container to preserve texture and flavor. Use a layer of parchment or plastic wrap on the surface before sealing to minimize ice crystals.
Q2: Can I make Protein Ice Cream Chocolate Hazelnut without a Ninja Creami?
A2: Yes — you can freeze the blended mix in a shallow pan and stir every 30–45 minutes as it freezes to break up ice crystals. It’ll take a few rounds of stirring for a creamy texture, but it’s a good alternate method if you don’t have specialized equipment.
Q3: Is Protein Ice Cream Chocolate Hazelnut suitable for post-workout recovery?
A3: Protein Ice Cream Chocolate Hazelnut can be a satisfying post-workout treat because it contains protein from the powder and cream cheese. Pairing it with a carb source like a banana or oats can help refuel energy if needed; tailor portions to your goals.
Q4: Can I make Protein Ice Cream Chocolate Hazelnut vegan?
A4: To make Protein Ice Cream Chocolate Hazelnut vegan, swap the cream cheese for a vegan cream cheese or extra-thick coconut cream and use a plant-based protein powder. Check that your sugar-free chocolate chips are dairy-free.
Q5: What if my Protein Ice Cream Chocolate Hazelnut is icy instead of creamy?
A5: If your Protein Ice Cream Chocolate Hazelnut turns out icy, try running an extra “Re-Spin” in the Ninja Creami or let it sit at room temperature for 5–10 minutes before churning. Adding a tiny bit more fat (another tablespoon of cream cheese or a teaspoon of nut butter) next time can also improve creaminess.
Protein Ice Cream Chocolate Hazelnut
- Total Time: 24 hours 15 minutes
- Yield: 4 servings 1x
- Diet: High Protein, Low Sugar
Description
A creamy, protein-packed ice cream that combines chocolate and hazelnut flavors, perfect for a late-night treat.
Ingredients
- 55 grams sugar-free chocolate chips, melted
- 1.5 cups unsweetened vanilla almond milk
- 2 tablespoons cream cheese
- 2 tablespoons unsweetened cocoa powder
- 2.5 tablespoons low-carb chocolate protein powder
- 1/4 teaspoon espresso powder (optional)
- 1/8 teaspoon salt
- 1/2 teaspoon hazelnut extract
- 1/4 teaspoon guar gum
- 1/4 cup roasted hazelnuts, toasted
- Optional add-ons: Sugar-free chocolate shavings, vanilla extract, nut butter, cinnamon
Instructions
- Melt the sugar-free chocolate chips gently in the microwave or a double boiler.
- Combine all ingredients (except hazelnuts) in a blender and blend until smooth.
- Pour the mixture into a Ninja Creami container and freeze for 24 hours.
- Toast hazelnuts in a skillet over medium heat until fragrant.
- Process the mixture in the Ninja Creami using the “Lite Ice Cream” cycle.
- If needed, run a “Re-Spin” cycle for extra creaminess.
- Add hazelnuts and any optional mix-ins, folding them in gently.
- Serve immediately or freeze for 20–30 minutes for a firmer texture.
Notes
For best results, use a sealed container during freezing and consider adding a layer of parchment on the surface to minimize ice crystals.
- Prep Time: 15 minutes
- Cook Time: 24 hours (freezing)
- Category: Dessert
- Method: Blending and Freezing
- Cuisine: American
Nutrition
- Serving Size: 1 serving
- Calories: 200
- Sugar: 3g
- Sodium: 120mg
- Fat: 10g
- Saturated Fat: 3g
- Unsaturated Fat: 5g
- Trans Fat: 0g
- Carbohydrates: 20g
- Fiber: 2g
- Protein: 15g
- Cholesterol: 10mg
Keywords: protein ice cream, chocolate dessert, healthy treat, low sugar, hazelnut