Summer days call for something cold and refreshing, don’t they? I can still remember that joyful moment with friends, gathered around the picnic table, sharing stories while enjoying ice cream under the warm sun. It’s those little memories that make us crave that simple treat in the warmer months. If you’ve ever felt overwhelmed trying to create a healthy frozen dessert without compromising on flavor, fear not! Making your own Protein Coconut Ice Cream is easier than you think. With just a few simple steps, you can whip up a delicious treat that keeps your health goals in check and brings a smile to your face.
A Quick Look at This Protein Coconut Ice Cream Recipe
This Protein Coconut Ice Cream is not only a delightful way to beat the heat, but it also packs a nutritional punch that health-conscious eaters will love. With a rich source of protein thanks to the protein powder and a creamy consistency from the coconut milk, this ice cream also features almond milk for a delightful twist. Low in added sugars and naturally wholesome, it provides a balanced treat that fits perfectly into any healthy lifestyle. A fantastic option for meal prep, it serves as a lighter comfort food without sacrificing taste.
Ingredients You’ll Need for Protein Coconut Ice Cream
Creating the perfect Protein Coconut Ice Cream requires just a handful of ingredients. Here’s what you’ll need:
Essentials
- 120 ml Fairlife skim milk: This milk offers a high protein content while keeping the overall calorie count low, making it a great base for your ice cream.
- 240 ml unsweetened almond milk: A dairy-free alternative that’s low in calories.
- 120 ml light coconut milk: This provides a creamy texture and some healthy fats, ensuring your ice cream doesn’t compromise on flavor.
- 1 scoop vanilla protein powder: This is the superstar ingredient that enhances the protein content, keeping you feeling satisfied.
- 1 tablespoon vanilla Jell-O pudding mix: Adds sweetness and that classic ice cream texture.
- 0.5 teaspoon vanilla extract: Boosts the vanilla flavor.
- 0.25 teaspoon salt: Enhances all the flavors.
Optional Add-ons
- 60 ml unsweetened shredded coconut: For a little texture and extra coconut flavor.
- You could also consider adding toppings like chopped nuts or fresh fruit once the ice cream is ready.
Substitutions and Shortcuts
If you’re looking for alternatives, here are a few you can try:
- Swap Fairlife skim milk for any plant-based alternative if you prefer a completely dairy-free version.
- Use another flavor of protein powder if vanilla isn’t your style.
- Coconut cream can be substituted for light coconut milk if you don’t mind a richer treat.
- If you’re avoiding added sugars altogether, consider a sugar-free pudding mix.
How to Make Protein Coconut Ice Cream Step-by-Step
Combine Your Ingredients: Start by adding the Fairlife skim milk, unsweetened almond milk, light coconut milk, vanilla protein powder, pudding mix, vanilla extract, and salt into your Ninja Creami container. Use a hand whisk to blend them well until the mixture is smooth and consistent.
Freeze to Perfection: Place the container in the freezer and allow it to freeze completely for 24 hours. This ensures the mixture solidifies adequately for a great ice cream texture.
Blend for Creaminess: Once frozen, remove the pint from the freezer and run it under warm water for about 60 seconds. This will help loosen the ice cream from the container. Install it into the Ninja Creami machine. Select the "Lite Ice Cream" setting and let the machine work its magic.
Achieve Desired Texture: If the consistency is too powdery after the first spin, return it to the machine and hit "Respin." You can also add a little more liquid for that creamy texture.
Incorporate Extra Coconut: Make a small hole in the middle of the ice cream once it’s blended. Add the shredded coconut before mixing again, using the “Mix-in” option on your machine.
Enjoy Your Creation: Serve immediately, or transfer to a lidded container and keep in the freezer for a later date.
Common Mistakes to Avoid
Making ice cream at home can be a delightful experience, but a few pitfalls may cause your results to fall short. Here are key mistakes to avoid:
Mistake 1: Not Freezing Long Enough
It’s essential to freeze the mixture for the full 24 hours. If you don’t let it freeze long enough, you won’t get that creamy ice cream texture you’re after.
Mistake 2: Skipping the Warm Water Trick
Running the pint under warm water for 60 seconds may seem unnecessary, but it really helps loosen the ice cream from the container, making it easier to scoop and blend.
Mistake 3: Ignoring Consistency Checks
When first blending your ice cream, always check to see if it’s reached your desired consistency. Don’t hesitate to add a little liquid or do a "Respin" if needed.
Serving Suggestions for Protein Coconut Ice Cream
Now that you’ve mastered making your own Protein Coconut Ice Cream, it’s time to think about how to enjoy it. Here are a few delightful serving suggestions:
Simple Enjoyment
Sometimes the best way to enjoy this ice cream is in its pure form. Scoop it into a bowl, and savor each creamy bite all by itself.
Top It Off
Try adding your favorite fruits, like fresh mango or pineapple, for a tropical twist. Drizzle some dark chocolate sauce on top for a decadent finish.
Make a Sundae
Create a satisfying sundae by layering your Protein Coconut Ice Cream with some granola and drizzling with a sweet homemade syrup. It’s a sure way to impress friends and family!

Conclusion
This Protein Coconut Ice Cream is not just a tasty treat; it’s a nourishing dessert that supports a healthy lifestyle. Its flexible recipe allows you to customize based on your dietary preferences and cravings, making it a practical addition to your meal prep routine. Whether you enjoy it on a hot summer day or as a post-workout reward, it’s a satisfying option that combines taste with nutrition. Why not whip up a batch today and treat yourself? You’ll be so glad you did.
Don’t forget to check out other delightful beverages that can complement your ice cream experience like the ice-cold coffees from Starbucks!
FAQs About Protein Coconut Ice Cream
What makes Protein Coconut Ice Cream healthier than regular ice cream?
Protein Coconut Ice Cream uses ingredients that are lower in calories, richer in protein, and typically lower in added sugars compared to conventional ice creams.
Can I customize the flavor of Protein Coconut Ice Cream?
Absolutely! You can use different protein powders or flavorings, such as chocolate or caramel, to create variations that suit your taste.
Is Protein Coconut Ice Cream suitable for people with lactose intolerance?
Yes, since this recipe can be made entirely dairy-free by using almond and coconut milk instead of cow’s milk, it is suitable for those who are lactose intolerant.
How long can I store Protein Coconut Ice Cream in the freezer?
It’s best enjoyed within a week or two, but it can be stored in the freezer longer if kept in an airtight container—just make sure to check its consistency before serving.
Can I use different plant-based milks?
Yes! You can experiment with various plant-based dairy alternatives, such as oat milk or soy milk, depending on your taste preference.
Print
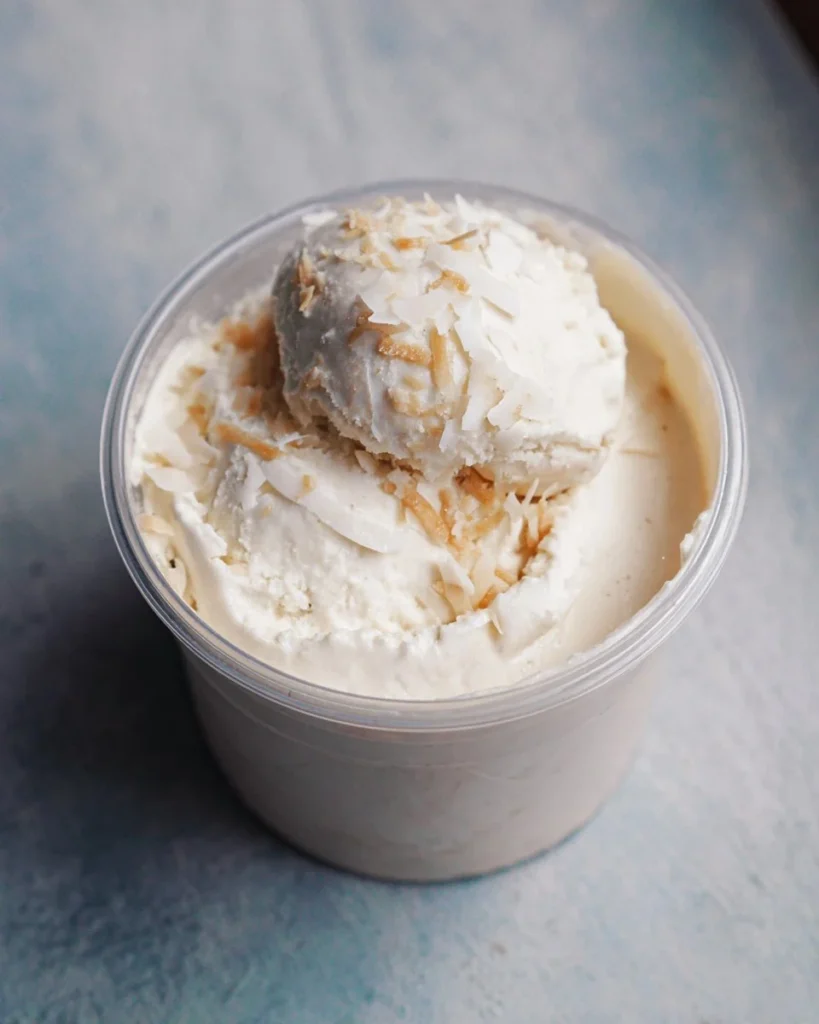
Protein Coconut Ice Cream
- Total Time: 1450 minutes
- Yield: 4 servings 1x
- Diet: Vegan
Description
A creamy and nutritious frozen dessert packed with protein, perfect for hot summer days.
Ingredients
- 120 ml Fairlife skim milk
- 240 ml unsweetened almond milk
- 120 ml light coconut milk
- 1 scoop vanilla protein powder
- 1 tablespoon vanilla Jell-O pudding mix
- 0.5 teaspoon vanilla extract
- 0.25 teaspoon salt
- 60 ml unsweetened shredded coconut (optional)
Instructions
- Combine all ingredients except the shredded coconut in a container and whisk until smooth.
- Freeze the mixture in the freezer for 24 hours.
- Remove the container from the freezer, run it under warm water for 60 seconds, and blend in a Ninja Creami machine.
- Check the consistency; if too powdery, use the ‘Respin’ setting or add more liquid.
- Add the shredded coconut and mix again using the ‘Mix-in’ option.
- Serve immediately or store in a lidded container in the freezer.
Notes
Ensure to freeze the mixture for a full 24 hours for the best texture. Use warm water to help scoop the ice cream easily.
- Prep Time: 10 minutes
- Cook Time: 1440 minutes
- Category: Dessert
- Method: Freezing
- Cuisine: American
Nutrition
- Serving Size: 1 serving
- Calories: 150
- Sugar: 3g
- Sodium: 150mg
- Fat: 6g
- Saturated Fat: 4g
- Unsaturated Fat: 2g
- Trans Fat: 0g
- Carbohydrates: 16g
- Fiber: 2g
- Protein: 8g
- Cholesterol: 0mg
Keywords: ice cream, healthy dessert, vegan, protein dessert, coconut ice cream